What's new

Seawitch Shop Log

Sgt GrizZ

Registered
Joined
Jul 21, 2011
Messages
11,336
Location
Ex PinballInfo Admin . MIA Brighton Hove beach
Alias
Ive
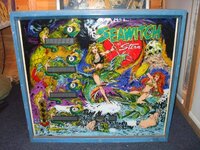
OK. Pretty rare game this in the UK, and I'm really chuffed to get my hands on one. Hopefully be of interest to people as I attempt to bring it back from the dead :thumb:

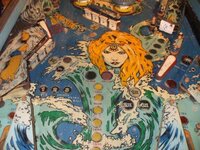
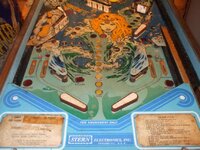
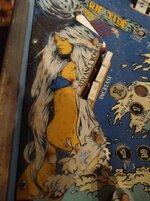
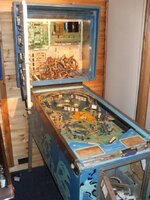
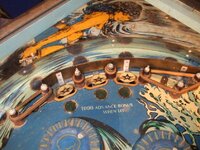
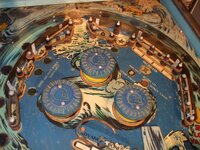
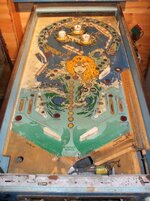
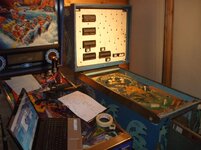
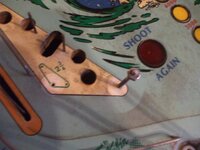
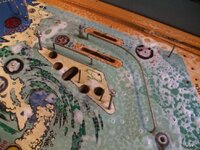
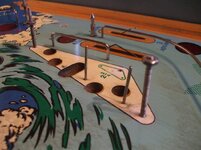
Here are just a few quick photos from setting it up yesterday to give an idea of condition.

First quick assessment ...

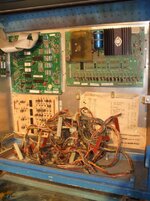
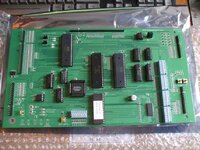
1. CPU board has battery leakage/corrosion. Will have to assess whether worth all the repair trouuble, or just cut to the chase and buy an all singing dancing Alltek :biggrin1:

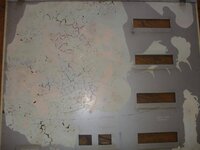
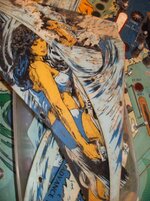
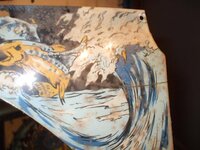
2. Backglass - It looks ok from the front BUT there is a sizeable area of paint crazing and flaking . This needs sealing asap with Krylon to prevent any further loss.

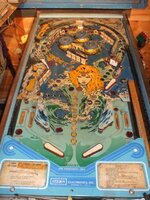
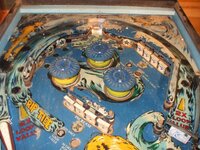
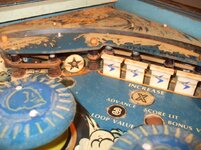
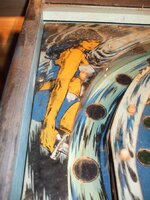
3. Playfield filthy. A few its of wear around inserts. Ball swirl etc. But overall not too bad considering this title usually got some heavy play in the wild apparently.

4. Under playfield mechs etc - small amount of corrosion but not too bad. All mechs seem to be moving freely. No obvious burned out coils.

5. Coin door really rough, very rusted. Legs cr*p too.

6. Cab not too bad.
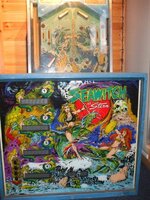

DSCF2822.jpg DSCF2821.jpg DSCF2826.jpg

DSCF2827.jpg DSCF2828.jpg DSCF2829.jpg DSCF2830.jpg

DSCF2833.jpg
 
First priority is the backglass. Closer look at the back of it reveals the extent of the paint loss/crazing 😢 There are some bits literally falling off so needs to be sealed asap as damage limitation.

DSCF2839.jpg DSCF2843.jpg

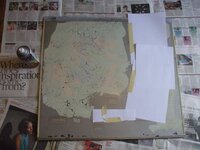
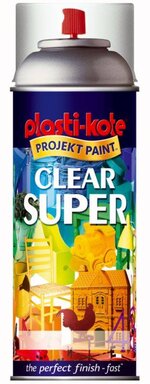
I was going to use Krylon Triple Thick, which is generally recommended, but can't for the life of me find my can of it :rolleyez:. Lost in the GrizZShack somewhere. I do however have a can of Plasti-Kote Super Clear spray which I have heard of people using successfully. I tested it on a small area at the bottom of the glass and it seemed to work ok - dried quickly leaving a semi gloss coat over the artwork. So masked off the score window area - and concentrated on the main affected part of the glass.

DSCF2846.jpg plasti.jpg

I gave it a very thin, high altitude spray first to help secure some of the very loose bits of paint. A few little bits came off but they were goners anyway. Then followed up with several thin spray coats. Luckily this stuff is pretty quick drying so you can crack on. Hopefully when fully dry it will have halted any more paint loss.

Shame when these glasses suffer like this but all too common. I think a run of Seawitch repro glass was done a few years back , but the cost and logistics of sourcing one from the US now prob prohibitive. For now will just have to live with slightly crazed artwork.
 
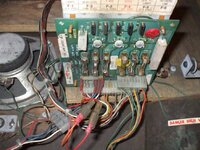
The rectifier board in the bottom of the cab has had some repair work done previously on burned connectors, the guy has soldered the J1 wires straight to the header pins ...which isn't ideal but at least its a neat job. Suppose at some point could replace the connector but right now I'll leave it. Also looks like a couple of the J3 connections have been removed from the connector and hardwired to the board.

DSCF2856.jpg

Before plugging in to any boards in the backbox I first tested the rectifier board.Good news is - all the fuses were correct and working, and all the voltages were present and correct at the test points . Yay !

Moved on to solenoid driver board - all voltages good at TPs.

And so to the CPU board, was expecting trouble due to the battery corrosion and sure enough it won't boot. LED is locked on. So need to decide on whether to go the whole neutralising acid,sanding,replacing multiple components and chips route to hopefully fix, or just go for an Alltek board which will be 100% and eliminates need for a battery . I know which one I'm more tempted by right now ;)
 
Good to see you have made a start, Glad also that you had the fore sight to spray your first dusting of clear non direct and high away from the glass. Never forget (can't menthon the guys name) spraying full force and close up to a badly flaked glass and he wondered why the blast from the areosol can blew away most of the flaked paint away. Doh.
Looking forward to the next instalment.
Oh and go with the alltek board, makes sence to before you waste time trying to bring a acid damaged board back from the dead.
 
+1 on the Altek board. There's no guarantee that if you do go through the hassle of trying to fix the original board that it'll work anyway so I'd be tempted to bite the bullet on the cost and get a new board.
 
this is gonna be an awesome shop log, i'm already captivated by it.

more pics though please, Ive, like close ups of that board where you say it's been worked on. there's a few here like me who have no idea what you meant, or what the relevance was of some of that there J1/J3/test point jargon. you can teach us while you demonstrate

:pop2:
 
I agree with Dan, these older machines need a more loving hand and we can all learn from those techniques. Great looking machine, pleased to hear the ladies on the back will be getting preserved for the future and good tips there on how to do it. :)
 
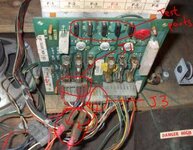
Here you go Dan - hope this makes it clearer.

You can see on J3 that 2 wires have suffered overheating and rather than replacing the whole connector someone has snipped the wires, extended them and hardwired them to the rear of the board. This is a workaround and really the connector and header pins should be replaced.

The test points on the board enable you to check the correct voltages are coming off the board, the rectifier board is the first link in the power chain so you can check everything is fine here before connecting anything else up. Looking on http://www.pinwiki.com/wiki/index.php?title=Bally/Stern#Rectifier_Board_Test_Point_Values gave me the expected values. So hooked up the multimeter and they all checked out ok.:D

[h=4]3.18.1 Rectifier Board Test Point Values[/h]
ModelTP1TP2TP3TP4TP5
AS-2518-18+5.4 +/-.8VDC+230 +/-27.4VDC+11.9 +/- 1.40VDC7.3 +/-.9VAC+43 +/-5.4VDC
AS-2518-49+5.4 +/-.8VDC+230 +/-27.4VDC+11.9 +/- 1.40VDC7.3 +/-.9VAC+43 +/-5.4VDC

rect board.jpg
 
As a general question, where do you put the ground lead when testing like that. Sometimes the board doesn't have an obviously labelled ground point. Is it sufficient to just jam it into any earth braid?
 
Alltek MPU board ordered from Sean @ Pinball Palace ! http://www.pinballpalace.co.uk/

Makes sense, this is a classic game that deserves to live on for a good few years yet, and I can't be doing with all the grief of trying to resurrect the acid damaged board. Its not the worst I've seen, but definite corrosion to a couple of chips and a dozen+ other components at the very least, plus couple header pins. Yes I'm sure it would be satisfying to do so but could also be a whole world of pain/frustration if there are still issues post cleanup. For this I just want to stick a new , bulletproofed board in and get on with it :smokin:
 
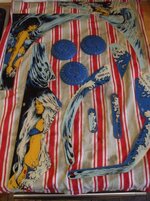
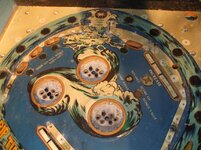
Just a few pics from earlier - spent a few minutes starting to strip the playfield topside, and joy of joys it won't take too long as there is sod all on there compared to a 90s machine :biggrin1: You can also see how filthy dirty it is, the rubbers look like they have been on there since 1980 !

DSCF2860.jpg DSCF2866.jpg DSCF2874.jpg

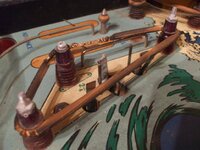
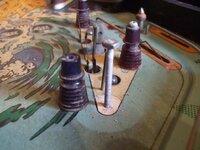
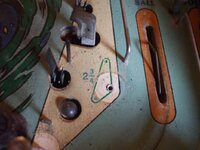
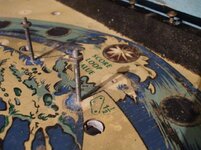
These posts are interesting - they are inserted thru from the underside with no obvious way of removing them - possibly can be punched thru but I prob wont risk it, the finned posts are held in place by a nut on top. I like the way the rubber size is printed on the pf under the plastic...handy :)

DSCF2852.jpg DSCF2854.jpg

Only one damaged plastic, large top right corner - cracked and a piece broken off. Obviously as a result of the playfield being lifted carelessly :nono:

DSCF2881.jpg DSCF2882.jpg DSCF2884.jpg
 
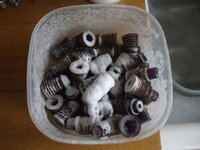
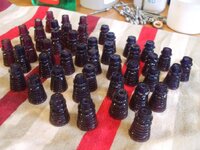
You going to treat her to a new plastic set from CPR? The bumper caps look in good nick, are they custom for the game?
 
You going to treat her to a new plastic set from CPR? The bumper caps look in good nick, are they custom for the game?

Yes I had seen P4P were stocking them -

http://www.parts4pinballs.com/product_info.php?currency=GBP&products_id=4800

I'll see what they look like when cleaned up. Best part of £100 to replace one broken is a quite an ask, especially as there are only a few really, though they do look nice. :confused1:

The pop caps will clean up fine. Not sure if that design was used on any other games ?
 
I'll see what they look like when cleaned up. Best part of £100 to replace one broken is a quite an ask, especially as there are only a few really, though they do look nice

I know what your saying, maybe see how the pf comes up....no point in spending that kind of cash and having new looking plastics if the pf doesn't match up. On the other hand you could go the whole hog and touch up the pf, get it cleared, buy the new plastics and paint the cab and have a brand new looking Seawitch (your new Altek board will bullet proof it for ever). Could end up with a mint game :thumb:
 
I am guessing those rubbers were white a long time ago. Useful to have the sizes printed on the PF as I forgot to record the sizes when I stripped Creech.

How will you remove those interesting posts? If they have a thread on the top, I would consider putting two nuts on they and locking them together to have something I can then turn against to loosen. If they are screwed in then this will unscrew them but if they were punched in it would just turn them and so no harm done. Or am I missing something that could damage the machine even more?

It is a bad break on that plastic but agree that £100 is a lot to pay if it doesn't stop play.

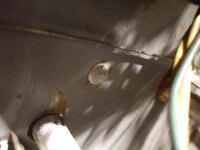
I don't think I will remove those posts - I can work around them. If you look under the playfield you can see just a smooth rivet style head, so unless I'm missing something I dont think they are meant to come out easily. First classic Stern I have worked on :)
 
I have never heard of riveted posts, so agree to leave them alone as twisting them might loosen them in ways that can not be fixed easily. I would be interested in a picture of the underside rivet to store in my memory banks for later.
 
I have never heard of riveted posts, so agree to leave them alone as twisting them might loosen them in ways that can not be fixed easily. I would be interested in a picture of the underside rivet to store in my memory banks for later.

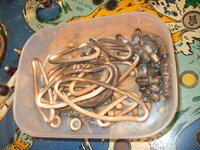
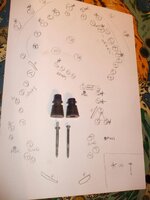
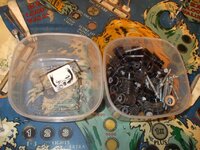
Pretty much stripped top playfield just now. Seems there are 3 styles of metal post used - the 'thru playfield' type that as discussed don't seem intended to remove easily, a wood screw with threaded top, and a straight wood screw. 2 styles of 'finned' plastic post used, a short one and a taller one.

I made a quick diagram of which screws/posts went where. Although I take loads of photos I often find it easier on reassembly to have a quick sketch/plan that I can refer to.

Feel free to use the 'GrizZs Shoddy Quick Pencil Sketch Showing Where Sh*t Goes Which Will Probably Get Mislaid Or A Beer Spilt On It Anyway Technique' (patent pending) on yr next shop job :wave:

DSCF2896.jpg DSCF2899.jpg DSCF2900.jpg

Still to remove pops, flippers, drops. Whitewater makes a useful workbench :D

DSCF2888.jpg DSCF2895.jpg
 
Your diagram design would have helped with creech, the realising that not all posts are equal length. Or even take the same gauge screw in the top.
Mind you, all your posts in one bucket is more than my mind can take. I even sorted out my star posts into areas of the table because I am obsessive.
 
Won't be sticking it in the game just yet. Need to double check all the power gubbins is fine before putting it in. And the fact the game is now in pieces doesn't help :rolleyez: Have kind of done this in reverse, normally I will make sure a machine is fully functioning on all fronts before ripping it apart to shop. The GrizZ shop method is in tatters on this one :D
 
That was good service and for I am amazed at how many Posties were spotted out in the snow. Very pleased that they braved it and respect them for that.
 
Back
Top Bottom