What's new
Pinball info

Register a free account today to become a member! Once signed in, you'll be able to participate on this site by adding your own topics and posts, as well as connect with other members through your own private inbox!

Complete Revenge from Mars - The Shop Log

Well its been a while since i last posted an update on here, Ive been spending too much time refurbishing, and generally tinkering with these:
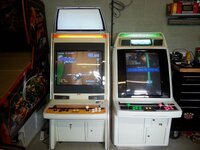
i.imgur.com_f4LbQug.jpg


Now that the sega cabinets are done, and after my trip to NERG i am psyched again to get the playfield finished off.


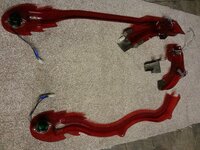
I managed to pick up a full set of ramps from ebay. They are in great condition, a bit of a polish up and they will be mint! My existing ramps have a few broken mounts, and the rest of the mounts are all crazed
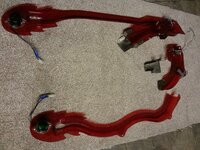
i.imgur.com_NeSFNAZ.jpg

Whilst i was at his house picking them up i asked if he had any more bits for RFM, and we did a deal on a few more bits that i needed
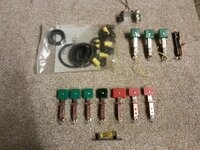
i.imgur.com_cpYpCsQ.jpg

The playfield on my cabinet has loads of wrong target switches, and a few that are broken, so this lot should sort that out. I also picked up a replacement rubber set, and a new level as mine is broken.
 
Nice work Dave. Is this your plan for your 'holiday' or is 'she who must be obeyed' dragging you away too? :)
 
Won't get chance to do it next week as I'll be in Wales on our annual Mountainbiking holiday.

Once Im back I'll be straight on it though.
When I'm back I'll finish off your cabinet too. Unfortunately we had to "let go" our employee that was doing the painting on your cab
 
I managed to pick up a full set of ramps from ebay. They are in great condition, a bit of a polish up and they will be mint! My existing ramps have a few broken mounts, and the rest of the mounts are all crazed

i.imgur.com_NeSFNAZ.jpg


.

It was YOU that outbid me!!! :mad::mad::mad::mad::mad:
 
:oops: yeah sorry about that. When I collected it the bloke said he had listed it twice before with no interest, then he said someone asked about a b.I.n price but said he would probably be fine due to no interest before.

I just did an eBay search for RFM saw these ramps with 3hrs to go so waited and stuck in a last minute bid :oops:
 
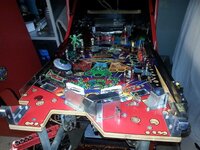
Ive had a re-arrange, and put the RFM in a position that is easiest to work on.

The plan is to start on one side; remove,clean replace, re-fit, and then move along the playfield that way i wont have lots of pieces all over the place. The only downside is that i will have to order replacement parts in a few orders if i find more bits that need replacing.

i.imgur.com_18GCYe8.jpg

So far every piece of plastic i look at is broken or cracked, so im replacing everything from the lower apron, all posts, lane guides, bumper caps + skirts, ramps, all the fancy plastics with graphics on them, and targets.

The game looks ok when playing, but when you get the playfield out and look closely you see more, and more issues:

i.imgur.com_f9jiz0J.jpg

Centre group of targets:- rectangle target is smashed, left most target is wrong type+colour, at some point int the past one of the palstics have got smashed (to the left of the targets) and someone made a replacement.... out of cardboard :sad: and a cliffy has been ordered to cover up the wear on the "stroke of luck" hole.
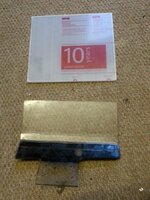
Looking around the playfield it looks like a few posts are missing, so ive been trawling through google images to find some decent quality images of complete playfields.
 
It's quite incredible what small details you notice when you start doing the teardown of the playfield. Unfortunately you often can't even rely on the documentation because even that can be wrong at times.
 
Dude, how can you work on that in the game? You can pull the playfield out easily as there are only a few plugs at the back to disconnect and they're all uniquely keyed.

Put it on saw horses, a table, or even just the floor.
 
Yeah i know, i just had it in that position whilst working on bits on the front edge. Once i need to work further along it will be getting pulled out, and put on the floor :)
 
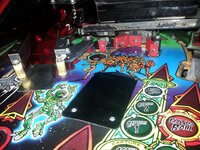
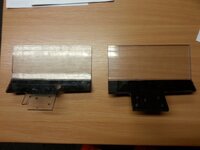
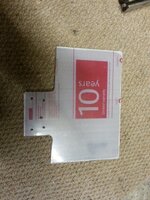
One of the jobs ive been meaning to do for a while is sort out the plastic catch plate that catches the ball when it launches uf the ramp as the existing one is in a sorry state from the years of getting whacked with pinball hitting it.

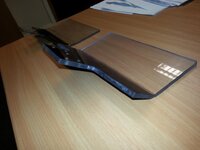
Existing plate, and new piece of 6mm polycarbonate. Existing one is around 5mm so thought i would try making one a bit thicker for added strength. It will be slightly heavier, but i cant see a few extra grams causing an issue with functionality

i.imgur.com_xWeWPpt.jpg

Cut to shape, and drilled:

i.imgur.com_vmXR0KP.jpg

Bent to shape, and black vinyl stuck to the back:

i.imgur.com_B1JVs8R.jpg

i.imgur.com_ZbMbL5s.jpg

I tried the heating/folding in a vice method to start with, but was having no luck with that. The chap in the shop told me it could be cold bended ( which i was a little dubious about) but thought id give it a go in our 90ton plate bender at work ( little overkill i know) and it worked like a charm :clap:

Just need to clean up the rest of the mechanism and get it bolted back in place
 
So the 1year mark has just ticked by, and the game is about done.

I have been working on the playfield for the past few weeks. I have: replaced EVERY piece of plastic on the playfield, rebuilt and replaced broken parts on the pop bumpers, replaced switches, repaired bulb holders, replaced bulbs, and replaced everything that was missing that should be there.

One of the ball gates was completely missing from the top of the playfield, so bought 2x new from MrPinball Australia. took about a week for the parcel to get to Grimsby UK, but we wasnt in when it was delivered. The postie left a note but didnt leave any reference number, and just ticked the box that it was with a neighbour, but didnt say which one. I went to loads of houses up and down the street on both sides, and none had seen it.. grrrr. It had come all this way and then disappears. Decided to take a trip to the local collection office to have a rant.... and thankfully they had the package there waiting for me :-D


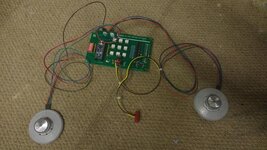
I had an intermittent problem with the lights on the Big lighting PCB under the saucer on the playfield, so i pulled it out to have a look:


cracked solder joints on both outer pins, so re-flowed them all and now it works perfect :)

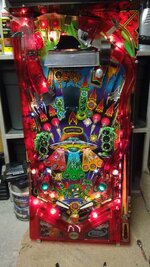
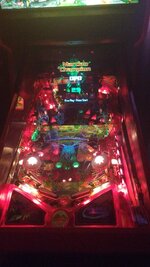
Finally got it all together and got a few shots. It is now very shiny, and brightly lit

i.imgur.com_JMa5BwS.jpg

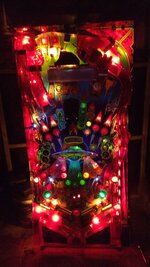
With the lights out:

i.imgur.com_U4uIgvm.jpg

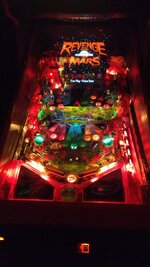
and fitted back into the cabinet:

i.imgur.com_iqP0uFl.jpg

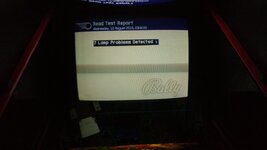
I ran the diagnostic test, and all it now shows is the following:

i.imgur.com_5RZrNEf.jpg

7 bulbs, which are the LEDs that i have put in to try. Its just the case that the diagnostics dont like LEDs so it isnt really a problem

All its waiting for now is the delivery of the saucer mod kit from @myPinballs cant wait!! will look awesome when done:-D :-D

Thought it would be rude not to give the game a try now that its all back together again (even though it was midnight by the time i was done hehe). The game feels different now that all the correct parts were fitted, all 3 pop bumpers now work where only 1 worked before, and all the lane switches work making the scoring work correctly. Much better!

Final jobs to do is repaint the coin door, locking bar brackets, and and few bolts/brackets.

The RFM has a new stablemate (Fishtales) so ive been tinkering a bit with that replacing broken parts, and fixing a few issues. Just need to have a move around now that the RFM is back together so everything is useable
 
Last edited:
The Saucer mod arrived and ive got it fitted. If you havent seen one before it is a very well made piece of kit, and installs just like an original piece of hardware. No cutting/hacking involved, Just plug into existing connectors, and run the 2 cables to the saucers on the playfield

i.imgur.com_s3GGJE7.jpg

Looks great when the game is running, but it very difficult to show the effect with a photo as it changes effect and colour with the game

i.imgur.com_dgJlCD3.jpg

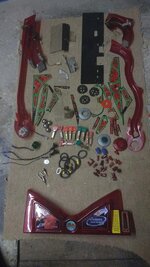
and finally here is the pile of bits removed from the playfield. Most of it has gone in the bin, but the odd part will be kept for spare

i.imgur.com_bfgLX7V.jpg

I'll finish the shop log here, as there isnt really much to see in the final bits of paint/touchup.

Since finishing ive played it more than i ever did before, and im absolutely loving it. I really cant understand why there is so much hate for this game :-S
 
Nice work! I love this game too.

In the bin? Some of those bits look salvageable. I bet that apron is in better condition than others out there! Bet it would have all sold as a job lot on eBay!
 
Of the plastic bits Ive kept the ramps, and apron, but everything else is broken/cracked/bits missing. Ive kept some of the target switches, and other bits of metal work that i will stick through a tumbler at some point before storing them.

I think i need to swap the green LED in the new saucers for a super bright LED as the flashing lights around the saucer are so bright that the green in the dome seems quite faint in comparison. All the playfield lights are just standard lamps which look really bright and colourful through the inserts, so cant see the point in changing them all for LED
 
The decision to convert to LED is a tricky one. I'm dabbling with putting LEDs in my older Bally solid-state games. The futuristic theme of the 1983 VECTOR suits LEDs well and I think they'll work well in the 1982 GOLD BALL, also quite a spacey-future-retro theme, but I can't see anything except classic incandescents in my 1979 PARAGON. I've been pleased with the way LEDs look in terms of brightness and colour when used for inserts, but it's the instantaneous on-off that makes them look wrong (they need a small resistor adding to each to prevent flicker although there is no ghosting). I've been working on some mods to make them fade in and out, which seem to work well, but I also understand there are brands that come ready made like this, but they're quite pricey.
 
On my machine the plunger was a bit sticky so I cleaned it up, and also the play field plastics that the plunger goes though below the alien was out of line so the plunger was rubbing against the side of the hole.
 
Back
Top Bottom