What's new
Pinball info

Register a free account today to become a member! Once signed in, you'll be able to participate on this site by adding your own topics and posts, as well as connect with other members through your own private inbox!

Complete Revenge from Mars - The Shop Log

Davey D

Site Supporter
Joined
Aug 4, 2014
Messages
608
Location
Grimsby, UK
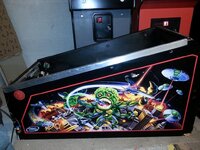
Hi all, ive just got hold of a Revenge from Mars. I'd say its in pretty good condition. Its all there, and the machine is playable, but there are still plenty of bits i want to do to it. There is no fade to any of the cabinet, just the odd nick here, and there, the obligatory damage around the legs where it bolts to the cabinet, and a bit of wear in the usual places on the playfield

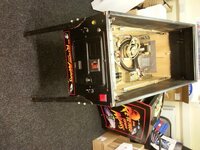
Its currently sat in one of our spare offices at work ( so i can play it on my dinner break, and after work;)) but in the next week or 2 i will be breaking it down into easier chunks to get home, as it took 4 of our blokes here to struggle it up the stairs all built up.

Im going to break down the work into sections so that each job in a section can be done at the same time, and if i find anything else that needs doing i can add it to that list.

I will update this first post with any jobs that need adding to this list as i find them. So far from just getting the game here, and having a quick play with it:

---PC---
Replace PSU with a decent quality one DONE
Replace CPU fan DONE
Remove CPU heatsink / replace heatsink compound DONE
Clean inside of PC DONE
Replace any batteries DONE
Fit video amplifier to boost image DONE
Update game version from current 1.2 DONE ( updated to 1.5)

---Electrics---
Re-crimp one of the power supply wires for the monitor DONE (ended up re-crimping all the connectors)


---Play Field---
Replace any broken plastics i find DONE
Left alien struggles to jump up and down, so investigate problem DONE
Modify Spaceships with LED mod DONE
Go through list of failed bulbs / fuses etc from diagnostic screen DONE
Fit cliffy to cover up/ prevent any more wear to "Stroke of Luck" hole DONE


---Cabinet---
Shotblast / repaint legs DONE
Shotblast/ repaint glass locking panel+ side rails DONE
manufacture new heavy duty leg mounts, as the threads are knackered in originals. DONE (Ended up buying some)
Replace leg bolts, as threads are knackered DONE
Fit new feet to legs as they are rusty DONE
Fit leg protectors, and repair/cover any existing leg damage to cabinet DONE
Paint coin door, and other brackets
 
Last edited:
Ooof, 4 people to get it upstairs. Those things ain't light.

Let me know if I can help out at all - although I have no doubt you've got it all in hand.
 
Don't forget some new t-moulding while your at it - green or original red. Easy to do, cheap and really sets off machine.
 
Over the weekend i had a bit of a chance to look at the PC, as that is the first thing i want to sort being the heart of the system.

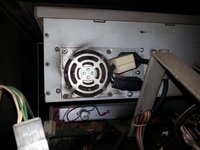
Opening the back of the cabinet it was a bit dusty, The rear fan of the PSU looked quite grotty, and it is quite noisy too:

i.imgur.com_vBaEKGl.jpg


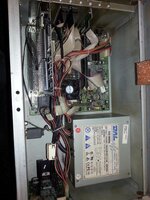
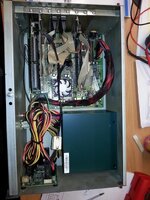
So i unplugged all the cables, and removed the PC for a closer look. There is a bit of dust in there, but i have seen much newer computers in much worse condition

i.imgur.com_A6FgrYM.jpg


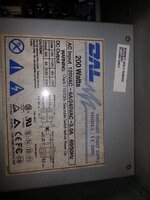
The PSU looks to be the original 15year old part.... do you think i should worry about voiding the warranty by removing it? hehe

i.imgur.com_scrI0tS.jpg


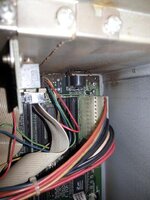
The motherboard actually has an AT and ATX connector, so im just going to go with a nice modern lower power consumption ATX psu
i.imgur.com_LIpTXyu.jpg

Most PSU these days have a large fan in the base, but i cant use one of those here. It has to be a classic design with a fan in the back only which seems to realllllly limit my choice.

I have found a nice one from Ebuyer though:
http://www.ebuyer.com/185183-antec-earth-watts-380w-fully-wired-80-bronze-power-supply-ea-380d-green

Its even painted a nice green colour, so should match the theme nicely :cool::D

I believe the CPU fan is a 50mm item, so ill order one of those. Whilst in there changing bits i'll get a new battery for the motherboard which is a common CR2032, and a battery for the Prism card is a BR2325 which i have only found so far from online suppliers. im going to order some other bits for my MAME cabinet (making a scanline generator) from RS components, so ill just get the battery from there at the same time.

The monitor is a Wells Gardner unit ( the better of the 2 monitors fitted to these cabs) and its a little bit easier fitting the video amplifier. I just need to find a new connector for the monitor pcb (believe its made by molex) as i dont want to hack the old one up to make the new cable

This is the Amplifier to be used from Ultimarc:

http://www.ultimarc.com/vidamp.html

i just have to check to see if my videocard outputs a 5v signal. If not i will have to run an extra 5v line from the PSU which is no big issue
 
Nice to see you got started on this.

Not sure if you noticed but someone on forum is selling a few spares for Pinball 2000, just in case you're in need of anything. I know parts for this are hard to come by.
 
Easiest way to do the ultimarc amp mod is to buy a breakout cable. http://www.ultimarc.com/store/section.php?xSec=11

Just cut the end off and wire into the amp and the other side is already done. Then you just need a normal vga cable to attach to computer.
You will probably need the 5v mod so test with multimeter - I had to do it even on a nucore system.

Also had to adjust the horizontal size which is actually on the pcb behind the monitor as opposed to the remote controls at the front - very tricky but there is a pot you can see if you look from the front to the back pcb.

Just remember not to touch the parts on the monitor due to potential high voltage stored in the tube bit - even when off so be extra careful.

My monitor was almost brand new and really good anyway but allows more contrast and fine tuning.
 
I don't think the power supply you linked is ideal. You want one with a selectable input voltage, you need 120v. I replaced mine with one from an old pc in my attick which had the selector on it. Of course you could alter the power cabling but the one that currently feeds the PC is wired to 120v.

Here's a link to a guide to replacing the power supply with a modern one, handy because it explains how to rig it up to the power button on the front of the PC box.

http://antelopearcade.com/forum/yaf_postst4_Pinball-2000-AT-to-ATX-Power-Supply-Replacement.aspx

Edit, the one linked does say universal input rather than specifying voltages so may well work, they unusually specify the voltages.
 
Yeah that psu does look suitable looking at the PDF, you'll still have to modify the ATX plug wiring to get it to turn on though.

Not sure about the transformer.
 
Yeah that psu does look suitable looking at the PDF, you'll still have to modify the ATX plug wiring to get it to turn on though.

Not sure about the transformer.


Yeah the wiring is easy. Just take the green wire to ground. ill modify the original switch to make it work in the same way as the AT psu did
 
Remember, and I cant say this loudly enough in case anyone has missed it ( I note you noticed Davey :) ), and it WILL cut down on your options....

IF YOU ARE LOOKING TO CHANGE THE PSU, MAKE SURE IT IS SWITCHABLE TO 110V, or takes 110V input.... (The antec one you have suggested looks like it will be fine!)

The power feed to the pc is 110v.... therefore put a 240v in and it'll break...

I remember I blew one this way... pulled out and fired up on the bench.... plugged it in, and pzzzt - 240v into 110v psu = broken PSU.

Oh and I did the Ultimarc mod and it completely rejuvenates the display... the default signal that is fed from the PC is 1v Peak-Peak.... whereas the monitor expects I think 4v or 5v peak-peak.... hence why it is so weak...
 
The innards of that PC look positively squeaky clean compared to some of the ones we see here on the dock estate. ;-)
 
The innards of that PC look positively squeaky clean compared to some of the ones we see here on the dock estate. ;-)

I always think about that machine i went to look at down the old BMW compound when i was working with you. You could barely see the motherboard for all the coal dust packed inside it! :-o
 
I don't think things have improved much to be honest.

The only real positive I can say is that as we're now using ultra-small form factor machines (Lenovo ThinkCentre M93p) the space for coal dust to accumulate is hugely reduced. But then I also guess the impact of any dust at all is going to be more significant.
 
All the bits I ordered from Ebuyer, and RS components arrived this week. The amount of warning labels on the package from RS was crazy. You'd think there was a nuclear bomb being shipped inside, when amongst other bits there was a small lithium coin battery and a can of foam cleaner.

I started off by removing the old PSU, prism card and fan, then blowing out all the crap with an air duster.

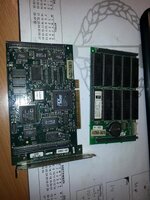
I replaced the CR2032 battery on the motherboard, and split the daughter board from the prism card to replace the BR2325 battery on there. Everything looked good with no battery damage

i.imgur.com_In0fmC6.jpg

All the caps on the motherboard looked fine with no bulging or leaking so was very pleased

Replaced the CPU fan with a new quiet one that uses a header on the motherboard instead of a hard drive style 4pin molex.

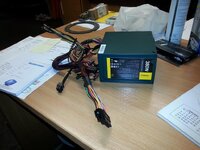
This is the lovely new antec PSU unboxed

i.imgur.com_7k4iDzK.jpg

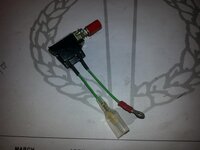
To make it power on you need to take the green sense wire to ground, so I removed that pin from the ATX plug, and pulled the wire out from the sheathing all the way back to the psu. I want to be able to use the original switch from the AT power supply so I de-soldered it from the old the old wiring loom, and soldered on some new wires as below

i.imgur.com_iA3VDti.jpg

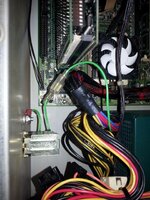
The ring terminal connects to the existing ground stud on the case next to the switch, and the spade terminal connects to another terminal I put on the end of the green write coming from the PSU. Turning the switch on and off will make/break the ground connection turning the PSU on or off. Putting the spade terminal on makes it easier to remove the PSU in the future without having to remove the switch.

All fitted
i.imgur.com_zGHElue.jpg

Here is everything cleaned and fitted ready to be put back in the cabinet.

i.imgur.com_n8Tj1k7.jpg

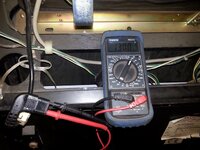
Out of interest I thought I would stick my multimeter over the power supply cable that plugs into the PSU..... And as claimed... The output is showing 130v

i.imgur.com_jG65pkd.jpg

Plugged it all in and fired it up. Worked spot on, and was super quiet now.

I have ordered the video amp from Ultimarc. Should be here next week. I have a 10pin molex connector and pins for connecting to the monitor. That came with the order from RS so will get that crimped up and ready to go next week. Will need to check for a 5v signal too which will determine if I need to run an extra power supply from the computer PSU
 
Excellent shop log Davey D aka Daisy Doo (sorry, my two year old loves the Night Garden and goes around saying Makka Pakka and Iggle Piggle and Upsy Daisy).

Most of it is over my head, but that's a reflection on me not you, and I like the stylish way you write which lets me learn a little every time. Very instructional and accessible, even to a numpty like me.

You're doing great, keep it up!

tapatalk.imageshack.com_v2_14_08_23_5f91635367a6a565777118a45633d280.jpg
 
the semi common sound interference
the fact was if the glass got smashed it is semi unobtanium and would severly diminish enjoyment if it was not there - Mark Squires had the glass smash on his
 
The video amplifier from Ultimarc landed today. I've been quite excited about seeing the results of this as I've heard it makes a big difference to the image.

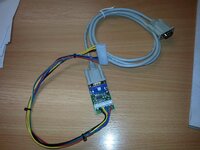
I had already made up the RGB / sync cable ready to connect to the amplifier.

I could have bought a cable from Ultimarc that you cut the end off for £10.71, but instead I bought 10x plugs and 100x pins for £7.99. Works out cheaper, and I've still got plenty for future projects ;)

Here is the full cable assembled ready to go

i.imgur.com_N9zBDSd.jpg

Some of the video cards in these pinball2000 machines only output around 1v, where the amplifier needs 5v to work. If this is the case you need to run another 5v + ground write from the computer psu to the amplifier.

I decided to just plug it in and see what happens... and to my surprise it worked fine... This must mean that mine is a later version that outputs a 5v signal.

The picture really is improved massively. You can really notice on the "Martian Happy Hour" game mode where it was a bit dark before. Now it is super bright with vibrant colours.

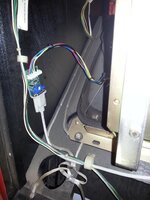
Ive now removed the original vga cable and clipped the new one into place. All I need to is mount the amp to the inside of the cab with a couple of spare pcb legs I've got

i.imgur.com_rGIpB8b.jpg
 
Work has been a bit slow on the RFM as ive been spending more time tinkering with my arcade cabs :oops:

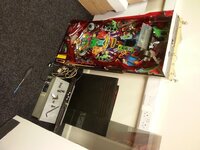
Ive pulled the cab to bits to prepare with taking it home, as its a heavy beast when built up. I have to say it really is as easy as the lady makes it look in the Williams Pinball 2k promo video:D


i.imgur.com_z8dGtuO.jpg


i.imgur.com_ttp0FWe.jpg

In the bottom of the main cab there is quite a bit of broken plastic bits from old lamp covers etc so it will need a good vacuming out. I'll unplug/remove the driver board and then give it a good cleaning inside

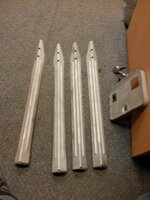
Ive started work on the legs so i can at least build up the main cab when i get it home, so ive had the legs shot blasted

i.imgur.com_cn9bUE3.jpg

Im in the middle of painting them gloss red, and im seriously considering painting the slam panel, and top rails in the same gloss red to match. It will really change the look of the cab brightening it up a bit. Should tie in nicely with the red T moulding around the head of the cab.

Ive got some new red T-moulding to fit to the cab head as the original is looking a bit faded and tired.

Also whilst at Play Expo at the weekend i picked up a few bits -

Leg levelers
Black leg bolts
Black plastic leg/cabinet protectors
Heavy duty bolt plates


Once the legs are finished ill get some pics posted of them posted up
 
Its been a while since ive posted an update, but the RFM had been sat in pieces at work until i finished moving my garage around to take it home.

Well everything has been moved about, and its now home so ive resumed work on it once more.

I have decided that as well as getting the legs powder coated red, im also getting the slam panel, and side rails done to match. It will brighten it up a bit, and also tie in with the red T-moulding on the head box.

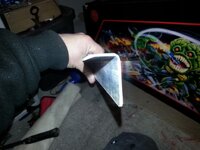
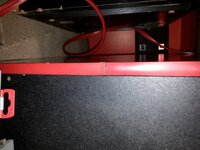
I dont know if all other pins are the same, but removal of the side rails was quite emotional. They are stuck on with double sided foam tape the full length of the cabinet :-( Being such thin steel ( around 0.5mm) they ended up getting a little bent and rippled along the length. I put some time into getting them back straight again, but wasnt happy with them, so I made some new ones at work from 1.0mm galvanised plate, and tried them for size

i.imgur.com_trKJanL.jpg

The fit was perfect

i.imgur.com_qC9snVX.jpg

I have taken all the bits down the the powder coaters today, and should have them back for the weekend :-D

Whilst i was tinkering a started removing the old T-moulding to replace with new. The photo doesnt do it justice, but the old stuff is faded, and very scratched

i.imgur.com_z9F9lGp.jpg
 
Hi Davey, looking good - you are making a great job of this!

Could you let me know where you ordered your t-moulding? I was planning on replacing the t-moulding on my RFM, but didnt know where to buy it. Also, how much do you need in total?

Thanks in advance!

Cheers, Mark
 
Thanks Davey, I'll have a think in case there is anything else I need, and get an order in :)

Good luck with the refurb, keep up the good work - it's looking great! RFM is a lovely machine in my oppinion, and always impressive when people come round, especially if people haven't seen one before!

Cheers, Mark
 
They sell the video amplifiers at ArcadeworldUK too which is a worthwhile mod if you haven't already done it
 
Thanks Davey, but mine as had the LCD conversion so I wont need that. Initially I was looking for an RFM with an original monitor as I thought the picture would be better, but the LCD conversion on mine was done really well and the pic looks great, even though its LCD.

Have you painted your legs yet? I had mine shot blasted and powder coated in a nice red - and they came out great! I didnt have the lockdown bar etc done though. Although, I have since done another pin where I had the legs, rails, lockdown bar all done in the same coloud and it came out really well!

Cheers, Mark
 
Back
Top Bottom