What's new
Pinball info

Register a free account today to become a member! Once signed in, you'll be able to participate on this site by adding your own topics and posts, as well as connect with other members through your own private inbox!

In Progress Revenge from Mars Log

Love a bit of freeplay. 👍

I'm sure if you saw my soldering you'd want to redo it!
 
received_217066042666265.jpeg

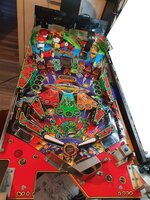
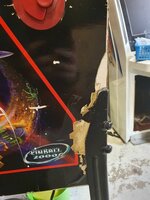
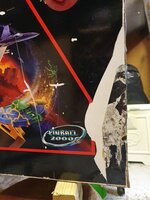
I have finally removed everything from the playfield and most parts from the bottom and started to clean it.

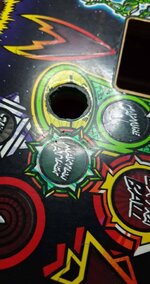
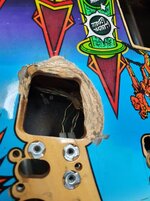
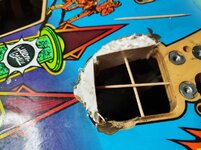
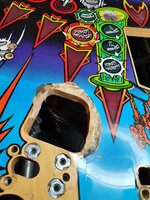
When I removed the duck tape from this place, I found this hole..
There should be some kind of green glass like the other two with some text, anyone know any smart way to fix this?

I'm thinking of two different ways.

1: cut some green plexiglas and then print the image on some transparent sheet.

2: transparent plexiglas and replace the lamp with a green LED. Then print the image.

Or is this some standard part? I've searched some but can't find any.

Thanks :)
 
Really interesting thread. Always loved AFM never got to play this one though it interesting to see it all! Good luck with getting it finished!
 
View attachment 101554

I have finally removed everything from the playfield and most parts from the bottom and started to clean it.

When I removed the duck tape from this place, I found this hole..
There should be some kind of green glass like the other two with some text, anyone know any smart way to fix this?

I'm thinking of two different ways.

1: cut some green plexiglas and then print the image on some transparent sheet.

2: transparent plexiglas and replace the lamp with a green LED. Then print the image.

Or is this some standard part? I've searched some but can't find any.

Thanks :)
Jeeez, how does that happen??

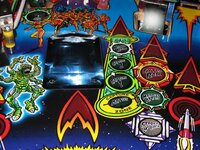
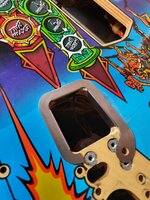
playfield art is like this


008AE472-668F-41F1-AC44-7B95947A82BC.jpeg

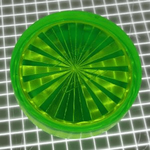
it’s a round green star insert underneath, the same as the ones above it. Going to need a decal or something once the insert is put in

good luck
 
@BigIan: Thank you for the link
@myPinballs: Thanks for the picture!

I've spent all weekend removing everything from the playfield, and all solenoids.

84701564_1182887418548526_7607840863221186560_n.jpg

After cleaning the playfield, I noted all flaws and things to repair.

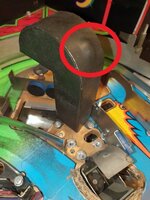
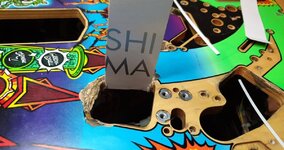
Even though I've bought a protector for the SOL hole I wanted to strengthen it.
84403601_207967107052253_984807413670477824_n.jpg

So i made a "form" for it with some hard cardboard (A part of it is on the bottom to), stuck with hotglue.

84228471_1238162686384279_5043118004456390656_n.jpg

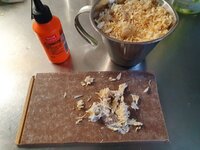
Then i mixed some shavings (not sure if it's the correct word :) ) with woodglue.

85197145_2763159693760767_5438179335544504320_n.jpg

This makes a thick strong mass that will be rock-solid when cured.

84440724_507179929935113_3881273563558182912_n.jpg

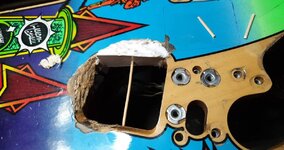
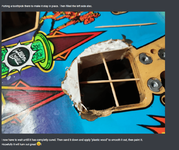
Putting a toothpick there to make it stay in place. Then filled the left side also.

85107786_223214698717797_6580799794883592192_n.jpg

I now have to wait untill it has completly cured. Then sand it down and apply "plastic wood" to smooth it out, then paint it.
Hopefully it will turn out great :)!

Sunday was spent on disassembly every part of ALL the solenoids and cleaning them, then assembled them again.

84489485_814388945655970_2986173658625474560_n.jpg
 
Reminds me of this guy on YouTube who repairs everything and anything with noodles. Well worth a watch. He achieves amazing repairs with them.
Is the intention to touch up the repair too?
 
Screen Shot 2020-02-10 at 14.14.09.png

If this doesn't work out I'd seriously consider buying some fibreglass resin. Not P40 but resin and hardener. You could always add some chopped strands of fibreglass matting to it.
That would be rock solid. It's messy to use and smelly but boat building is all about wood and fibreglass.

Plastic filler to finish.
 
If that works I will eat my hat !!;)

PVA glue and wood shavings will not work for a high impact area just to soft . Shaping a piece of hardwood and glueing it in with PVA glue will do it . Two pac wood filler is your friend here or chemical metal or a epoxy weld is the one's to use !!

Ps loving the enthusiasm and determination in giving this great pin a new life , I love mine :)
 
If that works I will eat my hat !!;)

Hahaha! Thanks man :D

If it was just this - then yes, but this area will be almost completely covered by a metal hole-protector, it's mainly for stability 😌.
I thought it was worth a shot to test it. I left a few mm so I can add some harder compond over it, like wood filler or epoxy as you suggested! 🙂
 
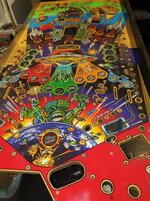
I have worked on it all weekend again. Finally done with the playfield, It's not perfect, but I'm happy with the result :).

Before:

84403601_207967107052253_984807413670477824_n.jpg

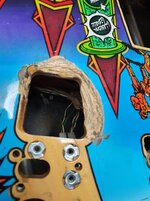
This is the glue/wood mix after a week of curing.

1.jpg

Used my Dremel to sand it down.

2.jpg

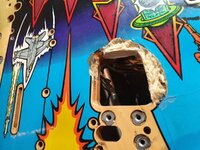
I forgot to take a picture of making it smooth with epoxy. After that, I mounted the protector and painted as best as I could around it and the tip of the Red arrow. 😊😄

3.jpg

I know that most people will cringe at the paintwork, but I tried as best as I could, it's also clear coated. 😱😰🤬
The paint looks uneven, but it's not, not sure why it looks like that on the picture...

Allot of screw holes were threaded/destroyed on the bottom of the playfield, so I had to repair them before starting to reassemble everything...


20200217_072624.jpg

Almost done with it, going to test it later today! :clap:

Do anyone know where I can get a 1" green starburst insert from a store in Europe?
I found some stores in the US, but they wanted 60-80$ for shipping... :suspect: :cuckoo: 😵
1581933236084.png
 
Nice progress on this one, the slings are on the wrong way round though dude. Best Of Pinball used to do a lot of different inserts, might be worth checking them out, will save you a lot of postage if they do have the right one.
 
Nice progress on this one, the slings are on the wrong way round though dude. Best Of Pinball used to do a lot of different inserts, might be worth checking them out, will save you a lot of postage if they do have the right one.

Thanks, will check them out :).
Haha yeah, noticed that when I was plugging in the saucers :tut:😫.

Going to post updates this weekend when it's all plugged in again. 😃
 
I'm sorry for the lack of updates, but I can't paint when it's freezing outside hehe...

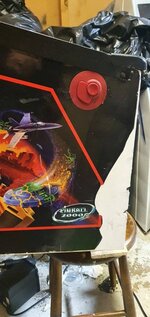
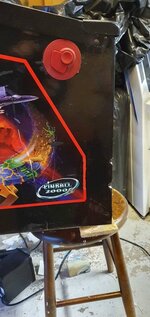
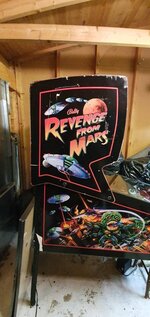
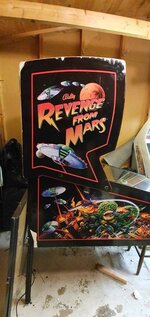
Still working on the cab.

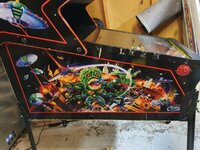
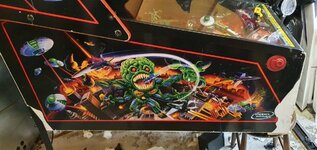
Before:
Pic.jpg

After cleaning and painting over some scratches:
pic2.jpg


pic3.jpg

pic4.jpg

pic5.jpg

pic6.jpg

pic7.jpg

pic8.jpg

Still working on it, might not be perfect, but a lot better than before :). Hopefully it will get warmer soon so I can continue working on it!

Yes - I could just buy new decals, but right now just wanted to make it look better as-is.
 
Small update while waiting for warmer weather :)!

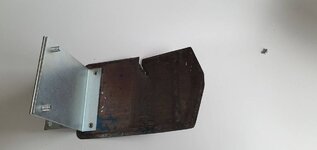
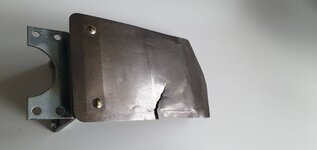
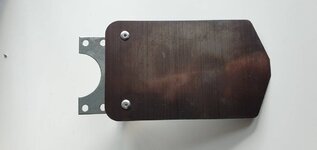
Replaced the old rusted flap skip ramp

1.jpg
2.jpg


New:

3.jpg
 
Back
Top Bottom