What's new
Pinball info

Register a free account today to become a member! Once signed in, you'll be able to participate on this site by adding your own topics and posts, as well as connect with other members through your own private inbox!

In Progress Revenge from Mars Log

Trozze

Registered
Joined
Jan 28, 2020
Messages
21
Location
Sweden
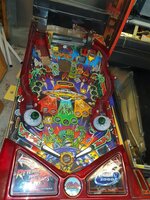
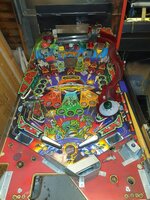
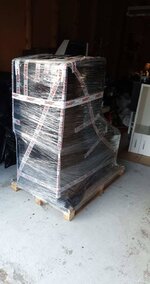
This is my first pinball (and first post on this forum); I got it last week and have started to work on it. :cool:
I did buy it as "not working" so I was ready for a lot of repair, I am used to electrical repair (I own 2 candycabs) but the playfield with all switches and bumpers will be a new learning experience! 🤓
received_1038730953151955.jpegreceived_2425447641050917.jpeg

I tried to power it on but nothing happened – as expected.
The computer was my first task to repair so I could get it to do anything at all.

20200122_133553.jpg
(PRISM card already removed)

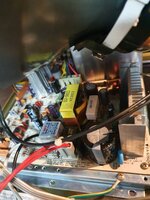
When taking it apart I noticed that one capacitor was bulging and another one replaced by someone. I had read beforehand that the motherboards used in Pinball2000 machines are notorious for bad capacitors, so I had ordered new Nichicon capacitors for motherboards/SMPS - Low ESR.

Next up was checking the fan/CPU, one pin had bent on the CPU but I managed to bend it back without breaking it.
The CPU fan was not moving so I had to clean it and put new grease in, now it spins, as it should again!
Adding new paste to the CPU, mounting the cooler and fan.
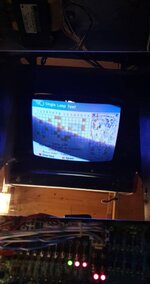
Tried to turn it on and it’s alive!! Got a picture on an old 15khz monitor.

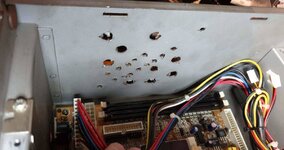
I am not sure how or why but someone had drilled many holes on the side of the computer “chassis” and stuck a fan there (and later removed it)… It looked awful. 🤔🤢

received_193887778422595.jpeg

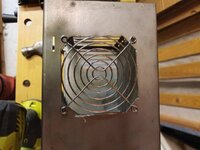
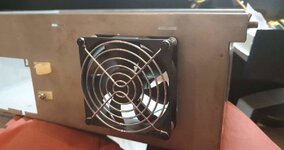
So I used my Dremel to cut a large hole were the fan should be mounted, made screw holes and mounted it to the chassis. 😁

received_2264664293834698.jpegreceived_843815199401592.jpegreceived_166181138022790.jpeg


Went back with the computer and tested it in the machine, I could hear the audio and the lights on my playfield worked! The monitor was not working at all, no neck glow. Soooo… I went on removing it from the machine.
When I got it inside for disassembly I saw that the main filter capacitor was bulging… not a good sign… 🤨


20200122_204754.jpg

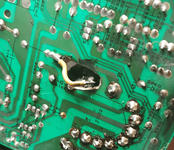
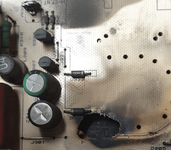
After removing the Chassis I turned it upside down.. WTF HAPPENED HERE?!?!?! o_O:hmm::oops::eek:

1580226251345.png
1580226341137.png
Oh boy… Several caps on the B+ line were also either leaking or bulging. 😔
I decided to remove all capacitors, desoldering the transformers and heatsinks then washing the PCB, it’s covered in soot in the flyback area.
While the card was drying up I had to clean the CRT because the tube was covered in a thick coating of black soot (No, not the aquadag).. Now it’s much better.

1580226446790.png

Next up was visually examining the chassis for broken components. Two transistors were cracked (Q307 and Q308) and the H-CENT pot was missing parts of it.
I could not find the same transistors and had to find two equivalent (KSC2383YTA and KSA916YTA).

1580226537875.png
Two resistors behind them were also broken and the two Diodes.
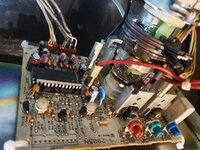
The neckboard was not any better; it too had taken a hit. One exploded capacitor and a burnt 10k resistor. Going to replace all the caps there to!

I am getting my order from Mouser today on all the parts for the monitor, will post when I have replaced everything. :D
 
Welcome (I am a new boy myself, so feel a bit of a fraud saying that!)

Does it def. say Revenge from Mars and not Webber on the side? Looks like something got warm! :)

You seem to be getting stuck in! Nice work!

Look forward to watching how you get on.
 
Welcome to the nuthouse! Congratulations on your first pin and be prepared for it to want to multiply! Excellent start on this so far, always good to see a pin being saved. A great choice for a first pin as well, I've always fancied one myself.

Will be following closely!
James
 
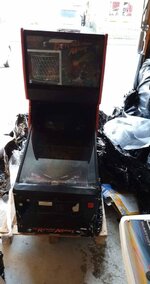
This is my first pinball (and first post on this forum); I got it last week and have started to work on it. :cool:
I did buy it as "not working" so I was ready for a lot of repair, I am used to electrical repair (I own 2 candycabs) but the playfield with all switches and bumpers will be a new learning experience! 🤓
View attachment 100839View attachment 100840

I tried to power it on but nothing happened – as expected.
The computer was my first task to repair so I could get it to do anything at all.
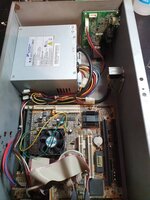
View attachment 100841
(PRISM card already removed)

When taking it apart I noticed that one capacitor was bulging and another one replaced by someone. I had read beforehand that the motherboards used in Pinball2000 machines are notorious for bad capacitors, so I had ordered new Nichicon capacitors for motherboards/SMPS - Low ESR.

Next up was checking the fan/CPU, one pin had bent on the CPU but I managed to bend it back without breaking it.
The CPU fan was not moving so I had to clean it and put new grease in, now it spins, as it should again!
Adding new paste to the CPU, mounting the cooler and fan.
Tried to turn it on and it’s alive!! Got a picture on an old 15khz monitor.

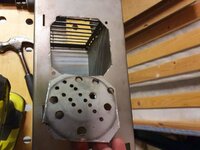
I am not sure how or why but someone had drilled many holes on the side of the computer “chassis” and stuck a fan there (and later removed it)… It looked awful. 🤔🤢

View attachment 100842

So I used my Dremel to cut a large hole were the fan should be mounted, made screw holes and mounted it to the chassis. 😁
View attachment 100843View attachment 100844View attachment 100845


Went back with the computer and tested it in the machine, I could hear the audio and the lights on my playfield worked! The monitor was not working at all, no neck glow. Soooo… I went on removing it from the machine.
When I got it inside for disassembly I saw that the main filter capacitor was bulging… not a good sign… 🤨
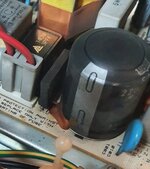

View attachment 100846

After removing the Chassis I turned it upside down.. WTF HAPPENED HERE?!?!?! o_O:hmm::oops::eek:

View attachment 100847
View attachment 100848
Oh boy… Several caps on the B+ line were also either leaking or bulging. 😔
I decided to remove all capacitors, desoldering the transformers and heatsinks then washing the PCB, it’s covered in soot in the flyback area.
While the card was drying up I had to clean the CRT because the tube was covered in a thick coating of black soot (No, not the aquadag).. Now it’s much better.
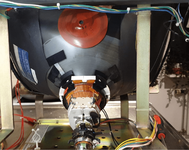
View attachment 100849

Next up was visually examining the chassis for broken components. Two transistors were cracked (Q307 and Q308) and the H-CENT pot was missing parts of it.
I could not find the same transistors and had to find two equivalent (KSC2383YTA and KSA916YTA).
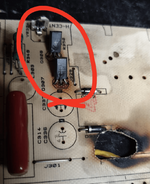
View attachment 100851
Two resistors behind them were also broken and the two Diodes.
The neckboard was not any better; it too had taken a hit. One exploded capacitor and a burnt 10k resistor. Going to replace all the caps there to!

I am getting my order from Mouser today on all the parts for the monitor, will post when I have replaced everything. :D


Welcome! a fine choice for your first game,. Be sure to update to my latest game code, available here : mypinballs.com

Also if you want a replacement computer case without the nasty holes/hack in it, i have some spares.
 
Finished my repairs to RFM last year. Good thing about Pinball 2000 design easier to access parts and most standard parts.
Problems seem to be start with TV & computer, but there are many options repair/replace them.
Good luck.
 
Thank you everyone :D !

@MajesticPinball:
I'm already started looking for my next project.. can't say my wife is as happy haha! 🤣

@myPinballs:
Thanks for the offer! But i think it's ok now when i removed the holes and mounted a fan :)
Will try it, was looking for 1.5 or 1.6 update files, but it seems to be removed from all websites. I think i got 1.1 or 1.2 now.

@NoCLU:
Nice, what did you have to fix on it? Yeah, it seems to be "easy" to get replacement parts for it.


Okay, so I replaced all the capacitors and defective parts on the CRT Chassis.

CRT.jpg CRT2.jpg

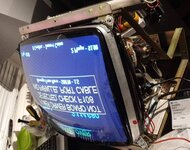
Plugged it in... :popcorn:... Was ready for the CRT to explode...

CRT3.jpg

It's alive again!! :-o😲 (Ignore the error, the PC was not plugged into anything)

I then went on recapping the Soundboard and the PowerBoard, maybe not necessary, but why not when I got everything apart? :)

Next up today is disassembly of the cabinet and cleaning!
 
@myPinballs:
Thanks for the offer! But i think it's ok now when i removed the holes and mounted a fan :)
Will try it, was looking for 1.5 or 1.6 update files, but it seems to be removed from all websites. I think i got 1.1 or 1.2 now.
[/QUOTE]

Forget 1.5/1.6 and go straight to v2.2 :)
 
@NoCLU:
Nice, what did you have to fix on it? Yeah, it seems to be "easy" to get replacement parts for it.
[/QUOTE]

Replacement computer & battery for motherboard, some wiring under playfield and normal LED update.
Plus problem with slam tilt see here:
Had to re-mount computer as not original, previous owner screwed computer into top of back box :confused:

Good clean was fun and doing underside playfield insert plastics with cotten buds.
Still looking for advice on buffing out scratchs on special pinball 2000 glass. Saving up to get playfield wear repaired.

BTW you have option of replacing computer with standard PC and using software version RFM. If you have problems with PRISM card (Which you might want to check battery I my memory correct).
 
Yes you want to change both batteries, 1 inside the prism card, 1 on the motherboard.

Be careful if you want to seperate your prism card to change the battery though, you need a special tool to do it. DO NOT USE A SCREWDRIVER!!

You can send to me to do it and update the card at the same time if you want.
 
Forget 1.5/1.6 and go straight to v2.2 :)

Okay, will update it when i get it together :) Thanks for the help.

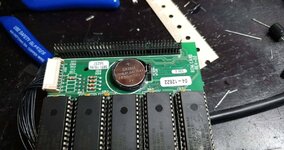
I replaced the battery in the PRISM card yesterday when I had it apart (Removed the BR2325 battery holder with a more common CR2032)

received_2628049067478414.jpeg

One of the IC sockets had corrosion on it, so I had to replace it with a new one. The IC are not damaged luckily. :)

Thank you for the offer tho! 😊😁 much appreciated!
 
Okay, will update it when i get it together :) Thanks for the help.

I replaced the battery in the PRISM card yesterday when I had it apart (Removed the BR2325 battery holder with a more common CR2032)

View attachment 100892

One of the IC sockets had corrosion on it, so I had to replace it with a new one. The IC are not damaged luckily. :)

Thank you for the offer tho! 😊😁 much appreciated!

cool, the roms can be recreated to if needed though better if you can keep the originals. normally you’d just change the battery as they are still available fairly easily

nice job so far on the restoration though especially the monitor
 
Thank you everyone :D !


Okay, so I replaced all the capacitors and defective parts on the CRT Chassis.
.
.
.
.
I then went on recapping the Soundboard and the PowerBoard, maybe not necessary, but why not when I got everything apart? :)

Casually, as you do 👍

Smashing through your list!
 
Welcome to the forum @Trozze and great work so far. This one if definitely not 'just a fuse' 🤦‍♂️

Will be watching this rebuild with interest.
 
Welcome to the forum @Trozze and great work so far. This one if definitely not 'just a fuse' 🤦‍♂️

Will be watching this rebuild with interest.

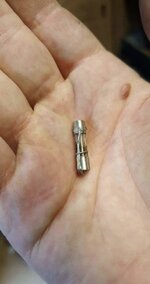
Thank you! Well.. speaking of fuses.. this was plugged in on the PowerBoard. I guess it's a bit more then 4 amp haha! :rolleyes:
Another 4 amp socket had a 16amp fuse, and yet another one had a 6.3amp fuse in it.

fuse.jpeg
 
Thank you! Well.. speaking of fuses.. this was plugged in on the PowerBoard. I guess it's a bit more then 4 amp haha! :rolleyes:
Another 4 amp socket had a 16amp fuse, and yet another one had a 6.3amp fuse in it.

View attachment 100896

Oh GOD no. After all the problems I had with fuses which saved my table. This makes me shudder.
I assume you have manual and know power board fuse values?
If you do not have fuses suggest this is a good deal:
 
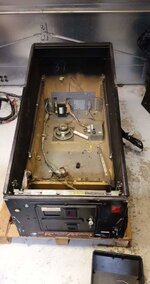
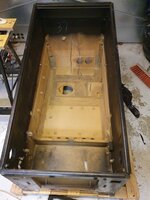
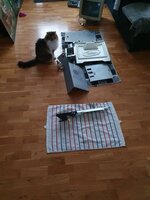
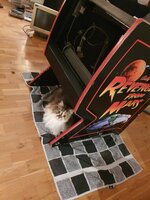
So i removed everything from the cabinet and cleaned each part, much needed!
received_116801982996076.jpeg20200129_195925.jpg
20200125_202709.jpg
20200126_113116.jpg
20200128_203007.jpg

My cat moved in... 😄😸

Do anyone know what screws are needed for the legs? Noticed that the seller didn't included them 😑
 
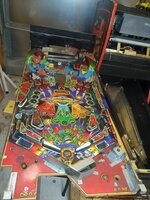
I have been working on the machine all weekend. So this will be a long post with loads of picture (Sorry 😅😄 )
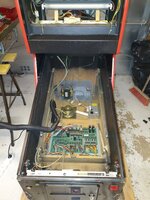
I started with putting everything back together to test the CRT and PC. I had the Playfield on a bench next to it so I could monitor everything.

pic1.jpg


It started, as it should so I put everything back together and tested it. 🙂


Just tested some basic things and it seem to work, however; A lot of things needs to be fixed! 👷‍♂️
I went on removing the playfield to my bench so I could take a better look at it from all sides while taking notes of what works and not.

Pic2.jpg

I put a mirror on the bottom of the cab so I could sit and do the diagnostics without the original glass. Checked and noted every fuse, Lamp, Flasher and Solenoids that did not work or had some problem. 😌

pic3.jpg

In total 25 lamps were broken, most of them probably had a sad meeting with a ball… 🤯😵

pic4.jpg

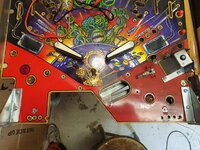
Most of the plastic parts are ok. One piece are missing, so I have to find a replacement later on.
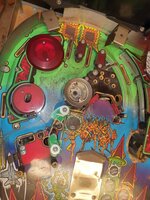
Now that I have tested, what is working and not, I decided to disassemble the playfield. This took almost 2 days of carefully removing parts and noting how it all was mounted and in what order.

Here are some random pictures from the disassembly process. 🥳

pic5.jpg pic6.jpg

pic8.jpg pic9.jpg

pic7.jpg pic10.jpg

pic11.jpg pic12.jpg

pic13.jpg


I tested cleaning a part of the playfield with just a damp cloth, the playfield seems to be under all that dirt!! Cannot wait to clean it all and wax.

pic14.jpg

Also tested to clean the left part under the flippers without any cleaning products. Check out that difference!!

pic15.jpg

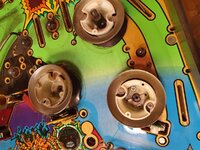
The bumper-skirts have seen better days.

pic16.jpg

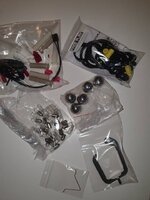
So today, I have ordered the needed parts for the playfield except the missing plastic part. I hope that I get it later this week!

In the meantime I’m going to start checking everything on the bottom of the Playfield.

Sorry for all the pictures!
 
Small update!

The first of two package with parts has arrived :) ! The next one will have a flipper rebuild kit, coils and some sleeves.

84554732_186607952411677_5839901555318325248_n.jpg

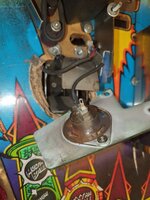
I have decided to remove everything under the Playfield and clean all parts, and re-solder parts that someone has been working on before.. Badly..
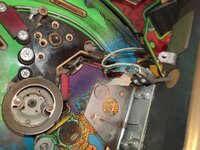
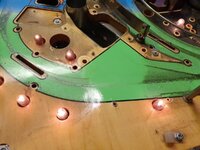
Something I also noted was that they have moved the bumper assembly, probably striped the old one. The problem is that it covers a hole were a lamp should be. 😵 :mad::cuckoo:

This will take some time, so it might take a few days until I have some updates! :)
 
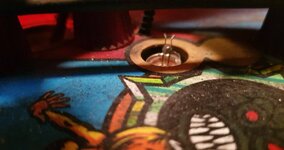
Some major wear around the sol hole. :( Cliffy and a new weldment needed for sure

Unfortunately yes :(. But the Stroke of Luck hole protector that I bought seem to cover almost everything. But I will try to rebuild it so it will not get any worse :)!
 
Back
Top Bottom