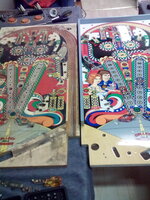
FT cab sorted, time to move onto the playfield.
Been swotting up, threads here & pinside plus vids.
Uncertain how to approach this task, whether to strip everything off the old PF, taking loads of pics, cleaning up/replacing bits then transferring over.
Did notice on one of
@Pick Holder threads having both PFs side by side and transferring parts over as you take them off.
TBH I find this approach very appealing.
Any hint/tips/guidance gratefully received,
Alan
Get the right tools first would be my advice.
If you want to see a playfield swap done right I would recommend following
@Ant-H 's Addams Family thread for a recent example. Have a read through for tips and advice.
You can find it here:
The last part that I needed to restore for the cabinets were the transformers. One of them had alot of surface rust so took a lot longer than I expected to get it back to bare metal. First thing I did was to mask up all the wires and crack out the wire wheel, my drill and remove all the old...

www.pinballinfo.com
You'll need the following:
A lot of space:
Ideally an area where you can work unhindered and free of children/animals!
 Ultrasonic bath:
This will be used for the plastics and Initial cleaning of parts. Also the harness if you're feeling brave.
Tumbler:
Used to bring back the shine on your metals (posts, mechs, flaps, wire gates etc.
Autosol/Metal Polish:
Used in conjuction with the Tumbler
Pinball Rotissorie/Tipper:
I've done 5 playfield swaps now with saw benches but its a royal pain in the ass. Its very difficult to install large mechs with a saw bench as there isn't normally enough clearance. Invest in the rottissorie, either build one or buy one.
Buy stock of parts:
Get a stock of star posts, metal posts, T-nuts, screws and Rubbers sorted. There's nothing worse than realising something has snapped or is missing and then buying stock and awaiting its arrival stopping you midflow.
Drill bits:
Get some imperial bits if you can, metric is OK but its never going to be exact and you'll often find with playfield swaps, holes either are missing entirely or aren't big enough to host posts. I've had this with every brand of playfield (Mirco, CPR, IPB).
Prep the playfield first:
My advice would be to burr out the clear around your post holes, pop bumper bolts and topside T-NUTs prior to any assembly, this will reduce the risk of cracking the clear. Some playfields come with some of the clear removed but often its just not enough and you could up cracking the clear on installing wire forms, bolts or posts.
Document everything:
Take multiple pictures, top down, side on etc. You've removed a layer? Take a picture. You've removed a post, take a picture of the type of post it is.
Bag everything, you can do this by sections on the playfield or by specific parts/mechs whatever level of detail you think is adaquate.
Take a video also you can run this back for any pictures you'll miss (you'll miss some, trust me).
Don't cheap out:
Replace ramps if they look scruffy, replace pop bumpers yokes and assemblies (they often are weak from decades of abuse), replace targets. If you're doing a swap, look to replace every perishable part. These should be scrutinised for there look and condition.
Replace star posts and pop bumper bodies/caps.
Elements you'll find the most stressful:
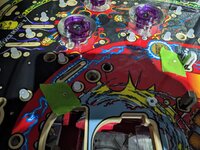
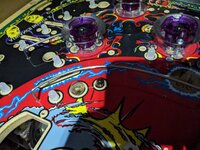
Installing wire guides, without a doubt this is the most stressful for me. Doing these without chipping the artwork or clear especially when they are flush is an artform.
My advice would be to use Green Duct tape over area's you are going to burr out with a bit to avoid slipping and damaging the surrounding area.
Keep the tape in place when installing the wire forms for the same reasons.
.
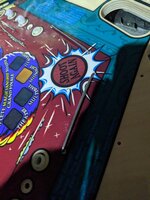 Final bit of advice, don't underestimate the task, its going to take a lot of time, especially your first.
I could go on here but maybe I'll make a guide post instead..


