What's new
Pinball info

Register a free account today to become a member! Once signed in, you'll be able to participate on this site by adding your own topics and posts, as well as connect with other members through your own private inbox!

Complete My first decal job on my RFM !!

newdos

Site Supporter
Joined
Jan 14, 2013
Messages
3,129
Location
Hartlepool
Alias
Newdos
Here goes guys my first attempt at a re-decal. Doing it on my RFM, for which I have a buyer so I hope it goes ok!!!

Just going to add pics as I go along so progress can be recorded here and hopefully I'm sure you will all chip in and tell mw hat I'm doing wrong!!

Cheers Kev

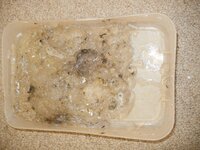
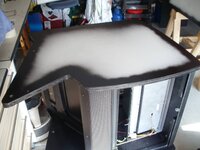
OK first pic of head off and decals removed with heat gun. The pot is the glue just off the two sides of the head!!! I use white spirit to get the glue off and a scraper. I not the head and cab are painted with a nice white smooth finish so guessing shouldn't need too much filling/sanding here.
P3250001.JPG

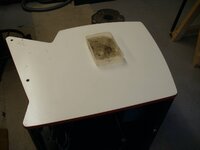
The p0ot of gunk!!!
P3250005.JPG

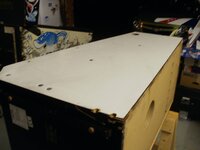
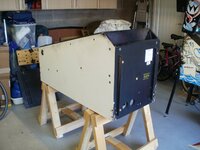
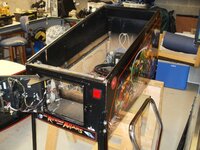
Here is the cab before pulling it to bits!!
P3250006.JPG


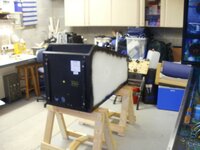
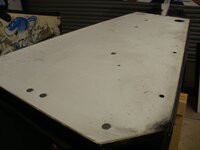
And finally couple of shots of the cab with the decals off but not yet had glue removed. That's two nights work so far!
P3250009.JPG


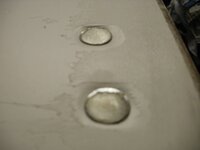
First question - the bolts the hold the slide rails in are sunken a bit is it good idea to fill over these ?
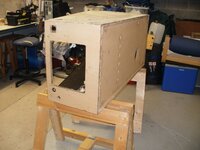

P3250010.JPG

That's it for now - glue removal tomorrow night, ready for filling then sanding.
 
First question - the bolts the hold the slide rails in are sunken a bit is it good idea to fill over these ?


That's it for now - glue removal tomorrow night, ready for filling then sanding.

Personally i didnt, since the filler has a habit of cracking if you do the bolts up too tight... Others will say that you should fill them, just not tighten so much...

50/50 me thinks...
 
Personally i didnt, since the filler has a habit of cracking if you do the bolts up too tight... Others will say that you should fill them, just not tighten so much...

50/50 me thinks...
problem is Paul the bolt heads are sunken already so if I don't fill them it will leave a floating bit of decal which could then be poked through
 
Personally i didnt, since the filler has a habit of cracking if you do the bolts up too tight... Others will say that you should fill them, just not tighten so much...

50/50 me thinks...
Sitting on the fence there Paul !;)
Look at my shop log , I filled them in , I asked the same question and most of the responses were don,t do it . I had to on 2of the holes because there was massive damage , so I ended up doing them all , so far so good , but I have not tightened them to within an inch of their lives ;)
I filled them and before I put the decals on I tapped the coach bolts in with a hammer to square out the hole and to check the filler was not going to move. I have only done one , so no expert , mine seams ok , but there will be other members who have done re-decaling a lot more and have maybe had a bad experience of filling the indents. So after all that , I am sitting on the same fence as Paul :rofl::thumbs:
 
Totally agree with what Paul has said.
Personally I don't fill them unless they are deep.
 
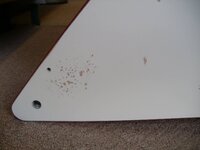
All glue off now and nice and clean. Next job a quick sand over and then filling. Still not sure about filling the bolt heads, but the dents are quite visible (must try and keep the bloody camera still!!)P3270016.JPG
 
No work done over weekend as been in Scarbados !!!

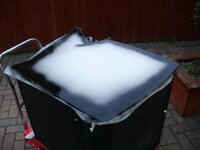
This morning I have done all the sanding, and it's a smooth as a babes bum!!!! filling tomorrow night. Couple of pics from today but not much to see at this stage.

Was a bit over zealous with the heat gun and it's lifted the paint on the head so a little but more filling required there.

Question for you pros - as the cab and head of the rfm has a white background should it be left this way, so when I trim back the decals it will leave a thin white line, or should I spray all edges black??


P4010017.JPG P4010018.JPG

Kev
 
personally??? I'd spray the edges black.... it's a black decal so it would then look relatively seamless and disappear off under the Red T-trim..... :)
 
deffo black edges. I spray mine and then follow up with a black paint pen once the decal is on as there's normally a thin white line on the edge of the cut decal.
 
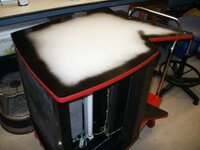
Ok filling all done sanding all done - very messy and cab edges sprayed black. a lot of work has gone into this so far. Learnt not to spray the paint to thick or it runs very easily!!! Wipes off with a bit of thinners very easily whilst still wet.

masking the edge of the head was a pain as it has a red trim - over spray if any removed with thinners. Not looking to bad I think

Getting close to decal time!!!!

P4030019.JPG P4030020.JPG
 
Too late now daz was going to do that but wasn't sure if it would go back on ok but still got a cracking result so well happy
Just the scary bit next!!!


Take off the T molding, it will make life much easier.[/QUOTE
 
One more without tape and dryView attachment 6439
Looking good , decals are not as bad as you think , it's all about the prep , well that's what I learned with my one I've done . I've got a felt applicator and a rubber roller if you want to borrow them -good for the decal application . Also when do you want to pick the plastics up , I go back to work next week :(
 
It's going to be easier to trim the decal once installed on the head without the molding. Otherwise you will be cutting freehand. It's the hardest head unit to redecal, I wish you all the best but it's going to be so much easier without the T molding. Use the sharp edge of the head as a guide to trim the decal.
 
Hi Lee, I may be able to come over at the weekend if that's any good for you ?
 
It's going to be easier to trim the decal once installed on the head without the molding. Otherwise you will be cutting freehand. It's the hardest head unit to redecal, I wish you all the best but it's going to be so much easier without the T molding. Use the sharp edge of the head as a guide to trim the decal.
Darren, I thought you trimmed back the decal about 5mm from the wood edge not flush with it so what difference does it make with the moulding on or are you saying on these heads just trim it flush with wood edge???
The original decals were trimmed back whihc is why you could see the white undercoat which is what I was asking about earlier

All advice greatly appreciated
 
noo... Decal needs to be as flush with the edge as you can get...

Also new T-moulding is usually available on Ebay.... it aint expensive
 
For a uniform cut on the edge it will have to be to the edge.
To do it free hand and get it the same all the way around will be near impossible.
Hope you understand where I am coming from.

I have done a couple pin 2000 heads and found that the only way was to do as above.
Good luck.
 
Gotcha now Darren makes a lot of sense so flush with edge of head but on the main cab still trim back a few mm correct?
 
For a uniform cut on the edge it will have to be to the edge.
To do it free hand and get it the same all the way around will be near impossible.
Hope you understand where I am coming from.

I have done a couple pin 2000 heads and found that the only way was to do as above.
Good luck.

Forgot to ask looks like it just stapled on then it pulls off?
 
Well that's it folks ready to actually put the decals on. As Daz advised removed red T moulding from head and we are good to go!!!

Just not sure I dare!!!! Any tips before I start anyone?? Guess head will be firstP4050023.JPG
 
Back
Top Bottom