What's new
Pinball info

Register a free account today to become a member! Once signed in, you'll be able to participate on this site by adding your own topics and posts, as well as connect with other members through your own private inbox!

In Progress Mishmash self build - let’s make a pinball machine

This is absolutely fascinating to me, the whole thing. I wish I had one hundredth of the skills and talent you have undertaking this project @AlanJ Hats off to you sir
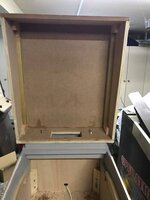
Same here, and thanks for taking the time to share your progress... massive respect!
 
Made an error on my backbox design. I thought it would look cool as a sloping box like this :
2B3C28FF-9CBC-4F89-908D-632C0E94D2E6.jpeg
But when i tried it out on the cabinet it just looked odd, so decided it needs to be like this:
998D7723-EFD9-4067-9A19-28EEF76AC89E.jpeg
only issue is, i used a thin piece of mdf for the “top” which now needs to be the bottom, so i’ve fixed a piece of ply to strengthen it up
0BE25CC0-2EFD-4F75-A9C8-A62347C8B920.jpeg
A2DB389E-9765-443F-8202-8E9E72546D77.jpeg
 
backbox on and hole to cabinet cut out, i decided to mount the bolts from the bottom up into the backbox - but this can easily be swapped around if needs be
 

Attachments

  • D648B773-FF6E-47B7-8552-5F6A9B2089EB.jpeg
    D648B773-FF6E-47B7-8552-5F6A9B2089EB.jpeg
    73.9 KB · Views: 7
  • 0C0870B4-94B9-4A4F-8BCE-3F367D04820C.jpeg
    0C0870B4-94B9-4A4F-8BCE-3F367D04820C.jpeg
    102 KB · Views: 7
Alan

Just ordered one of the soundcards you recommended. Do they come with some instructions, file naming etc?

Do you just rename sound files 1, 2, 3 etc to coordinate with inputs you trigger?

Do yo have any advice? My rifle project has progressed a bit and i need to use simultaneous play along with some logic, so have moved to a Pi. But i have a Halloween project in mind for the cards you use :)

Thanks

John
I found these instructions attached below (there are two different cards, one with SD slot and one without, but they work exactly the same) . Files are named 00001.mp3, 00002.mp3 ..... 00255.mp3 - then the 3 dip switches on the board itself set to the correct settings as per the documentation. (0,0,0) in my case - ie choose file 1-255 and play the sound clip until the end of the sound clip, even if we drop the input signal lines.
 

Attachments

  • mp3 player board documentation.pdf
    1.5 MB · Views: 7
I found these instructions attached below (there are two different cards, one with SD slot and one without, but they work exactly the same) . Files are named 00001.mp3, 00002.mp3 ..... 00255.mp3 - then the 3 dip switches on the board itself set to the correct settings as per the documentation. (0,0,0) in my case - ie choose file 1-255 and play the sound clip until the end of the sound clip, even if we drop the input signal lines.
Thank you, spot on. I think i will use mode 000, and just have the one spooky sound track looped :)
 
Amazing work mate, well done!!! If you ever go to any of the shows, bring it with you - great interest piece.
 
Today I’ve done a ton of work on the cab switches and wiring
first drill holes and got start button and flipper buttons
C0F48F1F-D590-4FD6-B3EB-AD7628C13C3E.jpeg
352327DE-6A12-4A8A-90F1-E015B38F3FD8.jpeg
then cut a large hole for the mains switch and then install it recessed on a rectangular board
66A4E491-BE5C-46DA-A30D-4A131304B96A.jpeg
3D8AC15E-A5ED-4ADE-B1D5-58FDFA3ED739.jpeg

next the line filter and wiring
564138DB-1367-4904-BA85-ADD4C3859680.jpeg

cheap ****ty chinese tilt mech
8560C5E4-A8D2-46F3-8B33-161FF70B5AD9.jpeg

wiring up and earth braiding
22B5F9F9-A400-4E8B-9947-E694022E563A.jpeg
6359B723-4D8C-467B-AD36-1FB71F422D98.jpeg
C2751D7A-403C-49DA-A6E1-439ED4CBBCE8.jpeg

made a wiring loom to the backbox, carrying the switch matrix wires, the speaker wires and power for the illuminated buttons.
E69920CA-D184-4E88-9590-1E42EEED32DF.jpeg
used some quality earth braiding
BF5071D5-3C43-4A3D-9E00-5A18D3F95AD9.jpeg

It has taken much longer than i imagined to wire up the cabinet, nearly there.
 
I have all the metal parts from a proper tilt mechanism somewhere in my spares,including the rolling ball part,if your in need of the real thing
 
Spent the morning wiring up to the new boards i made, at the bottom of the pic. These allow me to have all the connections to the playfield and the cabinet at the bottom of the board, and i’ve now wired up all the mosfets into the boards, so these are almost ready to test. I need to check all the 5v stuff is still working because i’ve redone all those connections. Once i’m happy with that I’ll test out the mosfet circuits, then finally hook up the playfield and see if we can get some flippers and solenoids firing properly.
B651D907-AAB1-4653-943E-D76AC3DEE451.jpeg
The bottom connectors, left to right are:
1. flippers and solenoids
2. solenoids, 5v to playfield, ws2812b data feed
3. playfield switch matrix
4. 5v power distribution
5. gnd power distribution
6. (second board) speaker output
7. cabinet switch matrix (nothing plugged in yet)

right at the bottom is a connector for the high voltage solenoid power.
 
checked all the wiring, tested the software changes, wired in the solenoid voltage and checked the mosfet boards leds light when the relevant mosfet is triggered. all looks good.

So……I plugged in the playfield connectors and switched on. Immediately got several coils locking on and the mosfet leds coming on really weird as i’ve checked all the playfield wiring too. i’ve tested all the coils and the diodes etc.

hmm head scratch time…….
 
FFS - Somehow I have blown up one or 2 or 3 mosfets on each of my 4 channel boards. Dunno how. Bloody hell. Now I need to swap the lot out. A real pain in the ****. I am also scrapping my solenoid power supply, discovered it was shoving out a ton of AC via the rectifier, so that looks knackered too.
 
Alan, it's certainly not a walk in the park this building a pinball lark.
Keep going , it was never going to be easy.
 
A few hours this morning removing the 4 Mosfet driver boards. I tested them all once disconnected, each has one or more faults. Fortunately I have spares, so installed those. 6 plug in wires and 6 screw in wires on each, so not too difficult a job. When I checked everything and powered back on, I realised that I've also now blown the sound card and also the main Processor board. It looks like I somehow managed to get the 30v coil supply into the 5v supply. Not sure how, but I was messing about a lot last night when coils were locking on.

So, swapped the sound card (tested the new one to ensure the SD card still ok - it is). Replaced the ESP32s board with a new one and re-installed the software.

Plugged in and all looks good, no solenoids locking on, so that's progress. But for some reason when I start a game, none of the solenoids are firing. I must have something wrong either in the software or in the wiring.......Time for a strong cup of tea and a bacon butty.
 
The 24v power supply isn’t quite powerful enough to eject the ball. I really need a higher voltage. i’ve got it going by adjusting the voltage to max on the psu, so it’s now giving out 27.8v, but I think i’d be happier with more voltage.

Looking on ebay, a power supply out of an old fruit machine might be a better bet - these give out various voltages 5v, 12v, 13v, -12v and then either 36v or 44v or 48v depending on the model. with a current of 3.2-4.8A (depending on voltage).
 

got the solenoids going.
Great Job Alan so happy that you are close to having your first game. What a labour of love and I feel for you too as I crossed the voltages on my cab and blew all the LED Matrix and strips. you cant beat the feeling however the first time it all comes together. Look forward to seeing your progress Take Care :)
 
Today’s the day we put it all together
DB4CF085-BE1D-4F20-A14A-358357904A35.jpeg
E328C573-CAD7-41DE-A668-850492EE9C12.jpeg
2260E3A9-EBB0-446D-8BB1-DEF33FCB77E5.jpeg
A8C13161-E69D-44FB-8510-4791F5062550.jpeg
87019066-D874-4085-8D0A-B9F3561CF919.jpeg
Got some wiring to do to wire the cabinet switches into the backbox board, a few of my new crimped wires are not solid enough so i’m going to redo those. Then a final check of all the wiring before i power on. I’ll disconnect the solenoid power to start with, check everything is ok then connect that up.
 
All wired up, ready for a test power on.........tonight after Ive got the kids from school and sorted them some grub........I'll take a video.

I've been thinking about the theme, and Ive decided that for the time being I will leave it as 8 Ball Champ. Ive quite enjoyed the game rules on this.....
 
Well done Alan with all the progress so far.
looking forward to the big switch on later.
 
Back
Top Bottom