What's new
Pinball info

Register a free account today to become a member! Once signed in, you'll be able to participate on this site by adding your own topics and posts, as well as connect with other members through your own private inbox!

Complete Medieval Madness Auction Jigsaw

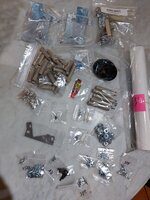
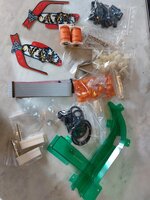
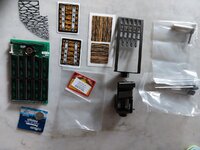
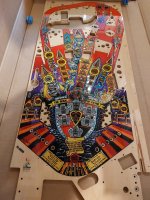
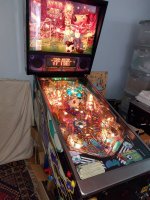
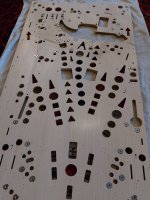
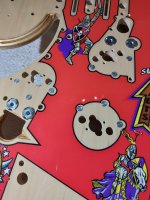
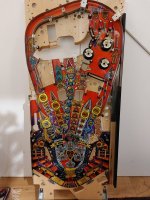
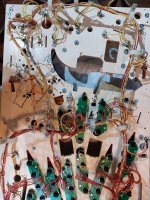
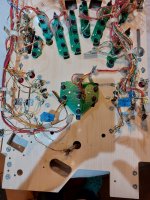
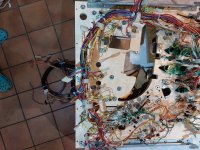
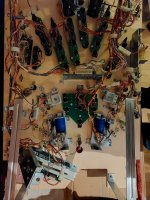
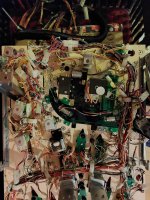
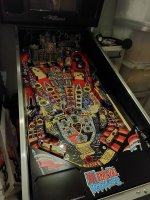
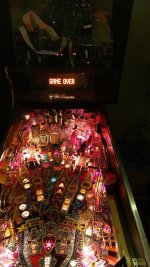
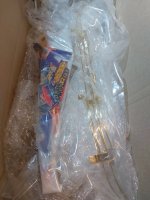
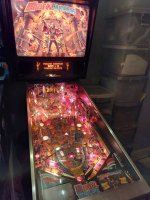
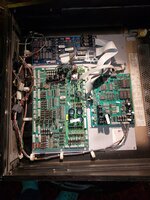
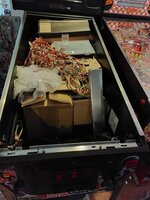
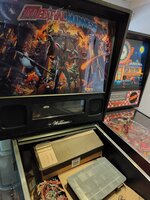
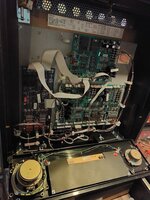
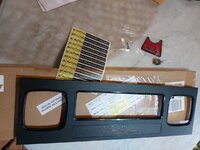
Last Sunday I cleaned up all the looms and did some minor soldering work where needed. Easier to fix the faults as seen and be able to do it on the bench rather than in the machine. Evenings this week were spent stripping the backbox, giving the inside a few coats of satin black cleaning and polishing and putting it all back together. Yesterday evening the backbox was installed on the machine. I now have a cabinet full of cleaned and polished parts, a full list of parts required to rebuild, so orders will go in this week and whilst waiting on the parts I will get on with the playfield touch ups.

Unfortunately work just got super busy again so I expect slow progress for a few weeks.
 

Attachments

  • 20230125_212230.jpg
    20230125_212230.jpg
    186.7 KB · Views: 68
  • 20230128_113652.jpg
    20230128_113652.jpg
    140 KB · Views: 69
  • 20230128_113706.jpg
    20230128_113706.jpg
    165.1 KB · Views: 67
  • 20230128_113736.jpg
    20230128_113736.jpg
    176.2 KB · Views: 64
Parts started to arrive today for this. I needed to order from 4 different suppliers to get all i needed. First batch of 4 orders was from ministry of pinball for the new speaker display panel. No issues with customs and vat as ministry dealt with all of this at their end. They deduct the 21pct netherlands vat off their Web prices and then charge 20pct uk vat so you basically pay the same price as on their website and the package whizzes through customs as vat prepaid.
 

Attachments

  • 20230221_115024.jpg
    20230221_115024.jpg
    148.7 KB · Views: 21
Another batch of parts arrived. This time from pinball life kindly couriered over the pond by an American colleague over for some business meetings. Also a pinhead so we scheduled an additional meeting involving pinball and beer yesterday evening :) .

Some parts were MM specific but many generic parts and stuff I needed for other machines such as new flipper parts for my Firepower.
 

Attachments

  • 20230223_221618.jpg
    20230223_221618.jpg
    123.3 KB · Views: 27
More parts arrived. This time from pinballcenter who had the green moat plastic. Also other parts ordered for my shadow, diner, creech, wcs and firepower.
 

Attachments

  • 20230228_113659.jpg
    20230228_113659.jpg
    124.3 KB · Views: 22
4th and probably last batch of parts from overseas arrived from Mr Pinball Australia who still has original nos stock of some parts for mm at great prices. Also some parts for other machines received such as nos p2k daughterboard.
 

Attachments

  • 20230301_122922.jpg
    20230301_122922.jpg
    155.9 KB · Views: 32
Having procrastinated for the best part of the year I finally bit the bullet and received this today.

But in the meantime, I managed to fully restore my WCS94 which turned out lovely.

So, now I'm back on track to complete this rebuild. The cabinet and backbox are already complete so its just the playfield to rebuild and everything for that is already cleaned and polished ready for reinstallation.

Aiming for completion by Christmas.

Paul
 

Attachments

  • 20231123_130217.jpg
    20231123_130217.jpg
    174.4 KB · Views: 79
  • 20230824_141822.jpg
    20230824_141822.jpg
    150.4 KB · Views: 76
And the second most scary bit now done. Hammering in the pop bumper mountings. The hammer is now being returned to the tool box. The fun part can begin.
 

Attachments

  • 17008419796742485759831523479717.jpg
    17008419796742485759831523479717.jpg
    121.7 KB · Views: 41
First layer topside done today.

It's been more tricky than usual as I didn't tear this one down myself so I have no pics. Fortunately HEP on pinside posted up a load from 2 MM he rebuilt at the same time. 1000+pics on there.

Next step will be the underside before returning to topside for the second layer.
 

Attachments

  • 20231125_172848.jpg
    20231125_172848.jpg
    142.6 KB · Views: 35
It doesn't help that there is no rubber map in the manual. I was unable to track one down on the Internet. Hopefully I got it right although the one under the pops looks odd.
 
Switches done. Power loom on.

Under playfield mechanisms next.
 

Attachments

  • 17010238055524759420674997332551.jpg
    17010238055524759420674997332551.jpg
    152.3 KB · Views: 20
  • 17010238395632782897133054364891.jpg
    17010238395632782897133054364891.jpg
    232.9 KB · Views: 20
Last 4 evenings have been spent putting all the under playfield mechanisms back on. The underside is now complete.

Next step is to get the playfield back in the machine then finish off the topside which is basically flat plastics, 2 ramps 3 wireforms, the castle and the apron. All that is then left is plugging in all the connectors in the backbox.

It's been a pleasure working with a new playfield. It's a Mirco and I had been reluctant to buy because of past reported issues both here and on pinside. But I'm glad I went ahead and there is clearly so much work that goes into making these playfields. Everything was spot on (excepting 3 dimples on the underside which were each a few mm out - but that's all I could fault). But real test will be in how it wears though, of course.

Looking forward to playing; hopefully within the next week.
 

Attachments

  • 20231130_224131.jpg
    20231130_224131.jpg
    162.9 KB · Views: 32
  • 20231130_224109.jpg
    20231130_224109.jpg
    184.7 KB · Views: 32
Playfield is back in the cabinet and most of the upper side is now complete. The hard bit is done. Not having taken it apart means that putting it back together is a bit more of a challenge.

2 ramps 3 wireforms and a few plastics to go on. Then connect all the backbox connectors and fire her up. Hoping for my first game tomorrow.
 

Attachments

  • 20231202_222914.jpg
    20231202_222914.jpg
    164.5 KB · Views: 26
Only took 1 year 🤣
Glad you finally got this all sorted, let me know when you want to sell it! 😆
 
Yes it's almost exactly a year to the day. The auction was 7th December last year. But I also manged to finish off my Diner refurb and wcs94 refurb. Not up to your speedy standard though 😉

It will not be leaving any time soon. My wife has been telling me to get a MM for 15 years and she must be obeyed.
Can't blame you there, it's truly a classic!
 
On rebuilding the playfield I found one missing plastic and a few broken or damaged ones and also the catapult wireform had been bent. So parts were ordered from Mr Pinball Australia 9 days back and they arrived this morning. Great prices too. Hoping to get the parts on this evening
 

Attachments

  • 20231213_112924.jpg
    20231213_112924.jpg
    98.3 KB · Views: 18
I'm marking this as complete.

I have been playing it for about a week and I had my first proper games on it on the eve of the 1 year anniversary from picking it up. So I really finished in under a year :)

I installed the parts that arrived today and I do have a few very minor jobs left including one niggling fault that doesnt affect gameplay but essentially it is working 100%. And it plays super fast.

I will likely add a colour display at some point.

Since it was in such great condition when I got it, it has been more of a light refurbishment with playfield swap as it didn't require a full rebuild. But everything has been fully dismantled down to the last nut and bolt, cleaned repaired and new service parts and replacement of anything broken.

I like to keep my games original so it is basically as it came out of the factory except a full set of Mantis playfield protectors and some custom apron cards. Its even on incandescent bulbs.

The total parts bill was around £1,800 including shipping and paying the VAT man on import. Most of that was the mirco playfield at £1,030 total.

Thanks for following.

Paul
 

Attachments

  • 20231213_223630.jpg
    20231213_223630.jpg
    207.8 KB · Views: 54
  • 20231213_223554.jpg
    20231213_223554.jpg
    151 KB · Views: 53
Last edited:
Sorry (not sorry) for resurrecting this thread from the dead, i started and could not put it down. I've never done anything as massive an undertaking as this myself (though i've done the divorce thing in which i swapped a mortgage-paid house for a rented flat) and am amazed what an enormous task it is - tbh after reading this i'm terrified to ever try! Paul, you clearly have skills, kudos sir :thumbs:

questions:
*one thing i didn't understand was during that six month spell away from the refurb (while you were doing up other games) you changed your mind from using the original playfield (which looked gorgeous to me, almost new) to buying a new playfield. why did you do that?
*what is T-nutting? sounds very rude but i assume you mean those funny looking bolt things? why were those things not already installed by the seller? Same Q for the other hammer job, something about the foundations for the pops? You've clearly done it before as you mentioned the terror of using a hammer on a playfield: what can happen? i can imagine, but frighten me please, i enjoy it like a good scary film. Plus Gaz/Kenneth @Spandangler mentioned something about doing it from underneath? explain pls.
*more info please on the playfield protectors you mentioned - are those the funny thin clear plastic sheet things? i never saw the point of those, it seems like wearing a condom when you don't need to, why use those things when you already clearcoated, cleaned, polished and waxed the living bejeezus out of the shiny playing surface?
*finally, what happened to the TAF buyer who was in the room on auction day? you said he was gonna join up here, did he?

Many thanks!

gif bart simpson pinball.gif
 
The original playfield had 7 or 8 areas that required touch up. Worst areas were around the left troll where previous owner had taken off mylar and with it chunks of the clearcoat and artwork. Plus also just above the left flipper there was a wear area. I have done playfield touch ups before and had playfields clearcoated and know just how much work they are to do well and get right. I tried to find an artist to do the paintwork couldn't get one. So in the end rather than spend probably 15 or 20 hours of my time minimum probably more and maybe not get a great result I would just get a replacement instead.

T nuts are used mainly on the back of the playfield in many places where the post screws in from above. They have spikes on them so they stay in place in the wood of the playfield. But some t nuts are topside and they are the scary ones. Same for the 3 screws that are used for each of the pop bumpers which you hammer in from the top. One wrong move with the hammed and you can easily put a ding in the topside of the playfield.

You can pull them into the wood using a screw but it does take a lot of pressure to do that so you ned to be careful not to damage the playfield. Some people use long reach g clamps too which is probably the safest way.

Doing anything on a shiny ne playfield is scary but they are probably more robust than you woild think they are.

The protectors are very thin metal guards that cover high wear areas where the ball will pass through the playfield. Often called "cliffys" as that who makes them.

Never heard from the taf buyer again. He really did just want a taf and already had somebody lined up to refurbish it for him. So probably didn't get the pinball bug.
 

Cliffys
Cliffys I know about. So what are those daft thin acrylic sheet things I thought you meant called then? Completely pointless, them. They were popular for about ten minutes like the PinSteps (TM) of their day. I thought they were completely shi_t.
 
Back
Top Bottom