What's new
Pinball info

Register a free account today to become a member! Once signed in, you'll be able to participate on this site by adding your own topics and posts, as well as connect with other members through your own private inbox!

In Progress Lord of the rings full restoration

Hiro996

Registered
Joined
Mar 24, 2013
Messages
470
I didn't expect to start another restoration so soon and certainly didn't think I'd be restoring a modern Stern machine but that is what has happened!

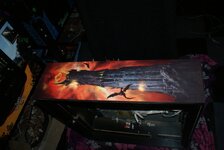
This is going to be a full restoration including cabinet and playfield swap for a brand new playfield with ceramic clear coat applied by Bill Davis (based in the US).

The machine is a UK machine but will no longer have skill posts (or the buttons) since the new playfield has been sourced from outside the UK.

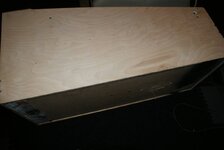
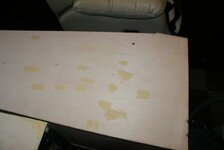
First up is the cabinet restoration since the playfield is in transit.
 
The Lord of the rings cabinets were silk-screened rather than decals so official replacement decals are not available - but I managed to find a source of some decals re-produced via a scan of a mint cabinet.
 
The decals were sent from overseas too so I started on the inside of the cabinet first for this one, just means it'll have to be masked when the base coat is applied to the exterior prior to the decals.

The first job was to strip the cabinet - the earth braid is in great condition so I labelled it at various points and took the usual loads of photos to ensure it will go back in it's original location.

It's a time consuming task but eventually the cabinet starts to look bare...

DSC05026.JPG

Nearly there...

DSC05040.JPG
 
The next stage was to paint the inside of the cabinet - I decided metallic gold would look good for an LOTR. Then it's just a case of masking the gold and re-spraying the black areas - I always use Plastikote paints for the cabinets (metallic gold as mentioned and satin black).

Here's the inside of the cabinet painted - took a lot longer to get to this point than to type this!!!

DSC05053.JPG

DSC05054.JPG
 
A shaker sounds like a good plan @TYHO !

@Carl Spiby , I tried a number of positions for the inscription and that seemed the best height for visibility when you lift the playfield so I decided to sacrifice the slightly detached view for the better position.
 
The decals eventually turned up so on to the exterior of the cabinet. The cabinet is actually pretty good on this example but there are a few marks:

DSC05061.JPG

DSC05063.JPG
 
The left side is in better overall condition but does have a long scratch towards the rear:

DSC05064.JPG
 
I have never re-decalled a screen printed cabinet before, I have discovered it is a lot quicker than re-decalling a decalled cabinet! Rather than a heat gun and scraper to get the original decals off followed by a razor blade and white spirit to remove the glue, you can simply attack it with a sander straight away - fantastic! So, time to bring out the Festool - I do love power tools!

DSC05082.JPG

15 minutes of careful sanding and it looks like this, no turning back now!

DSC05084.JPG

30 minutes later and one side is down to bare wood:

DSC05085.JPG
 
:eek: Festool!! All the decent professional tools!!! :)

As you may have guessed from previous shop logs, that cab needs to be like Glass when you have finished! no blemishes, perfect condition basically :) Then add the decals...
 
Same for the front, I forgot to take an after shot but here is how it looked before I sanded:

DSC05090.JPG

The cabinet base is in good condition so no need to change it but it could with some attention to clean it up - another job for the Festool!

Before:
DSC05091.JPG

After:
DSC05092.JPG
 
Next up it's a case of filling any imperfections (no matter how small) and sanding - I usually have to repeat this stage about three times in order to get a perfect finish.

I sand using the following grit levels
80 (to remove the decals)
120
150
210
240

DSC05093.JPG
 

Attachments

  • DSC05094.JPG
    DSC05094.JPG
    40.8 KB · Views: 7
When the filling and sanding cycles are complete it's time to spray the edges of the cabinet and the start button area. I do not usually worry about the inside area of the coin door but realised this is exposed on Stern machines of this age so I sprayed that too

Skill post button holes now gone!

DSC05097.JPG
 
Time for the first decal! There are a few approaches to this, I choose to position the decal, check, re-check and check again before clamping it in position like so:

DSC05098.JPG

DSC05099.JPG
 
I then cut a vertical strip of backing paper away from the front end of the decal, push the decal from the back to make sure there is no slack and then stick the front part of the decal - it's difficult to see in this image but the front 50mm of the decal is now attached to the cabinet:

DSC05100.JPG

I then remove the clamps and roll the decal over the front side of the cabinet:

DSC05101.JPG

Then I remove around 200mm of backing at a time working towards the rear of the cabinet and attach the decal. I'm about 75% of the way through here:

DSC05103.JPG

Finally the whole decal is attached, phew!

DSC05104.JPG
 
Now it's time to trim the edges. A great tip from Matt Adams is to leave a 1mm gap around the perimeter - this prevents the edges of the decal lifting from people brushing past the cabinet for example. I use a scalpel and metal ruler for this step - a new blade for each side just to make sure as a blunt blade could pull at the decal and damage it or at the very least not give the clean straight line you are after:

DSC05105.JPG

And here we have the first side finished:

DSC05107.JPG
 
And finally, the head decals, in the first image you can use the 3M decal spreader I use - does a fantastic job and is felt lined so protects the decal during application - perfect!

DSC05113.JPG

DSC05114.JPG

DSC05115.JPG

Done!

DSC05116.JPG
 
With the wiring loom and all other cabinet parts cleaned it's time to start putting it all back:

DSC05126.JPG

DSC05127.JPG

DSC05128.JPG
 
Now I need to wait for the playfield to arrive from the USA. In the mean time lots of other bits have been turning up for the playfield swap, I'll continue this thread when the playfield is delivered, hope it's been interesting and of some use up to now!
 
Thx @Paul , I wish a picture showed how smooth the bare wood finish is after all the effort - it's fantastic, almost a shame to cover it up with a decal!
 
Back
Top Bottom