What's new
Pinball info

Register a free account today to become a member! Once signed in, you'll be able to participate on this site by adding your own topics and posts, as well as connect with other members through your own private inbox!

Jurassic Park Thread

  • Thread starter Deleted member 2463
  • Start date
bbf7dc082bb37c66869f3451bea5f658.jpg

+1 for art blades.
If you’re comfortable removing the playfield I’d suggest that but I’ve always managed to fit mine without removing it. It’s tricky but can be done, the material can take a bit of abuse which helps.
I raise the playfield, stick the art blades in position with parcel tape then starting one end I peel off the backing and slowly work my way along [emoji106]


Sent from my iPhone using Tapatalk
 
I always think that if the artwork on the PF is overwhelming and busy then I go for mirrors. A good example would be Deadpool which really doesn't require any further drawings.

I always intended to get the art blades on JP just to give it that extra jungle vibe. I think the ones above look pretty good mate.
I love the official DP sideblades fitted on mine...
 
They do look cool. Did you remove the play field to apply them? How much of a ball ache was fitting them? I've done mirrors before which were a doddle but applying art work I'm a little bit more apprehensive about despite having done it on arcade cabs in the past
They are really easy to fit. I did mine by just peeling a small amount at the start sticking and working my way up. I think removing the playfield will make it easier but really not hard to do with it one - just need to start lifted and drop down or vice versa
 
Thanks fellas. Did you use a solution like rapid-tac for application to avoid bubbling or just bang theme straight on?
 
Thanks fellas. Did you use a solution like rapid-tac for application to avoid bubbling or just bang theme straight on?

Straight on, and if you mess up you can peel off and start again - best to get it straight 1st time though, never had bubbling at all.


Sent from my iPhone using Tapatalk
 
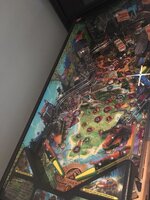
Yeah I think this about where I've got to with it Col. Definitely adds to that world under glass feel whereas mirrors just kinda bling/brighten it up. Do you remove the play field to fit?
Same as the others have said, left the playfield in, tacked them in place with the backing still on to get them positioned correctly (don't forget front and back positioning as well as top to bottom) then just remove the backing slowly as you go along, just don't press firmly down until you are happy with their placement. They are decent material so aren't going to tear and you can reposition them if needed. The middle part is the hardest.
 
Mine came with blades from xanick Think
That’s the correct way to spell it :)
They are smoked mirrors and have forest art printed they look the nuts. As been said already I also feel if art is too busy on PF mirrors look best , I had smoked mirrors on my ST and they looked awesome as well . Try and get a pic over later
 
I used to do it with the PF in but then I cocked it up once and changed my mind - two stools next to the game pop the PF out pull the backing off entirely line up the middle and get the angle right then make sure the back box end and bolt hole are lined up then boom you are done.
 
So many different ways that people are suggesting to fit side art.

Here's my input.

Lay the art work somewhere flat the day before to help flatten if they have been sent rolled.

  • Lift the playfield out - it takes 20 seconds, and the newer machines even have a handle at the top of the playfield to make it easier as well as plenty of excess wiring meaning you don't risk damaging anything by putting excess pressure on connectors.
  • I rip the backing of the artwork about halfway along, taking care not to damage the actual blades.
  • I remove the screws near the front which holds the playfield guides, as the art work will go under these.
  • Line the blades up, and peel back some of the backing from the centre.
  • Lightly press in place.
  • Then peel one piece of the backing off and lightly press in place from centre to front (or back)
  • Once you are happy with the positioning, go ahead and press down more firmly smoothing from the top to the bottom, and centre to end.
  • Repeat for the other end.
  • Remember to replace the screws in the playfield guide, which should now lay over the artwork.
  • Put playfield back in place.

By working from the centre it means you are not having to manipulate the whole length at once, is easier to manage and much less likely to get creasing and bubbles.

This literally takes me less than 15 minutes from start to finish to install both sides perfectly, and I have yet to incur any damage.

Stating the obvious but if you ever need to remove the backbox you are going to have to get access to the bolts, which will now be under the blades. Some have cut-outs allowing access without removing them, others you will have to cut with a sharp knife to gain access, mirror blades will have to be removed altogether. Worth considering before you make your final choice.
 
Stating the obvious but if you ever need to remove the backbox you are going to have to get access to the bolts, which will now be under the blades. Some have cut-outs allowing access without removing them, others you will have to cut with a sharp knife to gain access, mirror blades will have to be removed altogether. Worth considering before you make your final choice.
You can still remove the backbox by unbolting the other end of the hinges though. Yes it leaves them dangling alongside the cabinet and need to be secured, but it's been "good enough" for me in the past.
 
You can still remove the backbox by unbolting the other end of the hinges though. Yes it leaves them dangling alongside the cabinet and need to be secured, but it's been "good enough" for me in the past.

Try doing that on a spike 2 though, hinge bolts are under the power supply


Sent from my iPhone using Tapatalk
 
So many different ways that people are suggesting to fit side art.

Here's my input.

Lay the art work somewhere flat the day before to help flatten if they have been sent rolled.

  • Lift the playfield out - it takes 20 seconds, and the newer machines even have a handle at the top of the playfield to make it easier as well as plenty of excess wiring meaning you don't risk damaging anything by putting excess pressure on connectors.
  • I rip the backing of the artwork about halfway along, taking care not to damage the actual blades.
  • I remove the screws near the front which holds the playfield guides, as the art work will go under these.
  • Line the blades up, and peel back some of the backing from the centre.
  • Lightly press in place.
  • Then peel one piece of the backing off and lightly press in place from centre to front (or back)
  • Once you are happy with the positioning, go ahead and press down more firmly smoothing from the top to the bottom, and centre to end.
  • Repeat for the other end.
  • Remember to replace the screws in the playfield guide, which should now lay over the artwork.
  • Put playfield back in place.

By working from the centre it means you are not having to manipulate the whole length at once, is easier to manage and much less likely to get creasing and bubbles.

This literally takes me less than 15 minutes from start to finish to install both sides perfectly, and I have yet to incur any damage.

Stating the obvious but if you ever need to remove the backbox you are going to have to get access to the bolts, which will now be under the blades. Some have cut-outs allowing access without removing them, others you will have to cut with a sharp knife to gain access, mirror blades will have to be removed altogether. Worth considering before you make your final choice.

Thanks that's super helpful. The hinge bolts had crossed my mind and I'd planned on using an exacto knife to cut the art work accordingly. How many connectors need disconnecting roughly in order to lift the play field out?
 
I did it to IMDN. 2 screws to remove the power supply cover, and the bolts are accessible. No drama :)

Just make sure to disconnect the game first!! :D

Ah - I didn’t get that far, I removed mirror blades instead [emoji2361]


Sent from my iPhone using Tapatalk
 
If you are taking your playfield out be careful you don't scratch your side rails. *Actually if you're lifting the playfield be careful not to damage your side rails!
 
Last edited:
Where/how do you rest your playfield without damaging anything underneath?

I'm assuming the front end can be rested on the maintenance rails and the back a couple of sturdy blocks/paint cans/dumbells on each corner
 
Where/how do you rest your playfield without damaging anything underneath?
Just stand it up vertically next to the machine, or even against the machine itself. You can drape a towel over if you're concerned about scratching anything
 
Okay cheers all. I'll probably lift out the play field I think.

Anybody got the Barbasol can mod for the left hand side flasher? It's kinda iconic and for 25 dollars seems a nice little mod
 
Okay cheers all. I'll probably lift out the play field I think.

Anybody got the Barbasol can mod for the left hand side flasher? It's kinda iconic and for 25 dollars seems a nice little mod

I have mate, PM’ ya


Sent from my iPhone using Tapatalk
 
Is anyone else getting a loud "thunk", it almost sounds like the speakers are overloaded?

It normally happens at the end of the game when the egg is being turned over but sometimes during gameplay as well.

I'm running Tim's custom version, not the stock version so it probably only applies of using this version.
It is the free game match noise, the equivalent of a knocker even though it sounds nothing like a knocker and is just an annoying screech. You can turn it down or off in the settings.

 
Back
Top Bottom