A bezel then !
")
A quick easy way is to use mounting card or foam board. You can get plastic mounting board that is a pain to cut neatly - but is probably the best and looks pro. Just velcro that it.
I tend to get my screen as close to the front of the cabinet anyway. But you have to watch the plunger!
Plenty of pro's to building cabs to fit the screen but also some cons.... like lockdown bars! Probably best to keep width either standard or widebody I guess.
Do prefer to use an old pinball cabinet. Most of the hard work is done! Seen some kits for cabinets that are held together with plastic blocks and they would fall apart in no time.
Yep nice easy cardboard bezel would do the job!
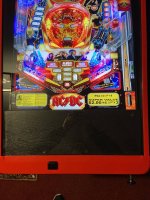
Or if you fancied a little project - get a proper apron, and but little screens where the cards go and have them display the correct instructions/pricing info on a per game basis - I bet that could be done somehow!
Mine fits the lockdown perfectly, it's exactly the same width as a standard narrowbody, but about 20cms shorter - screen fits like a glove. (And I benefited by someone on here getting some HS2 decals that were mint apart from the main body side decals misprinted 20cms too short - which was a stunning bit of luck as they look made to measure on mine!)
Getting the lockdown receiver and coindoor all lined and at the correct height up took a bit of work though, the other issue is you can't use standard glass or trim either - I used 2mm perspex and some 90 degree aluminium to cover the area the side rails would sit.
Mine is made from 1.8mm ply and re-enforced with 20mm x 20mm batons screwed and glued where each panel joins (because I'm no carpenter, and proper joints are beyond me!) none of this plastic block joining here, built like a tank

There is the one obvious problem though - it fits the screen
in it like a glove, so if it fails I'll have a bit of an issue unless I can find the exact same one again

I try not to think about that!
But 100% if I could have I'd have used an existing cabinet - way less time with the circular saw and having to get inventive with stuff, but I'm pretty happy with the result in the end