Happy miserable, rainy, cold Saturday everyone!
This isn't my first foray into Gamesroom builds. Two previous at my Ex's place (one a Gamesroom, the other a workshop) means that i'm a little seasoned and am always looking to improve on the last one, using lessons learnt.
Was looking around for a Basic "shed" - Prices have stayed fairly stable over the last 4-5 years, however in a lot of cases quality has decreased, so the key is to find something that has retained Price vs quality.
The area I had was limited - around 5m x 4m - however conscious that it needs to include an area to run off etc for water. Planned for approx 16'x12' "workshop" to be placed on top.
For my previous builds the bases were always Concrete - however practice shows that there were a few issues with this...
1. Not Really Eco Friendly.
2. Expensive
3. If you can't get the delivery directly to the location then it's Barrow time (last time it was around 90 Barrows for a 6" deep similar sized build... which unless the mix was Very sloppy would start to set before you had even finished moving the damn stuff!).
This time have decided on an alternative route....

So this is what we started with. Relatively level (other than the back right corner which has a bit of a rise on it..)

First of all Membrane down to prevent weeds whilst allowing natural elements to permeate through to the soil beneath. It also helps to keep your gravel clean by creating a barrier...

So to give me a level it was a layer of Gravel on the base - This allowed me to level out any imperfections and make things nice and flat.

Then i used what are is advertised as "DRIVEWAY CAR PARKING ECO500 PLASTIC GRAVEL GRIDS". Once these are filled with Gravel or soil, they will support over 25 tonnes axle load - or in real terms Over 500 tonnes/m2 , and also add to the "eco-friendly" approach, since they are made from recycled plastics. Some are available that have thicker walls and do not need to be filled, however when checking up on this i noted that when it gets warm (25C+) they do have a tendency to lose their strength. Therefore opted for the cheaper grids, however with around 4 tonnes of Gravel (1 for the base/level, 3 for the filling!).

What will also help is that they will act as a natural soak-away - meaning that there would be no standing water as there is on concrete bases... it should just drain through the Gravel.
Looked at the specs etc of what was about on the market, and came up with this :
19mm finish T/G cladding,
3x2 framework throughout
1’ thick flooring
Eaves height raised from 6'6" to 7' (obviously reducing the gradient of the roof VERY slightly to get it to stop at the legal Max of 2.5m for planning regs (Within 2m of the boundary)
all fully pressure treated
I requested a tweak to the location of the door to one end, which gives me more "wall space", and also rather than 6 small windows i would rather 2x larger ones, since it makes things easier (and cheaper) to install double glazed sealed units.
A week before delivery i needed to make sure there was enough space to fit everything in, and therefore a little "trimming" was needed...

This was due to be delivered on 26th Oct, however that was the weekend with Weather warnings all over the place, so understandably was cancelled, and re-arranged for the following tuesday.
Price included Delivery and erection, as i'm getting too old for that kind of Crap nowadays...")
And then it arrived....


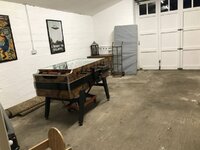
Inside....


Decided to get some decent external pics the following morning :


The weather has been crap since, so have been limited to what i can do (Previous builds have been in the summer, so have had the weather on my side).
Started on the internals this week. There was a little water seepage (initially because they had skimped on sealant around the windows - probably as i has mentioned changing the units... but can't afford that quite yet!), so re-sealed those and based upon recommendation i got some of this lovely stuff...
https://www.barrettinepro.co.uk/25/283/Decking-Oil-All-In-One-Treatment
Sprayed on the inside using a rather good spray gun for the price (https://www.amazon.co.uk/gp/product/B07CZYWQR5/ - yes i know the treatment is external use, however both sides will eventually be sprayed in it!) and VERY high in VOC (Solvent based - i.e. dont even think about using this stuff without a properly spec'ed face mask!!), however soaks in really easily and I can already tell due to the rain this morning it seems to have sealed anything major. Yes, this is the only part that isn't particularly eco-friendly, however the way i look at it if i didn't use something decent then it will have to be rebuilt in 5-10 years, so a little common sense prevails here.
Personal experience teaches me that with a lot of "eco" water based treatments they don't get absorbed as well by the wood, and therefore meaning that they have to be re-treated more often, and their effectiveness is lessened.
To be continued....
This isn't my first foray into Gamesroom builds. Two previous at my Ex's place (one a Gamesroom, the other a workshop) means that i'm a little seasoned and am always looking to improve on the last one, using lessons learnt.
Was looking around for a Basic "shed" - Prices have stayed fairly stable over the last 4-5 years, however in a lot of cases quality has decreased, so the key is to find something that has retained Price vs quality.
The area I had was limited - around 5m x 4m - however conscious that it needs to include an area to run off etc for water. Planned for approx 16'x12' "workshop" to be placed on top.
For my previous builds the bases were always Concrete - however practice shows that there were a few issues with this...
1. Not Really Eco Friendly.
2. Expensive
3. If you can't get the delivery directly to the location then it's Barrow time (last time it was around 90 Barrows for a 6" deep similar sized build... which unless the mix was Very sloppy would start to set before you had even finished moving the damn stuff!).
This time have decided on an alternative route....
So this is what we started with. Relatively level (other than the back right corner which has a bit of a rise on it..)
First of all Membrane down to prevent weeds whilst allowing natural elements to permeate through to the soil beneath. It also helps to keep your gravel clean by creating a barrier...
So to give me a level it was a layer of Gravel on the base - This allowed me to level out any imperfections and make things nice and flat.
Then i used what are is advertised as "DRIVEWAY CAR PARKING ECO500 PLASTIC GRAVEL GRIDS". Once these are filled with Gravel or soil, they will support over 25 tonnes axle load - or in real terms Over 500 tonnes/m2 , and also add to the "eco-friendly" approach, since they are made from recycled plastics. Some are available that have thicker walls and do not need to be filled, however when checking up on this i noted that when it gets warm (25C+) they do have a tendency to lose their strength. Therefore opted for the cheaper grids, however with around 4 tonnes of Gravel (1 for the base/level, 3 for the filling!).
What will also help is that they will act as a natural soak-away - meaning that there would be no standing water as there is on concrete bases... it should just drain through the Gravel.
Looked at the specs etc of what was about on the market, and came up with this :
19mm finish T/G cladding,
3x2 framework throughout
1’ thick flooring
Eaves height raised from 6'6" to 7' (obviously reducing the gradient of the roof VERY slightly to get it to stop at the legal Max of 2.5m for planning regs (Within 2m of the boundary)
all fully pressure treated
I requested a tweak to the location of the door to one end, which gives me more "wall space", and also rather than 6 small windows i would rather 2x larger ones, since it makes things easier (and cheaper) to install double glazed sealed units.
A week before delivery i needed to make sure there was enough space to fit everything in, and therefore a little "trimming" was needed...
This was due to be delivered on 26th Oct, however that was the weekend with Weather warnings all over the place, so understandably was cancelled, and re-arranged for the following tuesday.
Price included Delivery and erection, as i'm getting too old for that kind of Crap nowadays...
And then it arrived....
Inside....
Decided to get some decent external pics the following morning :
The weather has been crap since, so have been limited to what i can do (Previous builds have been in the summer, so have had the weather on my side).
Started on the internals this week. There was a little water seepage (initially because they had skimped on sealant around the windows - probably as i has mentioned changing the units... but can't afford that quite yet!), so re-sealed those and based upon recommendation i got some of this lovely stuff...
https://www.barrettinepro.co.uk/25/283/Decking-Oil-All-In-One-Treatment
Sprayed on the inside using a rather good spray gun for the price (https://www.amazon.co.uk/gp/product/B07CZYWQR5/ - yes i know the treatment is external use, however both sides will eventually be sprayed in it!) and VERY high in VOC (Solvent based - i.e. dont even think about using this stuff without a properly spec'ed face mask!!), however soaks in really easily and I can already tell due to the rain this morning it seems to have sealed anything major. Yes, this is the only part that isn't particularly eco-friendly, however the way i look at it if i didn't use something decent then it will have to be rebuilt in 5-10 years, so a little common sense prevails here.
Personal experience teaches me that with a lot of "eco" water based treatments they don't get absorbed as well by the wood, and therefore meaning that they have to be re-treated more often, and their effectiveness is lessened.
To be continued....


")