What's new
Pinball info

Register a free account today to become a member! Once signed in, you'll be able to participate on this site by adding your own topics and posts, as well as connect with other members through your own private inbox!

In Progress Fish Tales Shop Log

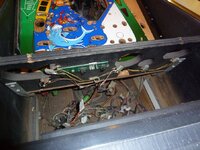
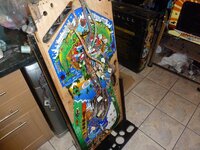
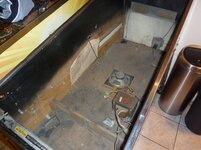
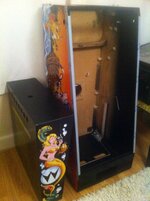
Got the cab ready to go over to my Dads tonight. First thing was to remove all the lamp holders and pcb from the backboard and then get the playfield out and put to one side......

P1030753.jpg P1030754.jpg P1030755.jpg

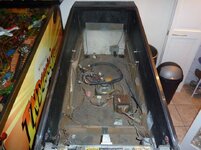
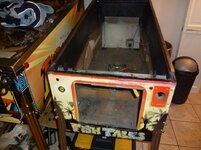
Then it was just a case or removing the rest of the stuff from the cab. I've not totally stripped it out but enough to make it easy to work with when re-decaling. I've left the lockdown bar receiver in for the time being so I can keep the glass in the cab but that will be coming out before I move it (along with the plastic channel). The only other thing I need to take out is the start button but I can't figure out how to do it :redface: Any ideas? Does it come apart in some way as the plastic screw washer thing won't come off the end because the gubbins that holds the microswitch is in the way.

P1030768.jpg P1030770.jpg

Need to get the cab and head over to my Dads asap to make space for something incoming next week :rockon:
 
From the inside, the start button centre part, the bit that holds the bulb and switch, should pull out. I will take a picture of my spare switch to demonstrate later.

Great work Chris, you really are going that extra mile that would scare me at the moment but I do intend to learn it at some point.

EDITED: Removed a twist action.
 
I can't find the spare so here is CREECH.
 

Attachments

  • ImageUploadedByTapatalk HD1362642233.810378.jpg
    ImageUploadedByTapatalk HD1362642233.810378.jpg
    23.8 KB · Views: 12
And this one hopefully shows it just clips in either side of the bulb holder part.
Sorry for the poor quality picture.
 

Attachments

  • ImageUploadedByTapatalk HD1362642473.609683.jpg
    ImageUploadedByTapatalk HD1362642473.609683.jpg
    89.3 KB · Views: 10
From the inside, the start button centre part, the bit that holds the bulb and switch, should twist or pull out. I will take a picture of my spare switch to demonstrate later.

Great work Chris, you really are going that extra mile that would scare me at the moment but I do intend to learn it at some point.

Do not twist.
Pull HARD to release.
And no the above is not sexual.
 
Managed to start work on the cabinet at the weekend. Got the old decals off and am now onto the dull bit of scraping all the left over glue off prior to sanding. Here's some pics......

IMG_1567.jpg IMG_1573.jpg IMG_1575.jpg
 
I've had the decals for a while. I got them from Mel at 1stoppinball....got a great deal :thumb:
 
Fish Tales sure does look great when re-decalled, Its such a big differance from the badly faded cab to a nice bright brand new one.
Keep up the good work, looking good so far.
 
It's been a long time but this thread is ready to rise from it's grave :D This game has been sat in pieces in my Dads's garage for the last 3 years so it's finally time to get it done. The cab got shipped off to @replicas a few weeks ago to be re-decaled as I finally faced facts that I was never going to do it myself. I also bought a better playfield off Daz so the first task is to remove it from it's light box, give it a clean and then start transferring the wiring loom over from the existing playfield.

I've got boxes full of FT bits all over my Dads house to I think I've need to dig them all out and remind myself what I've got :thumbs:
 
We'll be doing this at the same time then mate. Compare notes! I'm on the reserve list for a cpr repro after you pipped me to the post on Daz's pf :mad:;):D
 
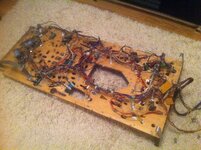
Both playfields are now back at my house so I can work on them more easily :) I stripped the lights and frame off the playfield from Daz and removed the black card he used to block light coming through the various holes. This has left some bits of card stuck to the back of the playfield so I'm going to run over the back of it with my sander to get it looking nice.

I've also started stripping things off the back of my old playfield and am slowly building up a load of stuff for the tumbler :thumbs: I haven't worked on a 90's game for ages as my last few restores have been early 80's solid state stuff and FT seems a load simpler to work on than those games. The design of the games obviously improved over the years :D
IMG_8276.jpg

IMG_8277.jpg
 
Wiring loom is now removed from the old playfield and ready for cleaning which left all of the loom hanger and a couple of small pcbs. A bit more unscrewing and all I'm left with on the old playfield is the t-nuts :D

IMG_8371.jpg

IMG_8372.jpg

IMG_8399.jpg
 
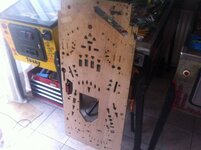
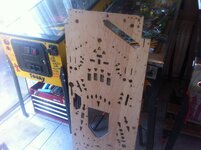
Managed to get outside with the sander today in between all the rain :) First pic is with the bottom half of the playfield sanded but the top still to do....

IMG_8437.jpg

And this is with the whole back side of the playfield done......

IMG_8441.jpg

The first bits and pieces are starting to come out of the tumbler....

IMG_8451.jpg

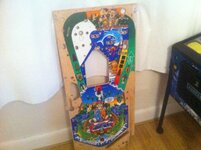
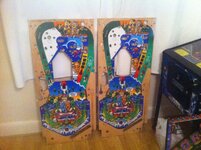
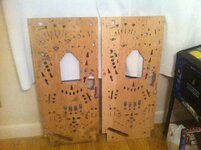
Finally here's some pics of the old and new playfields side by side. I'll be selling the old playfield so if anyone wants it shoot me a PM.....

IMG_8445.jpg

IMG_8448.jpg
 
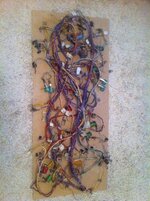
Finished cleaning the wiring loom today :thumbs: The best way to do this is to either stick it in the dishwasher (I don't have one) or chuck it in an empty bath and give it a good scrub with something like Cillit Bang. The problem for me is that I don't have a good way of drying the loom after doing this as you either want to hang it up in a nice warm airing cupboard or blast it with compressed air, neither of which I have access to. That means I have to go with the more laborious version of sitting on the floor in my lounge and cleaning the loom with baby wipes :( This job is a ball ache and doesn't get the thing as clean as doing it properly but it does get all the major gunk off and means handling the loom from now on doesn't result in me getting covered in black crap :D
IMG_8474.jpg
 
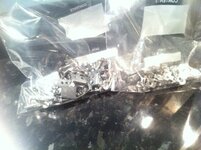
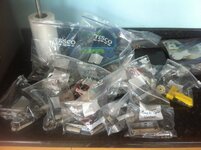
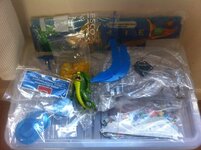
I dug out most of the boxes of parts from my Dad's garage the other night to continue with this FT and because all of this stuff was packed away about 4 years ago I completely forgot what I had and how I'd done things back then :) First is all of the parts off the game which I've bagged up individually depending on which mech or part of the playfield they come from. These days I strip the entire top of the playfield into one lot and the bottom into another as it just saves time but back in the day I hadn't taken many games apart so must have been worried about mixing up the different screws :rofl:

IMG_8545.jpg

Next up was a load of new parts I bought back in the day including plastics, the boat ramp and a cool Scooby Doo figure that looks just like the monster fish :D

IMG_8549.jpg

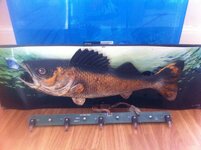
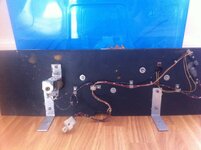
Lastly is the thing I'm most happy that I managed to get my hands on as you just don't see them come up for sale. It's a complete fish topper with lamp board and all wiring that will plug and play into my game once it's been cleaned up :D

IMG_8553.jpg

IMG_8555.jpg
 
What sort of shape is your old boat ramp plastic in mate? I'm always looking to improve on mine
 
What sort of shape is your old boat ramp plastic in mate?

I was planning on using it to practice some flame polishing but I'll dig it out and have a look. I'll clean it up, attempt some flame polishing and if I don't torch it then I'll stick a pic up. I have a suspicion it's knackered and that's why I bought the new one but I can't really remember tbh :)
 
What type of flame do you use for this please ? Fag lighter ? Plumber's torch ?
 
What type of flame do you use for this please ? Fag lighter ? Plumber's torch ?

I bought myself a small gas powered soldering iron that I'm going to remove the tip from and use like a blow torch but I suspect any gas torch would work :thumbs:
 
I dug out most of the boxes of parts from my Dad's garage the other night to continue with this FT and because all of this stuff was packed away about 4 years ago I completely forgot what I had and how I'd done things back then :) First is all of the parts off the game which I've bagged up individually depending on which mech or part of the playfield they come from. These days I strip the entire top of the playfield into one lot and the bottom into another as it just saves time but back in the day I hadn't taken many games apart so must have been worried about mixing up the different screws :rofl:

View attachment 28289

Next up was a load of new parts I bought back in the day including plastics, the boat ramp and a cool Scooby Doo figure that looks just like the monster fish :D

View attachment 28290

Lastly is the thing I'm most happy that I managed to get my hands on as you just don't see them come up for sale. It's a complete fish topper with lamp board and all wiring that will plug and play into my game once it's been cleaned up :D

View attachment 28291

View attachment 28292
The Scooby Doo monster fish is ace! I added him to mine behind the boat, tied in a lamp beneath him with the MF insert. I have a little vid somewhere.

Miss Fish Tales :-( Want another one :)

Sent from my C1905 using Tapatalk
 
It's time to continue the longest shop log ever :D I started this thread back in 2012 :eek: The cab that @replicas did for me is finally home after being at my Dads since I picked it up.....she is a thing of beauty :clap:

IMG_1441.jpg

Fully re-decalled, screen printed, new side rails, earth braid etc etc :thumbs: Now I just need to remind myself where I got to when I last parked this one :hmm:
 
Back
Top Bottom