What's new
Pinball info

Register a free account today to become a member! Once signed in, you'll be able to participate on this site by adding your own topics and posts, as well as connect with other members through your own private inbox!

Complete Fish Tales - My first Restore

MadNat

Site Supporter
Joined
May 11, 2019
Messages
1,047
Location
Warwickshire UK
Getting close to completing my first resotoration of a pinball machine. I chose Fish Tales for 3 main reasons:
1 - great game to play
2 - parts are available
3 - lots of blogs of previous resorations for encouragment

I know you should really share the story of how the project is progressing - but I was too nervous to to public at the begining - but ready now to share what I've done, as personally quite pleased with how its turned out.

The machine was is running - but poor shape. I knew this before I parted with my cash, so no complaints to the seller. But honestly, I didn't really know what I was looking at, the extent of work required, or how far you should go to consider my project a fair description of - "restoration". I'm not going to claim fully restored - I've seen where that can go on this forum :eek: .

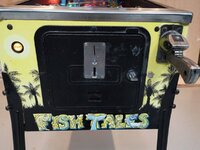
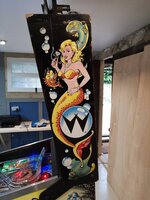
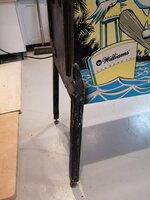
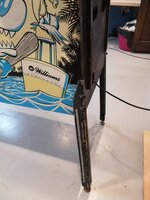
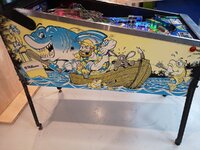
So a few pics of what I started with:
IMG_20190923_152809.jpgIMG_20190923_152736.jpgIMG_20190923_152723.jpg
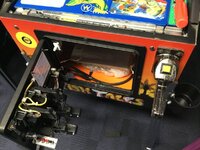
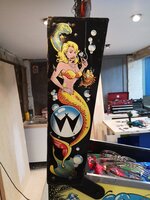
Basically the typical faded cabinet, and badly beaten legs.
What you cant see from the images is that the front of the cabinet was split from the sides, and the coin door had been badly hacked for a non standard mechanical coin mech (mechanical - not electronic).

The cabinet also had some delamination of the ply on the inside, and usual knocks and chunks missing from 27 years of use.
IMG_20190923_152753.jpgIMG_20190923_152741.jpg
IMG_20190923_152756.jpgIMG_20190923_152744.jpg
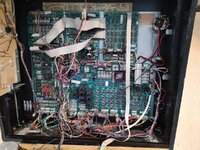
Electronics had a few non-standard features! Clearly there had been an issue with a blown Bridge Rectifier at some stage and a short in the secondary loom, melting a couple of cables. Many of the connectors on the Driver Board had been abused with direct wire to pin soldering, and one connector badly burnt, so some jumber wires were needed to keep the board functioning.

IMG_20190923_153314.jpg

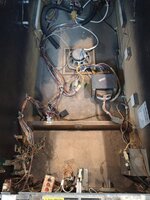
I admired the 240V flex that replaced the melted pair... again - I know this when I bought it.
IMG_20190923_153008.jpg

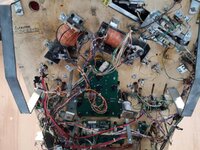
A previous owner was a oiler... lots of oil residue around the very worn flipper assemblies.
IMG_20190923_153000.jpg
The flippers were very weak - I assumed due to the worn assemblies and generous application of lube! Those with more experience than I, and a keen eye will note that they have the wrong coils fitted.

Other than all of these defects - I was very keen to give a restoration project my full attention (much to the delight of my family!). Keen to get the machine home and get cracking.

I made a short list of key things to do:
  1. Strip playfield, clean everything and replace rubbers (pretty filthy)
  2. Rebuild Flipper Assemblies
  3. Remove driver board and send to Jim at @myPinballs
  4. Strip, repair and redecal cabinet
  5. Powder coat beaten metal parts
  6. Repair a known playfield problem (a previous owner dripped resin on the PF!).
I will provide some more pics and details in time - but in short this is what I actually have done (in addition to the above), so far:
  1. Restore wiring from various hacks on the playfield (apparently many LED strips were added by a previous owner)
  2. Rebuild the DMD board (my first board rebuild - loved that experience)
  3. Re-crimp many faulty/burnt connectors in the back board
  4. Reflowed majority of connectors on playfield PCB's - many connectors had come loose from the PCB's over the last 27 years.
  5. Strip, sand and repaint cabinet and back board
  6. Replace the many plastics that disintegrate when you remove them from the playfield after 27 years of sitting there
  7. Replace the Yellow (weak) flipper coils with the fierce and properly spec'ed Blue flipper coils
  8. Re-run, cables, new ties and tidy up all cable runs from everywhere to everywhere
  9. Check and replace all diodes on every switch (had a very annoying TILT when in an exciting multiball experience, caused I believe by a phantom switch event).
  10. Renew the topper with a new dome (turns down the volume of Billy the Bass quite a bit!)
  11. Refit the missing plumb bob tilt mechanism
  12. Replace hacked coin door with a top notch 1992 equivelant and reprogrammed coin mech (thanks @new forest pinball)
  13. Strip and clean the stainless trim, lock down and receiver.
  14. Replace the boat ramp decal (more difficult than I expected!)
  15. Attached the shell decals to dome topper (dissapointed with that result - should have trimmed them from the strip and attached individually)
  16. Load with a set of 3 new pinballs
  17. Replace none original flipper bats with spec Yellow Lightning and red rubbers
  18. Replace broken/cracked slingshot and boat plastics (thanks @Toxteth O'Grady).
  19. Rebuilt the reel mechanism and fitted the correct transparent belt.
  20. Rebuilt a sticking caster drop target and failing actuator.
  21. Fitted a remote battery holder - with a connector in case I need to remove the board sometime.
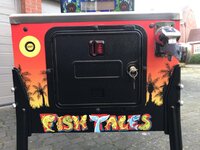
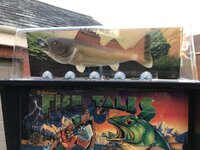
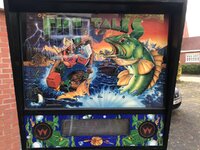
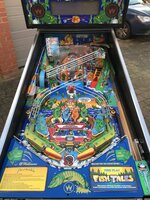
This is the best I can do with limited sunny days recently:
IMG_5929.jpgIMG_6883.jpgIMG_3983.jpgIMG_2986.jpg

IMG_2079.jpgIMG_0204.jpg

IMG_1649.jpg
At dinner last night my wife asked me what more did I need to do... I actually couldnt think of anything... well maybe:
  1. Get the caster handle refinished (can't decide how though - want to keep the original look) - oh and fit that missing bolt (I know you saw it!)
  2. attempt to remove some mylar which has been applied to a small area of the pf
  3. attempt to smooth the area even more where resin had been spilled (tough to see but I know its there)
  4. touch-up a few wear spots on the playfield - a skill I don't have, so need help (volunteers in Warwickshire please step forwards!)
  5. Maybe attempt a flame polish on the clear boat ramp...
I've really enjoyed every element so far. Certainly excited to build on this experience for the next project.

I must give huge thanks to @pinballmania for the many stupid questions, and blank looks he received from me, during various chats and visits for parts (he's got a lot of stuff!). Also @myPinballs for not making me feel like a complete idiot when he had every right too!

If only I could register a decent score on it... that's what I'll work on next!

Best

Mike
 
That looks like a reel good restoration mate.....
You need to try flame polishing that ramp, it’s a bit scary but well worth it for the difference it can make.
 
You need to try flame polishing that ramp, it’s a bit scary but well worth it for the difference it can make.

I wouldn't...

The thing with flame polishing is you can never touch it again with Isopropyl alcohol. I use Isopropyl alcohol to shift general gunk off a playfield, but get it on acrylic and ... it's forkdt!
Like the guy says, even a small amount will do this.
 
Nice to see a game I like lots get so so much work on!
attempt to remove some mylar which has been applied to a small area of the pf
I believe that is on all of the playfields. Also the topper decals are supposed to look like that too!
 
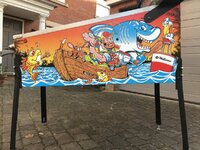
Super nice resto @MadNat - fishy is a game never gets old. Those decals really pop too - are they an alternate colourway? I've always thought that the decals look bleached even when they ain't but these don't look like that at all.
 
Super nice resto @MadNat - fishy is a game never gets old. Those decals really pop too - are they an alternate colourway? I've always thought that the decals look bleached even when they ain't but these don't look like that at all.

Thank you!

They are the standard Fish Tales decal set from https://pinballdecals.eu

Very pleased with them - as you say, strong colour, and nice to work with when applying. Highly recommended.
 
Getting close to completing my first resotoration of a pinball machine. I chose Fish Tales for 3 main reasons:
1 - great game to play
2 - parts are available
3 - lots of blogs of previous resorations for encouragment

I know you should really share the story of how the project is progressing - but I was too nervous to to public at the begining - but ready now to share what I've done, as personally quite pleased with how its turned out.

The machine was is running - but poor shape. I knew this before I parted with my cash, so no complaints to the seller. But honestly, I didn't really know what I was looking at, the extent of work required, or how far you should go to consider my project a fair description of - "restoration". I'm not going to claim fully restored - I've seen where that can go on this forum :eek: .

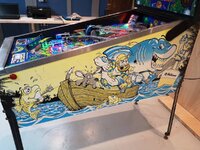
So a few pics of what I started with:
View attachment 97333View attachment 97339View attachment 97338
Basically the typical faded cabinet, and badly beaten legs.
What you cant see from the images is that the front of the cabinet was split from the sides, and the coin door had been badly hacked for a non standard mechanical coin mech (mechanical - not electronic).

The cabinet also had some delamination of the ply on the inside, and usual knocks and chunks missing from 27 years of use.
View attachment 97335View attachment 97337
View attachment 97334View attachment 97336
Electronics had a few non-standard features! Clearly there had been an issue with a blown Bridge Rectifier at some stage and a short in the secondary loom, melting a couple of cables. Many of the connectors on the Driver Board had been abused with direct wire to pin soldering, and one connector badly burnt, so some jumber wires were needed to keep the board functioning.
View attachment 97340

I admired the 240V flex that replaced the melted pair... again - I know this when I bought it.
View attachment 97341

A previous owner was a oiler... lots of oil residue around the very worn flipper assemblies.
View attachment 97342
The flippers were very weak - I assumed due to the worn assemblies and generous application of lube! Those with more experience than I, and a keen eye will note that they have the wrong coils fitted.

Other than all of these defects - I was very keen to give a restoration project my full attention (much to the delight of my family!). Keen to get the machine home and get cracking.

I made a short list of key things to do:
  1. Strip playfield, clean everything and replace rubbers (pretty filthy)
  2. Rebuild Flipper Assemblies
  3. Remove driver board and send to Jim at @myPinballs
  4. Strip, repair and redecal cabinet
  5. Powder coat beaten metal parts
  6. Repair a known playfield problem (a previous owner dripped resin on the PF!).
I will provide some more pics and details in time - but in short this is what I actually have done (in addition to the above), so far:
  1. Restore wiring from various hacks on the playfield (apparently many LED strips were added by a previous owner)
  2. Rebuild the DMD board (my first board rebuild - loved that experience)
  3. Re-crimp many faulty/burnt connectors in the back board
  4. Reflowed majority of connectors on playfield PCB's - many connectors had come loose from the PCB's over the last 27 years.
  5. Strip, sand and repaint cabinet and back board
  6. Replace the many plastics that disintegrate when you remove them from the playfield after 27 years of sitting there
  7. Replace the Yellow (weak) flipper coils with the fierce and properly spec'ed Blue flipper coils
  8. Re-run, cables, new ties and tidy up all cable runs from everywhere to everywhere
  9. Check and replace all diodes on every switch (had a very annoying TILT when in an exciting multiball experience, caused I believe by a phantom switch event).
  10. Renew the topper with a new dome (turns down the volume of Billy the Bass quite a bit!)
  11. Refit the missing plumb bob tilt mechanism
  12. Replace hacked coin door with a top notch 1992 equivelant and reprogrammed coin mech (thanks @new forest pinball)
  13. Strip and clean the stainless trim, lock down and receiver.
  14. Replace the boat ramp decal (more difficult than I expected!)
  15. Attached the shell decals to dome topper (dissapointed with that result - should have trimmed them from the strip and attached individually)
  16. Load with a set of 3 new pinballs
  17. Replace none original flipper bats with spec Yellow Lightning and red rubbers
  18. Replace broken/cracked slingshot and boat plastics (thanks @Toxteth O'Grady).
  19. Rebuilt the reel mechanism and fitted the correct transparent belt.
  20. Rebuilt a sticking caster drop target and failing actuator.
  21. Fitted a remote battery holder - with a connector in case I need to remove the board sometime.
This is the best I can do with limited sunny days recently:
View attachment 97345View attachment 97344View attachment 97346View attachment 97347

View attachment 97348View attachment 97349

View attachment 97350
At dinner last night my wife asked me what more did I need to do... I actually couldnt think of anything... well maybe:
  1. Get the caster handle refinished (can't decide how though - want to keep the original look) - oh and fit that missing bolt (I know you saw it!)
  2. attempt to remove some mylar which has been applied to a small area of the pf
  3. attempt to smooth the area even more where resin had been spilled (tough to see but I know its there)
  4. touch-up a few wear spots on the playfield - a skill I don't have, so need help (volunteers in Warwickshire please step forwards!)
  5. Maybe attempt a flame polish on the clear boat ramp...
I've really enjoyed every element so far. Certainly excited to build on this experience for the next project.

I must give huge thanks to @pinballmania for the many stupid questions, and blank looks he received from me, during various chats and visits for parts (he's got a lot of stuff!). Also @myPinballs for not making me feel like a complete idiot when he had every right too!

If only I could register a decent score on it... that's what I'll work on next!

Best

Mike


Nice writeup and good to see it up and going. Felt good to cut that horrible rectifier bodge out and return to factory! :)

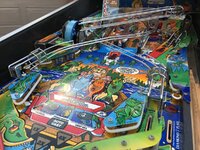
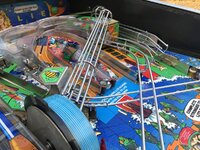
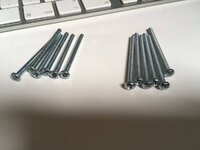
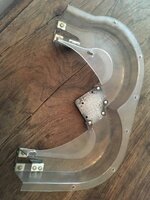
Some of these may spruce up the lower lane guards to. Harder to find #6 philips head bolts. pm me if you want some

IMG_5527.JPG
 
Very tidy work! I understand it must be very clean before letting loose with the blow torch?

Maybe put a sticker on the underside reminding you not to touch with Iso Alcohol...
 
I practiced flame polishing on my old FT ramp then did my WW ramps which came out really good too, just be careful because if you get carried away your ramp turns to jelly!

Just stripped my FT playfield to put a protector on and been touching up some inserts. Got a pair of new complete flipper mechs that I bought years ago for it so while flippers are off might as well do that too and I’ve actually just ordered a couple of lightning flippers so think I might be in for a shock when it’s back together😂

Yours is looking nice👍
 
Beautiful job on this, I've never actually played a Fishtales but always fancied one as it's a gorgeous looking machine, especially when it's in such good shape like this
 
This looks brilliant, well done. Fish Tales has some of the best cabinet art work from this era and seeing those vibrant colours puts a smile on my face.
 
Beautiful job on this, I've never actually played a Fishtales but always fancied one as it's a gorgeous looking machine, especially when it's in such good shape like this

Got to give it a go - it’s a fast game, and challenging (for me anyway). It’s got so many levelled challenges - will keep me busy for a while.

Thanks you for the feedback - I do think it’s a good looking machine
 
At dinner last night my wife asked me what more did I need to do... I actually couldnt think of anything... well maybe:
  1. Get the caster handle refinished (can't decide how though - want to keep the original look)

The casting handle was originally intended to have an illuminated button fitted. The earliest ones were shipped with this (my employers' first one had it) but it wasn't tough enough for sited use and quickly broke. If that one is still about (and has its original handle) it'll have the later type switch, but without the square black insert holding it. A large washer (provided with the switch by Deith Leisure) serves instead, but leaves the switch in a recess, which picked up cigarette ash and other detritus.

AFAIK the wiring for the illumination remained in the wiring harness throughout the production run, along with the assignment of a place in the lamp matrix, # 8,7.
 
Last edited:
The casting handle was originally intended to have an illuminated button fitted. The earliest ones were shipped with this (my employers' first one had it) but it wasn't tough enough for sited use and quickly broke. If that one is still about (and has its original handle) it'll have the later type switch, but without the square black insert holding it. A large washer serves instead, but leaves the switch in a recess, which picked up cigarette ash and other detritus.

AFAIK the wiring for the illumination remained in the wiring harness throughout the production run, along with the assignment of a place in the lamp matrix, # 8,7.
Somebody was selling them years ago and got one for mine, looks better I think.image.jpg
 
I’ve really missed tinkering and cleaning, modding and personalising machines over the past 2 years. Had a look back on the original Fish Tales I bought and still messing about with it. It’s my first pinball love!
Little update vid made today:

Since I “completed” the restore I’ve
  • stripped the playfield and sent it to Chris to repair artwork,
  • had the playfield clear coated (to make it even faster and more brutal!),
  • fit some of @stumblor electronic wizardry (Lollipops) on the pop bumpers,
  • added a Scorbit board to record my pathetic scores,
  • re led and added a few post LED’s.
  • Stuck a CPR mirror back glass in (not anywhere near as good at IJ and TZ in my opinion - but a nice upgrade to the original trans light)
  • Re-rubbered
  • Added mirror side blades
  • Found and added a new caster handle
  • Put in a PIN2DMD
  • Upgraded the speakers and put my speaker light kit in with @Colywobbles speaker plastics
  • Tried a customer colour changing playfield GI LED mod - but not convinced that’s a good idea yet
It’s not minty fresh out of the factory look I’ve see others (who are a lot better at this stuff than I am). But it’s been an absolute joy working on it over the years.

Next mod would love to be a Bob Mortimer and Paul Whitehouse Gone Fishing themed Pinsound pack - but that will take a long time I think. Come back in another 4 or 5 years!
 
Back
Top Bottom