Getting close to completing my first resotoration of a pinball machine. I chose Fish Tales for 3 main reasons:
1 - great game to play
2 - parts are available
3 - lots of blogs of previous resorations for encouragment
I know you should really share the story of how the project is progressing - but I was too nervous to to public at the begining - but ready now to share what I've done, as personally quite pleased with how its turned out.
The machine was is running - but poor shape. I knew this before I parted with my cash, so no complaints to the seller. But honestly, I didn't really know what I was looking at, the extent of work required, or how far you should go to consider my project a fair description of - "restoration". I'm not going to claim fully restored - I've seen where that can go on this forum .
.
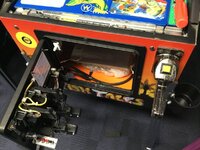
So a few pics of what I started with:
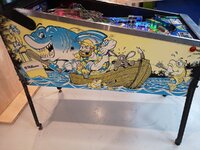
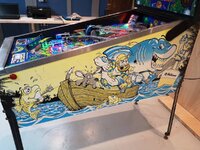
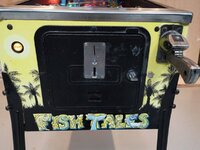
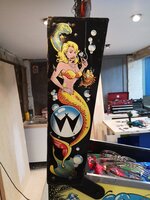
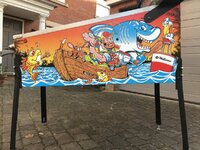
Basically the typical faded cabinet, and badly beaten legs.
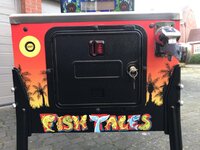
What you cant see from the images is that the front of the cabinet was split from the sides, and the coin door had been badly hacked for a non standard mechanical coin mech (mechanical - not electronic).
The cabinet also had some delamination of the ply on the inside, and usual knocks and chunks missing from 27 years of use.
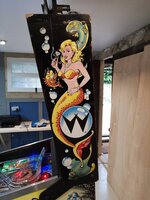
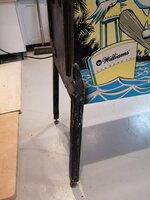
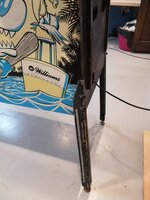
Electronics had a few non-standard features! Clearly there had been an issue with a blown Bridge Rectifier at some stage and a short in the secondary loom, melting a couple of cables. Many of the connectors on the Driver Board had been abused with direct wire to pin soldering, and one connector badly burnt, so some jumber wires were needed to keep the board functioning.
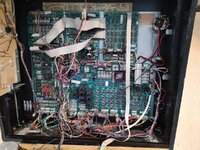
I admired the 240V flex that replaced the melted pair... again - I know this when I bought it.
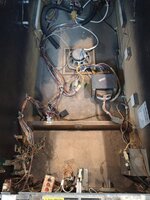
A previous owner was a oiler... lots of oil residue around the very worn flipper assemblies.
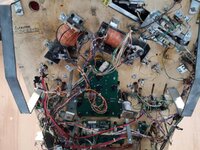
The flippers were very weak - I assumed due to the worn assemblies and generous application of lube! Those with more experience than I, and a keen eye will note that they have the wrong coils fitted.
Other than all of these defects - I was very keen to give a restoration project my full attention (much to the delight of my family!). Keen to get the machine home and get cracking.
I made a short list of key things to do:
At dinner last night my wife asked me what more did I need to do... I actually couldnt think of anything... well maybe:
I must give huge thanks to @pinballmania for the many stupid questions, and blank looks he received from me, during various chats and visits for parts (he's got a lot of stuff!). Also @myPinballs for not making me feel like a complete idiot when he had every right too!
If only I could register a decent score on it... that's what I'll work on next!
Best
Mike
1 - great game to play
2 - parts are available
3 - lots of blogs of previous resorations for encouragment
I know you should really share the story of how the project is progressing - but I was too nervous to to public at the begining - but ready now to share what I've done, as personally quite pleased with how its turned out.
The machine was is running - but poor shape. I knew this before I parted with my cash, so no complaints to the seller. But honestly, I didn't really know what I was looking at, the extent of work required, or how far you should go to consider my project a fair description of - "restoration". I'm not going to claim fully restored - I've seen where that can go on this forum
So a few pics of what I started with:


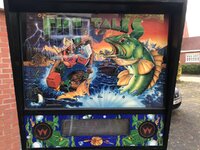
Basically the typical faded cabinet, and badly beaten legs.
What you cant see from the images is that the front of the cabinet was split from the sides, and the coin door had been badly hacked for a non standard mechanical coin mech (mechanical - not electronic).
The cabinet also had some delamination of the ply on the inside, and usual knocks and chunks missing from 27 years of use.


Electronics had a few non-standard features! Clearly there had been an issue with a blown Bridge Rectifier at some stage and a short in the secondary loom, melting a couple of cables. Many of the connectors on the Driver Board had been abused with direct wire to pin soldering, and one connector badly burnt, so some jumber wires were needed to keep the board functioning.

I admired the 240V flex that replaced the melted pair... again - I know this when I bought it.

A previous owner was a oiler... lots of oil residue around the very worn flipper assemblies.

The flippers were very weak - I assumed due to the worn assemblies and generous application of lube! Those with more experience than I, and a keen eye will note that they have the wrong coils fitted.
Other than all of these defects - I was very keen to give a restoration project my full attention (much to the delight of my family!). Keen to get the machine home and get cracking.
I made a short list of key things to do:
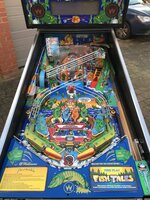
- Strip playfield, clean everything and replace rubbers (pretty filthy)
- Rebuild Flipper Assemblies
- Remove driver board and send to Jim at @myPinballs
- Strip, repair and redecal cabinet
- Powder coat beaten metal parts
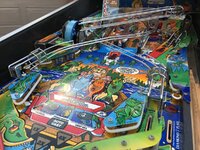
- Repair a known playfield problem (a previous owner dripped resin on the PF!).
- Restore wiring from various hacks on the playfield (apparently many LED strips were added by a previous owner)
- Rebuild the DMD board (my first board rebuild - loved that experience)
- Re-crimp many faulty/burnt connectors in the back board
- Reflowed majority of connectors on playfield PCB's - many connectors had come loose from the PCB's over the last 27 years.
- Strip, sand and repaint cabinet and back board
- Replace the many plastics that disintegrate when you remove them from the playfield after 27 years of sitting there
- Replace the Yellow (weak) flipper coils with the fierce and properly spec'ed Blue flipper coils
- Re-run, cables, new ties and tidy up all cable runs from everywhere to everywhere
- Check and replace all diodes on every switch (had a very annoying TILT when in an exciting multiball experience, caused I believe by a phantom switch event).
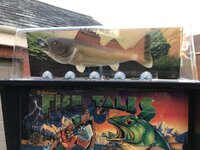
- Renew the topper with a new dome (turns down the volume of Billy the Bass quite a bit!)
- Refit the missing plumb bob tilt mechanism
- Replace hacked coin door with a top notch 1992 equivelant and reprogrammed coin mech (thanks @new forest pinball)
- Strip and clean the stainless trim, lock down and receiver.
- Replace the boat ramp decal (more difficult than I expected!)
- Attached the shell decals to dome topper (dissapointed with that result - should have trimmed them from the strip and attached individually)
- Load with a set of 3 new pinballs
- Replace none original flipper bats with spec Yellow Lightning and red rubbers
- Replace broken/cracked slingshot and boat plastics (thanks @Toxteth O'Grady).
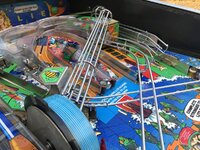
- Rebuilt the reel mechanism and fitted the correct transparent belt.
- Rebuilt a sticking caster drop target and failing actuator.
- Fitted a remote battery holder - with a connector in case I need to remove the board sometime.


At dinner last night my wife asked me what more did I need to do... I actually couldnt think of anything... well maybe:
- Get the caster handle refinished (can't decide how though - want to keep the original look) - oh and fit that missing bolt (I know you saw it!)
- attempt to remove some mylar which has been applied to a small area of the pf
- attempt to smooth the area even more where resin had been spilled (tough to see but I know its there)
- touch-up a few wear spots on the playfield - a skill I don't have, so need help (volunteers in Warwickshire please step forwards!)
- Maybe attempt a flame polish on the clear boat ramp...
I must give huge thanks to @pinballmania for the many stupid questions, and blank looks he received from me, during various chats and visits for parts (he's got a lot of stuff!). Also @myPinballs for not making me feel like a complete idiot when he had every right too!
If only I could register a decent score on it... that's what I'll work on next!
Best
Mike

