What's new
Pinball info

Register a free account today to become a member! Once signed in, you'll be able to participate on this site by adding your own topics and posts, as well as connect with other members through your own private inbox!

In Progress Filthy not so White Water restore

Tyke

Site Supporter
Joined
Apr 10, 2012
Messages
824
Location
Melksham
Alias
Mike
Having taken a hiatus from Pinball for a few years, I feel happy to be back in the swing again. My recent RFM restore, which is almost complete and now just awaiting a replacement playfield, has really brought my mojo back and love for fixing these things up again.

5116C0AA-993A-464D-B415-03972D98E7F3.jpeg

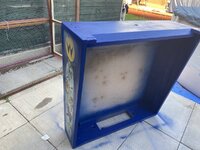
Next on the restore list is WH20 which needs an epic amount of TLC to get it back to former glory. The good news is the cab is complete and PCB wise all working, but not without many hacks a previous op has done in the past to keep the coins flowing. It needs a full strip top to bottom, many repairs to the bodges, playfield needs so much love. Ramps except for one are all in perfect shape, they will get a clean/flame polish and new decals. The cabinet will get a full lick of paint and decals. etc etc it's a giant money pit but boy it will be worth it. :p

Wish me luck!
 
Last edited:
Made a start on stripping the topside, it was beyond filthy so I keep on going until everything was removed. Overall the condition is ok, bar a few wrong screws used which have just poked through, I think I can repair and make it good.

E5E6DC30-DD90-49B6-81C9-3037709DD5FC.jpeg96BC9F91-0731-4A5E-924E-60EAD2E71CE9.jpeg080ECFB9-4E0D-4218-B2AF-FBA11D417B3A.jpeg
D26583F2-BD6C-403D-9F66-DB041C7D1BE6.jpeg
B2F44505-8817-48B6-A936-26E5A0E5CD36.jpeg
 
Last edited:
With the top stripped I made a start below removing all of the targets, mechs, bumpers, switches and posts.

Some funky cotton wool/masking tape to dampen the subway return kicker, also has extra plating and a massive divot where the ball has gone through it a billion times!

06EB105E-C90C-44E6-ABE6-D4F9634E4439.jpeg

AE1E6300-F51C-4DD0-9A70-92BE04CA8AC9.jpegDB65275B-A7F0-4E6F-B643-2D7FB8B06A09.jpeg8F143C12-A23F-4880-8EA1-0921A7B5E471.jpeg
4E61C440-01CD-45F3-8DAD-0DF676E910FB.jpeg
 
Last edited:
Some funky cotton wool/masking tape to dampen the subway return kicker, also has extra plating and a massive divot where the ball has gone through it a billion times!

Screen Shot 2020-05-31 at 20.09.56.png

Damn I love Ghetto fixes! :p
 
I do like whitewater but I feel the need to tell you we have the same keyboard.
It doesn't like spills so be careful.

(Disclaimer, great work on the WhiteWater, I have been drinking, but not water sooo).

:)
 
Last edited:
Great start on this so far, that does all look rather murky 😂 Looking forward to following your progress
 
This evening I made a start cleaning up what was salvageable from the mechs and ball guides, with some elbow grease it is all now dirt and grease free.

I gave the insert pcbs a much needed bath in isopropyl, scrub and re-flowed all of the headers. I also made the first of what will be many part orders, that should give me most of what I need for this first stage 😀

4EFD01A0-D158-42EA-9C19-5DF661718BEF.jpeg
1A4F266A-B97D-443A-B8E3-5584295B71DB.jpeg35738F15-251B-402B-8021-71DCAEBBC8BB.jpeg
880F2614-64F1-4631-8533-EE7E0B94B28D.jpeg
31DFA63B-2B21-45A1-B523-87ACB64A87DB.jpeg
 
Progress is still moving along on this one, it's been slow waiting for parts to arrive from multiple vendors but its all nearly here. When people say this is an expensive cab to restore, that is so very true, the amount I’ve spent on new parts is eye watering 😂

I have rebuilt every mech on the game now, many had broken parts replaced, new coil sleeves, springs etc plus I’ve replaced 7 coils too. Rebuilt the pops which are always fun but thankfully only 3 on this cab, went for transparent skirts which look super sexy against the fresh new white pop bodies.

EF054756-8625-4D7A-8260-D7F691DCA3DE.jpeg
22CD6D7D-B3F0-4F5B-AA46-14942EB64744.jpeg

Cleaned the underside inserts and fitted LEDs.
66E779DE-935D-4872-8BAE-872849D3CD9B.jpegD0712E9D-C4FE-43D2-ADD6-5B9830B16FFC.jpeg

Fitted all new targets and sling and score switches.

B19A055B-A969-4DC4-8A85-B5797E6C793A.jpeg
C792AA7F-80DE-4E90-9083-F2A095E90E45.jpeg

Touched up the playfield wear from the lost mine kicker and fitted a protector to the whole playfield. Full silicone rubber kit fitted, have updated to blue post sleeves since I took the picture. All new star posts too.

AAC6C889-96DC-4685-ABD9-17AC8E0C445C.jpeg

10CB56C2-15B8-40EF-B870-321101C90C25.jpeg


Refitted new black ash vinyl to the wooden rails.

79C6AC0E-1102-4F60-97B3-E8CE6B1E0304.jpeg
D79E93C4-F940-4A93-B47E-AFDE55081F41.jpeg
C9422180-E686-4F89-B721-96FD4570EAC2.jpeg

Now I’m moving on to the cabinet. just need it to cool down outside as I’m melting at the moment. All the metal work is currently at the power coaters, looks forward to seeing how that pans out.
 
Last edited:
Nice work. Get those LED's in the whirlpool changed for blue, they look so much better.
 
Made a start on the cabinet today, like the rest of this cab it was pretty minging..

I’m fitting those fancy Rad decals for the first time so don’t have to go crazy on the prep for the front and sides which will make a change.

882A7CE9-A4B6-41F9-BF92-31BBEF431542.jpeg
35C94A9F-CDC5-4439-9D1A-B578573F09AB.jpeg
860AD1C5-4876-4C8E-AC69-41D4F7138C0C.jpeg
C1F4EFAA-C0AA-4059-85AE-EA3517DB6FE4.jpeg

Out came my trusty mouse and I got on with sanding the dirty bottom, followed by glueing and clamping the rear before filling.

38F6B6D8-BC06-483A-A087-8925B3B2E6F8.jpeg
4AF762BC-D583-4D74-9CEC-9A12EDE13363.jpeg

Next job is removing the earth braiding and giving the insides a good clean and paint job.

C0593C8A-2E2D-4A51-8C75-9C57B5510B50.jpeg

10 points to the first person to name the game this recycled bit of cab came from?

7F749579-AD6B-4F19-8F6F-38202EDE3E6A.jpeg
 
Found more Dr Who parasite cab parts today whilst replacing the wooden rails.

058B6AF0-0F98-4D90-9EC9-E00E948E0FDD.jpeg
96E479F8-7804-4168-8C2D-642BCF07F4B6.jpeg

Got all the powder coated parts back today so I can finally kick this up a gear and get the cabinet finished off :)

FA00EDBE-8BE9-4E1A-9F01-2604243B9011.jpeg
 
Last edited:
Another wet day! little chance to do any spray work. But I did manage to cut and fit new side rails, went for a slightly more thicker wood than the original ply, which should survive another 25 years hopefully :)

B88B6CB3-5A59-4445-AF57-5ADF2A9E90A7.jpeg

1D7A0396-D71D-4373-BC29-43E2A0BA3E54.jpeg
Fingers crossed the weather is good tomorrow and I can finish the main body of the cab with a few clean coats of paint. Gagging to fit the new artwork.
 
What are your thoughts on the radcals? I’m on the fence whether to decal mine or go down this route


Sent from my iPhone using Tapatalk

Very easy to fit and give a superb high gloss finish. They use them on the ltd edition JJP cabs so it’s a premium look, I guess suits some games better than others.
They are pricey over standard decals, but the time saved in prep and the overall look is worth the extra cost to me :)
 
Very easy to fit and give a superb high gloss finish. They use them on the ltd edition JJP cabs so it’s a premium look, I guess suits some games better than others.
They are pricey over standard decals, but the time saved in prep and the overall look is worth the extra cost to me :)

Thanks! I look forward to seeing the finished article.


Sent from my iPhone using Tapatalk
 
Quick bit of progress. Over the weekend I made a start on the back box, which was in a pretty poor state.


5E9E4141-DAFE-4FFF-B1BC-B331DCC77EE0.jpeg
626B7070-334E-4D7C-9CB7-647E4C9CB117.jpeg

Stripped it down and got it ready for prepping and painting.

7CC3A0C4-86D3-4634-A6CD-E3298A2EBE17.jpeg

Primed and painted in a few coats of ultramarine blue.
BCF047F6-EEBD-416F-952E-180CB370EA99.jpeg

91A833D4-7492-4A7A-B6CD-F2DE4151EF2A.jpeg

As I’m fitting rad decals I decided to counter sink all of the bolt heads on the sides to save spoiling the artwork.

3325233A-0949-4A68-AC1B-815204BC1847.jpeg

All back together and ready for PCBs. Getting closer 😀

FAE4B8CF-D543-4038-96DE-93DF10714AC1.jpeg
FAFD9FBE-B5F3-4C06-9600-8B0B587C85B1.jpeg
 

Attachments

  • 7439E312-3981-4E6F-BA5C-7DD52FC008D1.jpeg
    7439E312-3981-4E6F-BA5C-7DD52FC008D1.jpeg
    176.8 KB · Views: 11
Looking great Mike! Love the high glass look of the radcals. Almost up to the fun bit now, getting the playfield back together.
 
nice job!!! not sure about the rad decals though jury's out on that one. love the clear pop skirts though!

Cheers

kev
 
Those radcals look great. As they have "thickness" how does the front edge corners on show where they join work?
 
Those radcals look great. As they have "thickness" how does the front edge corners on show where they join work?

The front panel is ever so wider and over hangs so you can but the side pieces up. It's pretty clean looking :D
 
Back
Top Bottom