A great game with potential to be very nice but in need of lots of time ,so I picked it up mid last year with the intention to fully restore as time allowed and have been working on it slowly ever since.
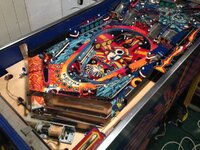
Before pics
Before pics
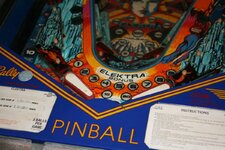
") The plastic playfield looks to be in reasonable shape. Are you going to try and replace it or restore what you've got?
The plastic playfield looks to be in reasonable shape. Are you going to try and replace it or restore what you've got?Good game Elektra


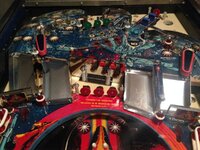
edges are all polished
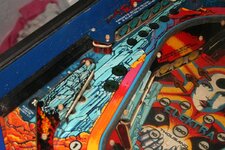
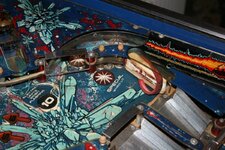
Can't quite work out what I'm seeing in those photos? Does that main playfield have a very thick, e.g., 2-3mm, sheet of polycarbonate on it?
Is this what I'm seeing? But I don't see it around the green targets which are on the upper playfield, right? I thought you'd got a new repro PF from Marco but the upper surface looks original. If that is a PF protector and it is that thick are you going to have to adjust any rollover switches, etc.? Doesn't look like the main PF has any star-rollover inserts, but the upper PF is covered in them. Is this why no protector on the top? Star-rollover inserts are they reason why I went for 0.75mm Lexan on my GOLD BALL.
Nice work on the linear flippers, BTW, and glad to see you're sticking with them rather than ditching them for the classic style. Very shiny plungers so I'm assuming they were part of the rebuild kits rather than tumbled?
A-ha! Thanks for the explanation. I didn't notice that about the acrylic sheet on the main playfield even when I played a real one! But looking back at your before and after photos it now makes sense. That acrylic must have protected the playfield really well? It certainly looks like it did. Effectively a 30+ year-old playfield protector. Interesting as I'm making my own in much the same fashion, that is, covering everything edge-to-edge with large holes for bulbs, slingshots, bumpers, etc., and small holes for fixing posts, wire guides. There seems to be concern that dirt would get under a playfield protector and turn into a grinding medium that can't be cleaned away. What was it like underneath the original acrylic sheet when you removed it?


Ok, Elektra is a 3 playfield game, so Bally designed the middle playfield with a factory acrylic sheet across the whole area so that it took tare of the window for the lower playfield. This meant they needed to modify pretty much every switch bracket, target, wire form and mech on the middle playfield. Seems like madness to me, when you could have just recessed a normal playfield window in.


Looks awesome man. The attention to detail is there.
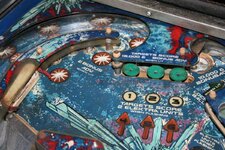
The rubbers on your flippers look a little pink for some reason?
I see you're using black flipper paddles. D'you think the lower playfield would suit them, if 2" are available in black?
Played my first games on it. A few dead bulb drivers to sort and some switch adjustment but all good so far.


Wow this thing is looking amazing.
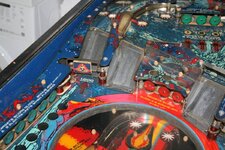
I'm afraid I'm gonna have to insist that you clean up that lockdown bar receiver though.
Happy birthday too by the way!

 Probably the socket