What's new
Pinball info

Register a free account today to become a member! Once signed in, you'll be able to participate on this site by adding your own topics and posts, as well as connect with other members through your own private inbox!

Complete Discs of Tron environmental

Wow! That is pretty nasty! All wiring and parts still there? Is the original cpo salvageable after a clean or is it time for a new repro one?? Original would be sweet if possible
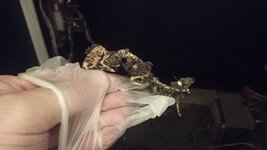
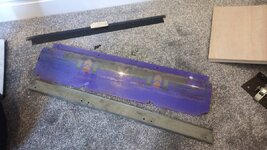
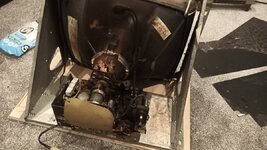
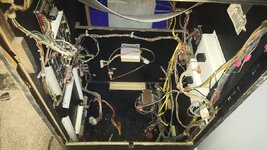
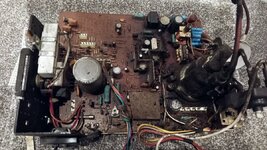
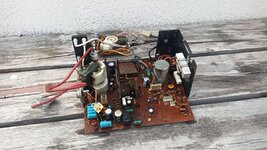
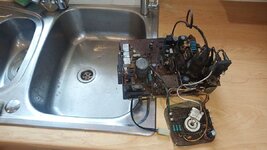
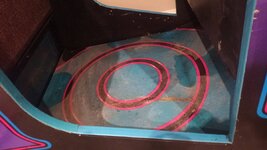
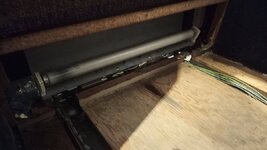
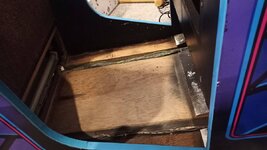
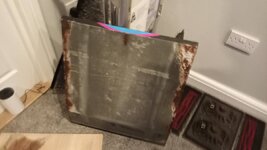
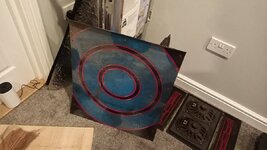
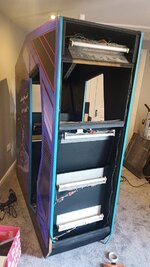
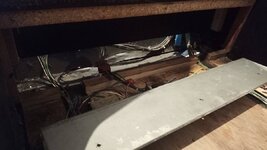
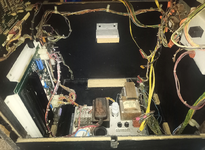
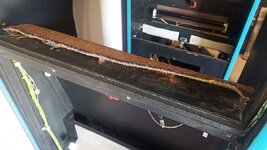
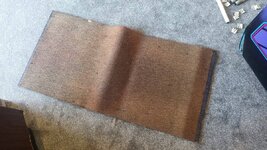
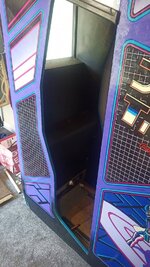
I have a silkscreened replacement somewhere. This week's mission is to find where I've been hoarding it.
 
When I played an edot in the arcades around 1989-91 I always remember the carpet backed leaning area.

I started to take off metal work to be repainted/powder coated and I was amazed at the carpet.

Original colour appears purple.
 

Attachments

  • IMG_20220416_215503.jpg
    IMG_20220416_215503.jpg
    155 KB · Views: 33
Didn't get to much time today as it's Easter but started stripping bits off it to aid in a deep clean and sort the metal work.
 

Attachments

  • IMG_20220417_131007.jpg
    IMG_20220417_131007.jpg
    147.3 KB · Views: 19
  • IMG_20220417_131010.jpg
    IMG_20220417_131010.jpg
    147.4 KB · Views: 18
I've never known something so convuluted and overly complicated. Finally can see all the way through it.

Hope I remember how it goes back together.
 

Attachments

  • IMG_20220418_132726.jpg
    IMG_20220418_132726.jpg
    65.2 KB · Views: 37
  • IMG_20220418_143601.jpg
    IMG_20220418_143601.jpg
    60 KB · Views: 30
  • IMG_20220418_132656.jpg
    IMG_20220418_132656.jpg
    88.1 KB · Views: 34
  • Screenshot_20220418-215704~2.png
    Screenshot_20220418-215704~2.png
    223.9 KB · Views: 35
Removed the monitor this evening, it went from filthy to clean but I'll go over it once more. I will be using an anti-static brush to clean the yoke.

Monitor chassis will be cleaned under the tap in the sink then sent off to be rebuilt and serviced.

Made a first pass on cleaning the inside also but I can't get right into the machine until the coin door is off.
 

Attachments

  • IMG_20220419_193813.jpg
    IMG_20220419_193813.jpg
    141.1 KB · Views: 27
  • IMG_20220419_193820.jpg
    IMG_20220419_193820.jpg
    119.4 KB · Views: 27
  • IMG_20220419_201428.jpg
    IMG_20220419_201428.jpg
    143.6 KB · Views: 26
  • IMG_20220419_194000.jpg
    IMG_20220419_194000.jpg
    153.4 KB · Views: 26
  • IMG_20220419_201527.jpg
    IMG_20220419_201527.jpg
    106.2 KB · Views: 27
Gave the chassis a rinse. I'll give it another clean with water and washing up liquid before sun drying it then sending it off for servicing.

The horizontal width coil plastic gave up and snapped so it will need at least a new one of those.
 

Attachments

  • IMG_20220419_214432.jpg
    IMG_20220419_214432.jpg
    168.3 KB · Views: 22
  • IMG_20220420_155201.jpg
    IMG_20220420_155201.jpg
    178.5 KB · Views: 21
  • IMG_20220420_154350.jpg
    IMG_20220420_154350.jpg
    113.5 KB · Views: 23
The horizontal width coil plastic gave up and snapped so it will need at least a new one of those.
I hate those things. Worse than a wafer biscuit out of an ice cream cone. I think I used epoxy on the last one I touched. It's finding the non existing replacements too.
 
I've been fighting these rusted security torx screws for the last three days. I managed to get three out but the other nine just won't come out. I have tried every trick in the book including an extraction kit.

Currently waiting for some special mole grips to arrive from Amazon.
 

Attachments

  • IMG_20220421_195206.jpg
    IMG_20220421_195206.jpg
    77.6 KB · Views: 19
  • IMG_20220421_195230.jpg
    IMG_20220421_195230.jpg
    28.1 KB · Views: 19
I've been fighting these rusted security torx screws for the last three days. I managed to get three out but the other nine just won't come out. I have tried every trick in the book including an extraction kit.

Currently waiting for some special mole grips to arrive from Amazon.
They used those bloody things on the control panel too. Horrible to move once rusted.
 
Yep can't get two of them out of the joystick :(
I think as my stick was shot I ground through the heads, removed the handles, soaked the joins in WD40 and got mole grips on the thread, not nice at all.
 
Had thise on FT topper were a nightmare on a couple of them, ending up using a dremel to cut a slot in them and used a flat head screwdriver to get then out straight in the bin
 
The mole grips didn't work so ordered a Dremel.

The Dremel arrived at 5pm so I went straight out to the gameroom and got to work.
 

Attachments

  • IMG_20220424_200341.jpg
    IMG_20220424_200341.jpg
    67.6 KB · Views: 38
  • IMG_20220424_200333.jpg
    IMG_20220424_200333.jpg
    89.3 KB · Views: 37
  • IMG_20220424_200111.jpg
    IMG_20220424_200111.jpg
    60.3 KB · Views: 35
  • IMG_20220424_200102.jpg
    IMG_20220424_200102.jpg
    93 KB · Views: 43
  • IMG_20220424_195946.jpg
    IMG_20220424_195946.jpg
    53.4 KB · Views: 41
  • IMG_20220424_202503.jpg
    IMG_20220424_202503.jpg
    63.1 KB · Views: 44
Last edited:
Pretty much fully dismantled other than some wiring and the lighting and ballasts. I managed to clean inside all the nooks and crannies with it all apart.

It will be time to start putting it back together soon.
 

Attachments

  • IMG_20220425_174134.jpg
    IMG_20220425_174134.jpg
    83.9 KB · Views: 24
  • IMG_20220425_173653.jpg
    IMG_20220425_173653.jpg
    62.5 KB · Views: 23
  • IMG_20220425_155253.jpg
    IMG_20220425_155253.jpg
    59.4 KB · Views: 17
  • IMG_20220425_154900.jpg
    IMG_20220425_154900.jpg
    73.6 KB · Views: 21
So!

This game when I got it was missing the game PCB, linear power supply brick and power supply PCB. I've temporarily borrowed the power supply out of a Tapper that I have and acquired a rebuilt power supply PCB and a working game PCB.

I've installed the brick into the game and start testing voltages.
 

Attachments

  • Screenshot_20220506-115010~2.png
    Screenshot_20220506-115010~2.png
    400.6 KB · Views: 7
  • Screenshot_20220506-114719~2.png
    Screenshot_20220506-114719~2.png
    203.4 KB · Views: 6
  • Screenshot_20220506-114713~2.png
    Screenshot_20220506-114713~2.png
    170.6 KB · Views: 7
  • Screenshot_20220506-114709~2.png
    Screenshot_20220506-114709~2.png
    164.7 KB · Views: 8
So!

This game when I got it was missing the game PCB, linear power supply brick and power supply PCB. I've temporarily borrowed the power supply out of a Tapper that I have and acquired a rebuilt power supply PCB and a working game PCB.

I've installed the brick into the game and start testing voltages.
The 135V AC is an odd voltage, innit? Should that be 110V for the monitor and lights?
 
The 135V AC is an odd voltage, innit? Should that be 110V for the monitor and lights?
It should be 120+125. The monitor is on its own isolation transformer. The brick is a 220v one so I think that's the reason for the stepdown increase, I'll need to repin it on the 240 in.

However saying that as it worked in the Tapper ok I'm assuming the G07s are fine with this input voltage. Need to consult the G07 manual.
 
Smelly carpet time 🤢🤢🤢

The carpet was originally purple (and clean!), removing it shows how gross it actually is. I was surprised the ends hidden on the metal clips were purple as I only remember the wine red colour from back in the day.

I've measured it up to get a nice new purple piece cut and installed. I'll need to buy a carpet stapler as it uses these really thin long staples to attach to the wood.
 

Attachments

  • IMG_20220508_113005.jpg
    IMG_20220508_113005.jpg
    104.5 KB · Views: 23
  • IMG_20220508_113016.jpg
    IMG_20220508_113016.jpg
    49.2 KB · Views: 20
  • IMG_20220508_113122.jpg
    IMG_20220508_113122.jpg
    244.9 KB · Views: 21
  • IMG_20220508_113229.jpg
    IMG_20220508_113229.jpg
    114.2 KB · Views: 21
Air stapler is what I'd use, (if you have a compressor). The same tool they used on cabinet timber.
 
Air stapler is what I'd use, (if you have a compressor). The same tool they used on cabinet timber.
I do not have a compressor, that sounds expensive. I'd like to install it the same way it was done in the factory if possible rather than glue it.
 
I do not have a compressor, that sounds expensive. I'd like to install it the same way it was done in the factory if possible rather than glue it.
Or you use what I stapled my grounding strip to the inside of my Scared Stiff cabinet and that's a heavy duty stapler like this.

Heavy-Duty-Tacker-Staple-Gun-6-14mm-Upholstery-Stapler.jpg

Rapesco are a great brand, had mine years, bought it 2nd hand and will outlast me. You just have to make sure the width of staple is correct and the depth of the staples will do what you want it to.

Rexel are another good brand. I have one something like this too...
https://www.avansas.com/uk/rexel-heavy-duty-staple-tacker-silver-p-89009?gclid=EAIaIQobChMIqtrNpZvQ9wIVwbTtCh2bqAGpEAQYAiABEgL5q_D_BwE

www.ebay.co.uk/itm/115371820854 < Or probably even this one.

Whichever one you go for they want to be this loop kinda deal with nothing on the bottom so you can fire them at people.
 
Last edited:
Back
Top Bottom