Nice conversion ! I wish I had read your post before I had to rebuild the original blue chasers !!
If anyone is interested here's how I did it (unfortunately I didn't take any photos along the way sorry !!)
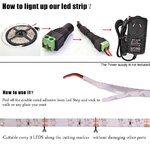
You will need :- a sharp knife, a pen, small cable ties soldering iron, side cutters or pliers, hot air tip or gun, 2 packs of led's eBay item no 121076185729, some heat shrink tube (maplin selection pack) some thin stranded wire, thick cardboard or sheet of ply, black insulating tape, 9volt battery & a packet of long drawing pins !!
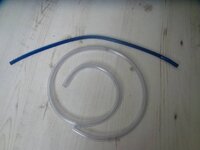
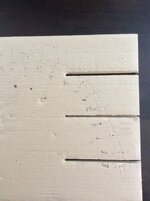
Remove the blue strips, turn them upside down, using a sharp knife cut a slot from end to end & remove the inside leaving just the tube (sounds a bit like blue peter!) lay the blue strip onto the cardboard & draw round it. Take the old lighting strip & lay it inside the drawing. Mark the positions of the lights with a line. At the left side starting from the first bulb nearest the connector mark it with no 1, the next with no 2, the next with no 3, then no 1 then 2 then 3 repeating until all bulbs are numbered ! Tale the new led's, starting at the bottom (no1) stick a pin Between the 2 legs & attach it to each position of the old lights already marked. The red wire to the outside, black to inside. (It is helpful to add extra pins on the outside to loop red cables out of the way) starting with the furthest away led take the red wires from as many as you can to one point, twist them together (you will have to strip them back a little) solder a longer bit of cable to them then shrink a little tubing into it ! Repeat all the way down until you have a cable coming out of the bottom of the template. The black leads are done the same way connecting all the no 3 led's together then the no 2s then the no 1s. You should now have 4 wires coming out of the bottom ! Time to test them ! Get the battery & connect the wire going to the red side of the led's to + touch one of the other wires to - & the corresponding 4 led's should light (yee haa happy days !) if they are all working pop a piece of heat shrink over them all at the end of the template then cut off the 4 coloured leads from the old light assembly pop some heat shrink tube over each cable & solder & shrink them onto the corresponding wires white to the led's red wire(common to all) black to lamps 1,4,7,10, brown to lamps 2,5,8,11 & green to lamps 3,6,9,12. Push the lights & cable back into the slit & run some tape around the cables & end of tube ! Test them once more then re install with cable ties
")
) to do the other side turn the drawing round & repeat everything again ( you are probably better re drawing it as it can get confusing !) I will take a couple of photos of the template etc & it might explain the layout a bit better !
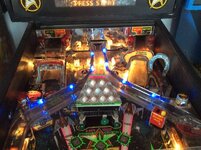
Don't know if anyone's thought of this I found it by accident as I was taking photos ! If you put your iPad / I phone into camera mode & rest it on top of the glass you can magnify / inspect the play field etc so for us half blind oldies you don't need to do your Sherlock Holmes impression with a magnifying glass !