What's new
Pinball info

Register a free account today to become a member! Once signed in, you'll be able to participate on this site by adding your own topics and posts, as well as connect with other members through your own private inbox!

Complete Baywatch

That’s really nice,
I thought about doing the inside blue on my Baywatch, and would have been a lot easier lol but I settled for black 😀
 
Another update
Earth braiding finished.
Transformer unwrapped after spraying and cables cleaned etc.
Shown with smaller 12v 5a transformer which will be wired to the main switch to provide clean power for some led mods and instruction card lights without affecting the machine wiring.
Transformer now installed.
All vents also installed.
Hoping to have the cabinet loom in tomorrow and up on legs for first time.
I installed the stern cabinet protectors and had to grind the rear ones down so they don’t overhang the bottom of the machine and potentially cause a problem if machine is transported or moved horizontally, which I tend to do when I collect machines.
Also showing the JBL 600w cabinet speaker which is going in and a quick shot of the playfield which is 60% completed
 

Attachments

  • 2FC562AE-4358-4A6D-A561-1918A6FC0A3E.jpeg
    2FC562AE-4358-4A6D-A561-1918A6FC0A3E.jpeg
    80.9 KB · Views: 55
  • 6ABD0D70-9036-4342-8FE4-5CD38A098214.jpeg
    6ABD0D70-9036-4342-8FE4-5CD38A098214.jpeg
    138.2 KB · Views: 57
  • 025A5FD5-0629-4507-BEF7-011F51B2877C.jpeg
    025A5FD5-0629-4507-BEF7-011F51B2877C.jpeg
    150.6 KB · Views: 58
  • 7B3C8EF4-A0CF-4412-B0C2-1AF698133904.jpeg
    7B3C8EF4-A0CF-4412-B0C2-1AF698133904.jpeg
    97.6 KB · Views: 59
  • 23333F7F-CA31-43A3-8546-BEAB2E56D5FA.jpeg
    23333F7F-CA31-43A3-8546-BEAB2E56D5FA.jpeg
    77.5 KB · Views: 57
Last update before wedding 🎩 so have to concentrate on that lol
All the looms have been cleaned thoroughly,
Pcb plate painted, pcb’s cleaned and resoldered discoloured joints and removed manky flux residue.
Also removed all the glue that held the battery holder in place, NVRAM fitted.
Pcb’s refitted to backbox, 7 screws missing and ordered, wired up ready.
Look almost fitted to cabinet, just the mainswitch box and supply cables as I’m fitting a new main switch to the enclosure.
New speaker fitted and all cable clamps in place.
Finally up on legs for first time with all feet fully wound in and no rocking at all.
One happy bunny 🐰
 

Attachments

  • 5E8E411D-90E5-4D9F-BEA5-04EC58A845F4.jpeg
    5E8E411D-90E5-4D9F-BEA5-04EC58A845F4.jpeg
    204.3 KB · Views: 56
  • C5EFD441-A290-488E-A61C-DBDD60FE7F59.jpeg
    C5EFD441-A290-488E-A61C-DBDD60FE7F59.jpeg
    110.9 KB · Views: 61
  • 05A45F35-25D2-4F72-87D1-390084A422E9.jpeg
    05A45F35-25D2-4F72-87D1-390084A422E9.jpeg
    109.3 KB · Views: 60
  • 05F3AFFB-0352-4116-8FB8-BA47CEFBAEEB.jpeg
    05F3AFFB-0352-4116-8FB8-BA47CEFBAEEB.jpeg
    77.9 KB · Views: 58
  • 758D9EBA-D57B-4792-839F-B332A2DDB10F.jpeg
    758D9EBA-D57B-4792-839F-B332A2DDB10F.jpeg
    77.6 KB · Views: 58
  • 6721F033-E16A-4AAC-A44F-0CF159EA3182.jpeg
    6721F033-E16A-4AAC-A44F-0CF159EA3182.jpeg
    87.4 KB · Views: 65
  • 5C70536D-F76A-45B0-B13D-8F1D8AC67327.jpeg
    5C70536D-F76A-45B0-B13D-8F1D8AC67327.jpeg
    87.3 KB · Views: 64
Another update.
Looks like slow progress but had a few hurdles to get over and it’s done properly or not at all -
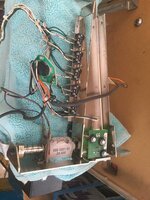
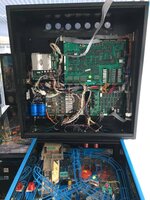
Main switch broke during removal so thanks to Vimtoman for helping source a new one, 3 in fact for £8 delivered from Amazon.
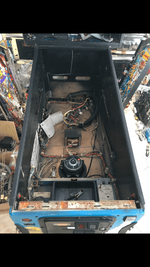
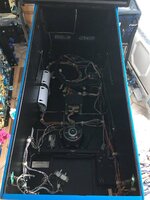
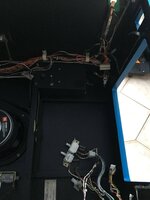
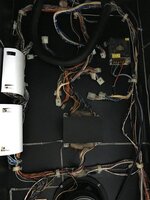
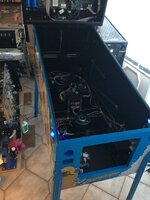
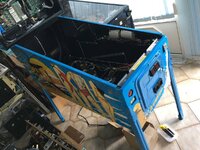
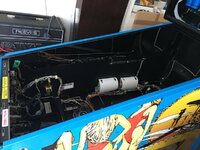
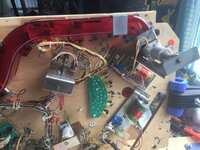
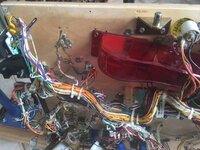
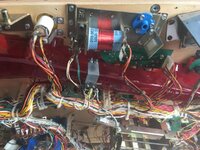
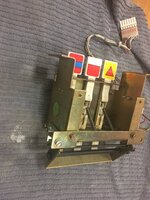
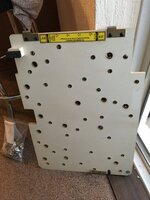
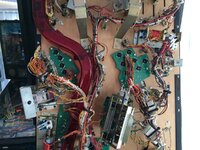
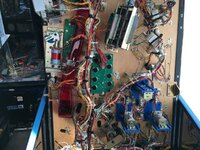
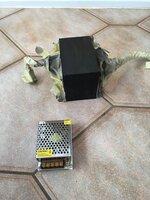
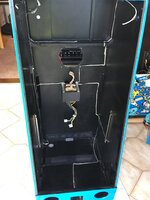
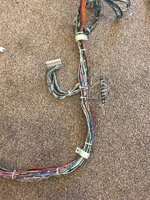
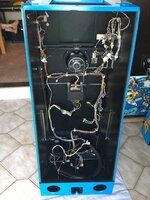
Cleaned and sprayed switch box, fitted new main switch and rewired and added a power cable connected to the switched live to power the new 12v 5a PSU which will power my lighting mods.
Fitted the new PSU, mains cable and socket hood, both flipper boards after resoldering some fuse sockets.
Cleaned the flipper board covers and fitted.
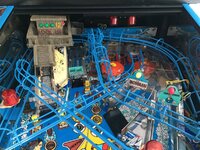
Fittted the flipper leaf switches and blue led flipper buttons which are powered by the new PSU.
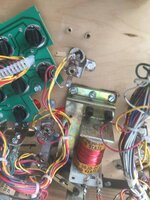
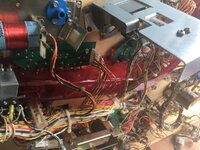
Plugged machine transformer in and turned machine on to test machine transformer after painting and the 12v PSU, flipper button leds work.
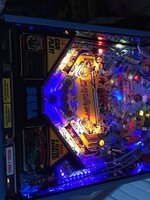
Added a 2nd feed from 12v PSU which will be a cable going inside the trunking to the playfield to supply power to the trough led, shooter lane led, shark led, float led and the instruction card led plates, which means I can raise playfield without trailing cables or disconnecting anything.
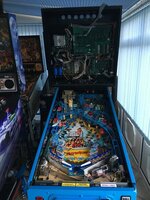
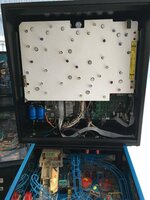
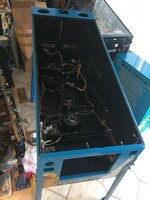
Fitted missing pcb mounting screws to backbox.
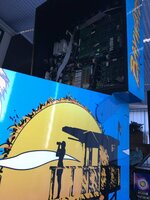
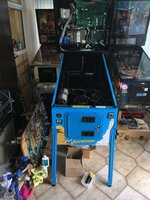
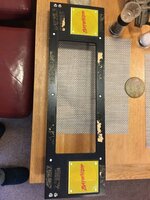
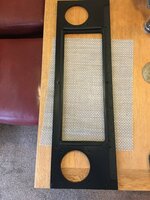
Sprayed backbox speaker panel receiver channel (metal) and fitted.
Fitted backbox hinges and remaining hardware.
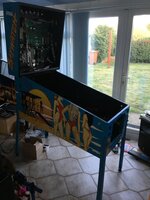
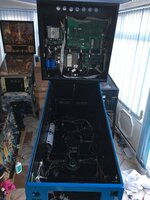
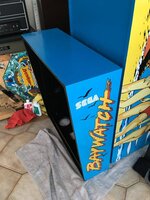
Fitted backbox to Cabinet with both halves of roto-lock cleaned and fitted.
Fitted new powder coated backbox hinges and bolts, new washers, sourced a new hinge bush which was missing from the machine.
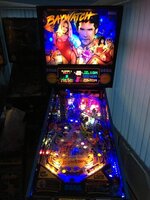
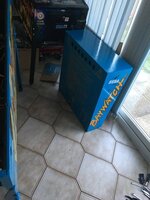
Backbox now rock solid and no movement at all, as it used to rock back and forth.
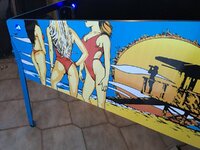
It’s also straight !
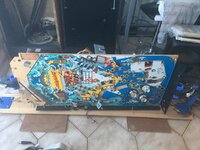
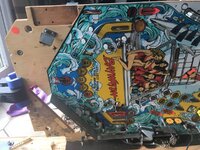
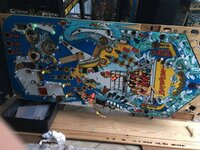
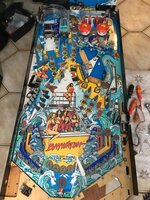
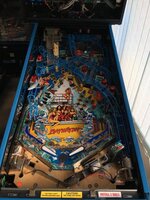
Just a few bits to do and cabinet complete then on to finish the playfield
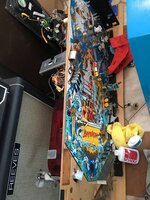
 

Attachments

  • 045DD022-FD97-4367-A89B-1E449545ECF6.png
    045DD022-FD97-4367-A89B-1E449545ECF6.png
    185.3 KB · Views: 55
  • 32AD2EBE-40DD-4E18-BFCD-9F4FFE9CDCFC.jpeg
    32AD2EBE-40DD-4E18-BFCD-9F4FFE9CDCFC.jpeg
    88.6 KB · Views: 52
  • C3377CFE-8708-45C4-ADC5-43366D0140EA.jpeg
    C3377CFE-8708-45C4-ADC5-43366D0140EA.jpeg
    97.1 KB · Views: 52
  • 84103EFD-8068-46D7-87F3-FBD2EC71218A.jpeg
    84103EFD-8068-46D7-87F3-FBD2EC71218A.jpeg
    96.1 KB · Views: 51
  • CFF99266-C7C9-4C5D-A3DB-92398B04F923.jpeg
    CFF99266-C7C9-4C5D-A3DB-92398B04F923.jpeg
    55 KB · Views: 50
  • F6B39A93-F7A6-42F3-9F0F-1F6CBDC950FA.jpeg
    F6B39A93-F7A6-42F3-9F0F-1F6CBDC950FA.jpeg
    85.4 KB · Views: 50
  • B9C6CF28-385F-4211-8CC3-F7FB2134C1F0.jpeg
    B9C6CF28-385F-4211-8CC3-F7FB2134C1F0.jpeg
    85.4 KB · Views: 53
  • C4AA96B9-46A0-43CC-B2CC-793B4B824AA8.jpeg
    C4AA96B9-46A0-43CC-B2CC-793B4B824AA8.jpeg
    133.8 KB · Views: 52
  • 9E5EF9DA-363D-4CF6-910C-F357E1E4E97F.jpeg
    9E5EF9DA-363D-4CF6-910C-F357E1E4E97F.jpeg
    84.7 KB · Views: 54
Playfield well under way, only a few major mechs to finish cleaning, new coil sleeves, flipper rebuild kits x 4 and leds being fitted.
Top side half playfield cleaned and fitting new clear posts, a selection of coloured post sleeves and rubbers to accentuate different areas which I have co-ordinated with selective led lighting.
A big shout to Collywobbles for coloured plastic protectors which will be fitted and shown soon
 

Attachments

  • 74AB8B5F-FC62-4A19-8511-15FE6AACF272.jpeg
    74AB8B5F-FC62-4A19-8511-15FE6AACF272.jpeg
    149.2 KB · Views: 50
  • 4B847425-D077-4D58-89C1-D8C55E37BB5E.jpeg
    4B847425-D077-4D58-89C1-D8C55E37BB5E.jpeg
    94.7 KB · Views: 49
  • 2B7AD209-F3E3-4007-BB67-8C6154D61EFF.jpeg
    2B7AD209-F3E3-4007-BB67-8C6154D61EFF.jpeg
    111.3 KB · Views: 48
  • 05198B97-F0E9-4044-A2CE-FB01F6263912.jpeg
    05198B97-F0E9-4044-A2CE-FB01F6263912.jpeg
    201.8 KB · Views: 45
  • BC655E7E-2AB1-4D9F-A13C-E4E0CB921072.jpeg
    BC655E7E-2AB1-4D9F-A13C-E4E0CB921072.jpeg
    222.6 KB · Views: 44
  • 2EC6DC37-D74B-4FBC-9EFA-615D3D87194E.jpeg
    2EC6DC37-D74B-4FBC-9EFA-615D3D87194E.jpeg
    188.3 KB · Views: 43
  • 2755EB54-2900-4635-BF38-40E1CE00ADD3.jpeg
    2755EB54-2900-4635-BF38-40E1CE00ADD3.jpeg
    141.9 KB · Views: 42
  • FF46EC59-9750-45E9-8C5F-2F4BD09B6D7A.jpeg
    FF46EC59-9750-45E9-8C5F-2F4BD09B6D7A.jpeg
    157.4 KB · Views: 39
  • A189E995-28AD-4088-A077-64973F67D013.jpeg
    A189E995-28AD-4088-A077-64973F67D013.jpeg
    158.5 KB · Views: 37
  • 4E5F1F4C-5CE7-4BFC-AD64-0CC3A3F97AC8.jpeg
    4E5F1F4C-5CE7-4BFC-AD64-0CC3A3F97AC8.jpeg
    152.6 KB · Views: 37
  • 83A9FA51-FE6C-4125-BDB4-EAF25D91EA33.jpeg
    83A9FA51-FE6C-4125-BDB4-EAF25D91EA33.jpeg
    150.9 KB · Views: 35
  • C91D55C3-D768-41E3-A785-5FC650572995.jpeg
    C91D55C3-D768-41E3-A785-5FC650572995.jpeg
    145.3 KB · Views: 36
  • FDA98BD2-FE42-495F-B044-120FAC2D333D.jpeg
    FDA98BD2-FE42-495F-B044-120FAC2D333D.jpeg
    128.9 KB · Views: 38
  • 0DCD3983-E68F-4654-844A-FC40D21C8486.jpeg
    0DCD3983-E68F-4654-844A-FC40D21C8486.jpeg
    157.6 KB · Views: 38
  • 9C5CC09A-404D-459D-B7BD-FA9E425C6415.jpeg
    9C5CC09A-404D-459D-B7BD-FA9E425C6415.jpeg
    152.8 KB · Views: 37
  • 99E9A835-C844-4BF8-AF1C-25CF4FD9265E.jpeg
    99E9A835-C844-4BF8-AF1C-25CF4FD9265E.jpeg
    118.7 KB · Views: 38
Playfield well under way, only a few major mechs to finish cleaning, new coil sleeves, flipper rebuild kits x 4 and leds being fitted.
Top side half playfield cleaned and fitting new clear posts, a selection of coloured post sleeves and rubbers to accentuate different areas which I have co-ordinated with selective led lighting.
A big shout to Collywobbles for coloured plastic protectors which will be fitted and shown soon

I think theres going to be plenty of Baywatch converts after this build. Top quality @Beowulfz07
 
Another update,
Underside of playfield 95% completed.
All LED’s now fitted.
Shark flip insert repaired, huge thanks to Mikonos for making the new decal.
All cleaning done and playfield Protector fitted.
One ramp on and finished, 3 more to go !
Slingshots and out lanes done including coloured protectors and clear washers.
Made a plastic bracket which replaces one of the spacers under a ramp flasher and fitted my shark to it, very pleased as from the front it looks like it’s floating.
Decided to spruce up the tower which is very detailed but was all one colour, so it’s been primed, base colour and various layers of different colours followed by washes.
Just highlights, lettering, door and window to do and very pleased with the transformation.
 

Attachments

  • ECFAA41C-12C6-4888-8EEC-F7AEC1561FD6.jpeg
    ECFAA41C-12C6-4888-8EEC-F7AEC1561FD6.jpeg
    180.3 KB · Views: 48
  • BFD9DB1F-06E8-4057-8557-078CE57B5708.png
    BFD9DB1F-06E8-4057-8557-078CE57B5708.png
    175.3 KB · Views: 50
  • 4E249D99-A7C2-42A3-9356-67E6779523E0.jpeg
    4E249D99-A7C2-42A3-9356-67E6779523E0.jpeg
    127.2 KB · Views: 49
  • 6BBB57BF-661C-4983-882C-18015509AD69.jpeg
    6BBB57BF-661C-4983-882C-18015509AD69.jpeg
    89.9 KB · Views: 49
  • D5100BCA-F305-4208-A31C-F5190CEF5D1A.jpeg
    D5100BCA-F305-4208-A31C-F5190CEF5D1A.jpeg
    98.4 KB · Views: 48
  • 297FE5B8-389D-4FCB-BA11-EB6398D2731F.jpeg
    297FE5B8-389D-4FCB-BA11-EB6398D2731F.jpeg
    163.3 KB · Views: 48
  • 3738239F-E8C0-4214-B349-86295F641D91.jpeg
    3738239F-E8C0-4214-B349-86295F641D91.jpeg
    149.7 KB · Views: 48
  • 74000942-D869-4225-B47F-34AAC0A6945A.jpeg
    74000942-D869-4225-B47F-34AAC0A6945A.jpeg
    108.5 KB · Views: 51
  • C5ADCBE0-079F-4251-B03A-26A20C2EC34A.jpeg
    C5ADCBE0-079F-4251-B03A-26A20C2EC34A.jpeg
    172.2 KB · Views: 48
  • 947219AD-B41A-42B9-958C-486E53B514C3.png
    947219AD-B41A-42B9-958C-486E53B514C3.png
    262.2 KB · Views: 47
  • 8E36CB16-ED6B-4339-A27C-2A3A18B54FBE.jpeg
    8E36CB16-ED6B-4339-A27C-2A3A18B54FBE.jpeg
    124.5 KB · Views: 45
  • 5654CFC7-A758-4A0D-A2AD-782A6FB29526.jpeg
    5654CFC7-A758-4A0D-A2AD-782A6FB29526.jpeg
    128.8 KB · Views: 46
  • 394132F8-FCA3-4DAB-96E4-9800438593FC.jpeg
    394132F8-FCA3-4DAB-96E4-9800438593FC.jpeg
    132.5 KB · Views: 46
  • D75D8B2A-8B8B-4AA1-AA98-FF7F7A6FFD50.jpeg
    D75D8B2A-8B8B-4AA1-AA98-FF7F7A6FFD50.jpeg
    162.4 KB · Views: 46
  • AC315294-9FD3-47DF-BF6E-8AB3057F56C3.jpeg
    AC315294-9FD3-47DF-BF6E-8AB3057F56C3.jpeg
    161.4 KB · Views: 43
Last edited:
Looking good!....loved our baywatch..hope you have paid the required licence fee for the shark mod...lol...(planetary pinball style)
Here was ours with interactive red led shark mouth (patents pending)...for more of the same see this classic thread.......oh and a pic of the shark mod......
https://www.pinballinfo.com/community/threads/stupid-mods-thread.37499/

IMG_4340.JPG
 
Light board and speaker panel painted,
Made 2 new MDF spacers for new JBL 2 way speakers and painted them.
Half way through speaker grills and finished cleaning remaining mechs and fitting last of coil sleeves etc leaving just a couple of plastic ramps to clean before everything going back together, hopefully finished next weekend
 

Attachments

  • 8977ACBB-5060-4024-97EC-A5F5FD765766.jpeg
    8977ACBB-5060-4024-97EC-A5F5FD765766.jpeg
    77.1 KB · Views: 22
  • 2D5705DA-6C87-4310-A92B-DB1F74B0064A.jpeg
    2D5705DA-6C87-4310-A92B-DB1F74B0064A.jpeg
    139.9 KB · Views: 22
  • 99CD2119-493D-4453-89AF-8B6B93904E06.jpeg
    99CD2119-493D-4453-89AF-8B6B93904E06.jpeg
    110.4 KB · Views: 23
  • 75FA89E7-E7D2-48B1-852F-5BB1BD83615F.jpeg
    75FA89E7-E7D2-48B1-852F-5BB1BD83615F.jpeg
    120 KB · Views: 25
  • 27EA09BB-439D-40AB-8E30-CBCBC317EAB7.jpeg
    27EA09BB-439D-40AB-8E30-CBCBC317EAB7.jpeg
    135.2 KB · Views: 26
  • CDD54F0A-FA57-4707-AB14-8FB6DC678F40.jpeg
    CDD54F0A-FA57-4707-AB14-8FB6DC678F40.jpeg
    150.7 KB · Views: 25
How thick are those spacers and do the sit between the grill and speaker Tony?
Reason I ask is I can cut upto 15mm Acrylic and you could do some kinda lighting effect easily, maybe even shark teeth effect

Col
 
Thanks Colin, they are 9mm and I decided not use speaker lights as the Baywatch grills look better unlit next to the huge colorled dmd and space is very tight, the speaker tweeter cones extend beyond the fitting line which is the only reason for making the spacers.
Appreciate your offer as always 😀
 
Finished at Last,
Not the best pics as they make the leds look far more saturated than they are.
Speaker panel completed, new JBL 2 way speakers fitted and a new speaker loom made and XL Colour LED DMD fitted.
Leds fitted to backbox, led strip fitted under rear glass receiver, led strip fitted to shooter lane and trough.
New instruction cards and decals to Apron.
Barbie floatation device fitted on custom bracket above laserkick targets.
All bulbs, flashers and coils tested.
Some microswitches and ramps adjusted for the playfield protector.
Invisiglass fitted.
Fully play tested and plays very well, no more failed kicks for the skillshots, shark flip now works as it should, NVRAM previously fitted along with the hugely updated game code.
Looks and sounds so good it’s been dragged kicking and screaming from a 90’s game to a pin that is now right at home next to a GB and TWD
 

Attachments

  • D25ABEF0-20F2-4926-AC3C-35D9B9748ACA.jpeg
    D25ABEF0-20F2-4926-AC3C-35D9B9748ACA.jpeg
    121.7 KB · Views: 87
  • BC1106CC-A206-4491-8C94-50C41D45D5BB.jpeg
    BC1106CC-A206-4491-8C94-50C41D45D5BB.jpeg
    125.7 KB · Views: 89
  • 29634B7E-FEA7-4B55-AC8D-8971D283DCED.jpeg
    29634B7E-FEA7-4B55-AC8D-8971D283DCED.jpeg
    127.5 KB · Views: 90
  • 3C6BA76B-853A-4DB2-8F0B-FAE834A0D318.jpeg
    3C6BA76B-853A-4DB2-8F0B-FAE834A0D318.jpeg
    201.8 KB · Views: 95
  • E844FF9B-31D9-436A-9A27-B26DC110E0AE.jpeg
    E844FF9B-31D9-436A-9A27-B26DC110E0AE.jpeg
    231.7 KB · Views: 93
  • C56FF00A-B07A-4AEF-915C-D4D542C5CF1F.jpeg
    C56FF00A-B07A-4AEF-915C-D4D542C5CF1F.jpeg
    220.7 KB · Views: 88
  • 16F27C0C-76E9-4380-906D-09692402D891.jpeg
    16F27C0C-76E9-4380-906D-09692402D891.jpeg
    126.2 KB · Views: 87
  • 27A949B6-EB26-4B7D-9683-4B9A85E6B98A.jpeg
    27A949B6-EB26-4B7D-9683-4B9A85E6B98A.jpeg
    158.7 KB · Views: 84
  • E2C6E9BF-D145-45DD-A6A5-F16E333B2B4C.jpeg
    E2C6E9BF-D145-45DD-A6A5-F16E333B2B4C.jpeg
    183.6 KB · Views: 82
  • 33114104-7992-4076-B8C0-B408C23E3EAB.jpeg
    33114104-7992-4076-B8C0-B408C23E3EAB.jpeg
    184.7 KB · Views: 85
  • E6B20471-B7CF-4DDB-8409-2C44EA7F03D1.jpeg
    E6B20471-B7CF-4DDB-8409-2C44EA7F03D1.jpeg
    88.3 KB · Views: 97
  • A0BF0261-1595-4B0C-97BC-E4207F8F1159.jpeg
    A0BF0261-1595-4B0C-97BC-E4207F8F1159.jpeg
    100.6 KB · Views: 101
  • E543C142-6394-4E21-86D3-BE8B585AC668.jpeg
    E543C142-6394-4E21-86D3-BE8B585AC668.jpeg
    113.9 KB · Views: 95
I think you need a rest from refurbishing and play a few pins :)
The Baywatch looks great by the way. Well done.
 
Amazing work, it looks stunning. You can certainly see the effort and the attention to detail that has gone into it.
 
Back
Top Bottom