What's new
Pinball info

Register a free account today to become a member! Once signed in, you'll be able to participate on this site by adding your own topics and posts, as well as connect with other members through your own private inbox!

In Progress Alien Poker - full restoration

It's worth mentioning that a lot of these restoration threads say things like 'I stripped the cab' without explaining basic things like how to remove the hexagonal-shaped things on the back of the flipper buttons (they turned out to be nuts).

Anyway, after a bit of faffing around, I turned to YouTube and this is how you remove flipper buttons on old Williams pins.

Just incase this is helpful to someone who might be pointed to this shop log in the future (hopefully, not for the purposes of ridicule)!

 
Another YouTube link, this time about e-clips/e-rings, which might be helpful to someone following along. There are a lot of these little f**kers on this pin and, so far, the only one that has defeated me is the one on the actual shooter rod - thanks to this helpful tech talk.

 
I just use a little flathead and lever them off, but keep your hand close or do it in a freezer bag so the clip doesn't fly off to never be seen again.
 
I just use a little flathead and lever them off, but keep your hand close or do it in a freezer bag so the clip doesn't fly off to never be seen again.
The one on the shooter rod is right up snug in a groove, so you can’t get a thin flathead into the holes. I’m going to try using a watchmaker’s flathead, but am worried about breaking the screwdriver.

Far too sensible. I love spending a few hours on my hands and knees looking for the feckers

We’ve already had that excitement replacing the shooter rod for LoTR when we owned that. We lost the e-ring in the front room, couldn’t find it, and the pin was out of action for a couple of weeks while we ordered a new one. That was a serious nuisance. So, yes, I wrap a cloth/my hand around them.
 
I've had no issues with them on shooter rods as I replace the sleeves and washers on nearly every game.
Must be one of those old c clips
 
I've had no issues with them on shooter rods as I replace the sleeves and washers on nearly every game.
Must be one of those old c clips
This is legit c-clip* hell, folks.

*It is more ‘c’ than ‘e’ shaped, now you mention it…

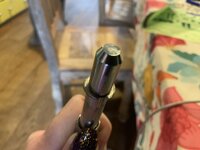
I’ve currently tried two watchmaker’s screwdrivers and needle-nosed pliers, and the little fecker is not moving. Seriously, it’s harder to shift than my three year old off the sofa at bedtime.

1C264852-A329-4916-871D-C00D1573520E.jpeg
 
This is legit c-clip* hell, folks.

*It is more ‘c’ than ‘e’ shaped, now you mention it…

I’ve currently tried two watchmaker’s screwdrivers and needle-nosed pliers, and the little fecker is not moving. Seriously, it’s harder to shift than my three year old off the sofa at bedtime.

View attachment 227776

Yeah this is the old horrible type😄 I just bend them off and replace with proper E clips.
 
Those sort of clips I use needle nose pliers and pull one end up out of the groove then work the remainder out using pliers and screwdriver.
 
Can’t pull those off, you’ll bend them. As Moonraker wrote you lever them out if the groove and push off the front.
 
Can’t pull those off, you’ll bend them. As Moonraker wrote you lever them out if the groove and push off the front.
I’ve been trying. I’ve tried with a pick & lock set, needle-nosed pliers… adjustable wrenches… Nothing’s moving the c-clip. So, I’ve deprioritised it for the moment.

I had a pause in work (or, at least, doing a couple of hours on Alien Poker each day) due to the big A word, i.e. adenomyosis. It’s luckily not fatal, but it’s not wildly pleasant either.

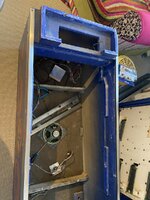
Anyway, I’ve done a bit of work on stripping down the cab with lots of stoppages due to a lack of suitable knowledge and equipment.

I’ve been putting my tumbler on for too little time (apparently, it should be minimum 4-8 hours with 24 hours being more typical). I had wondered why dipping everything in Autosol hadn’t seemed to help!
E8B0C85C-23CB-41A1-A978-DFF0135BD32B.jpeg

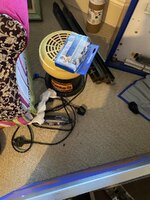
Then I realised that the pin was absolutely filthy. The picture underestimates just how utterly dirty it is. Every piece of metal and section of wiring harness is a total grimefest (and not the funkily-attired artist who formerly dated Elon Musk, either). So, I had to research how to actually clean stuff without resorting to a toothbrush and washing up liquid, and now have a 9L Labbasics ultrasonic cleaner plus automotive degreasing fluid coming from Amazon.co.uk. Research on Pinside suggests you need at least a 9L cleaner to clean wiring harnesses, as the wire basket inside the machine holds less than the diameter of the tub.
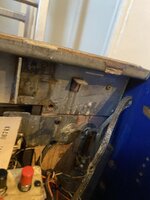
C2DB32F6-6803-4147-8048-6179CFD8341A.jpeg
My earthing braid is shot (I’m sure it’s not doing much grounding hanging off in little chunks, as on the far left of the image), but Pinball Mania has it in multiple ampages (10A, 15A, 30A) and I’m currently not sure what ampage I need. I checked the Alien Poker manual (which is useless) and the Williams Flipper Solid State Maintenance Manual (which is only slightly better), and neither told me, so I‘ve asked here and on Pinside in the hope someone knows.
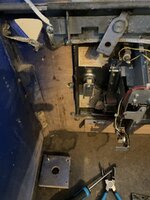
6E474420-A9EF-4B8A-A7CC-F850E577D2C5.jpeg
I stripped all the incandescent bulbs out of the backbox and realised I should probably - if I could, while I’m doing all this work - replace those old orange displays with something newer and funkier. Not sure if @AlanJ does displays for Williams early SS, so I’m investigating XPin displays as an alternative.
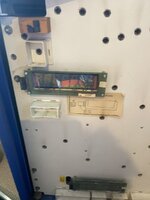
2BBF5239-57C5-480F-8E85-1B40846072D2.jpeg
Finally, my replacement side rails arrived and were horribly bent in multiple places. Happily, Marco Specialities immediately fixed me up with some new (hopefully unbent) ones.
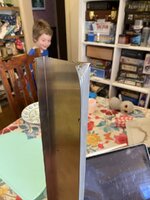
C962B832-AAE3-4116-BDAB-8B8634FDD924.jpeg
Apologies that there’s so much minutiae on this shop log. Thing is, I read a lot of shop logs and they tend to go “I stripped down, sanded and painted the entire cab” as though it happened by magic. Whereas, everything I attempt seems to involve a massive clueless faff where I have no idea what equipment or techniques to use, or how to use them, and everything takes ages and goes wrong. I’m sure I’m not *that* hopeless (just slightly hopeless), so am including every terrifying mistake, time-consuming mess and blind alley in the hope of assisting someone else who takes on a full restoration with no experience or relevant skills other than boundless optimism.
 
Last edited:
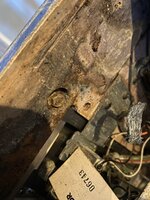
I present this nut on the coin door without comment, other than to note that there’s a thread currently running about accurately describing faults/flaws on pins for sale, and have no idea what I’d say about this (other than to worry about the shop log discussing the risks of hantavirus).

Note: the nut is cleaner than when I started unscrewing it.

IMG_6831.jpeg
 
I present this nut on the coin door without comment, other than to note that there’s a thread currently running about accurately describing faults/flaws on pins for sale, and have no idea what I’d say about this (other than to worry about the shop log discussing the risks of hantavirus).

Note: the nut is cleaner than when I started unscrewing it.

View attachment 228099
Good luck, it seems whenever I attempt to unscrew when they are like that I end up snapping the bolts. 🍀🤞
 
Tumbler needs to run at least 24 hours in my experience. Sometimes I've left items in it for 2-3 days 😄
 
There's some at the bottom of mine that have been there at least a month 😳
Had to empty it yesterday as the media was done for and I found balls I forgot I put in🤣
They must look great😎

I did some that were in my MMR recently and probably original, I swear the game is playing much faster. Rounder, smoother balls move faster🤓
 
I’ve been trying. I’ve tried with a pick & lock set, needle-nosed pliers… adjustable wrenches… Nothing’s moving the c-clip. So, I’ve deprioritised it for the moment.
Try using the black handled pliers in your tool box that you got for removing side rail nails. You will likely ruin the c clip but I would replace with an e clip anyway.
 
I hosted a London & SE league tournament on Saturday, but have made some small steps forward with Alien Poker today. We are moving now (albeit slowly) towards having a stripped-down cab ready for painting.

289809F0-B54B-4394-BC4C-DD2B38D76E5D.jpeg

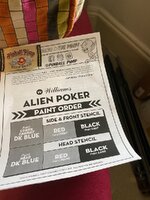
Someone told me during the tournament that there’s an online listing of the Pantone colours for pinball machines, and I can get the numbers for Alien Poker from there to colour match. With that in mind, I tried searching the Internet Pinball Database (no luck) and then unpacked my Pinball Pimp stencils in the hope that the ‘paint order’ would give me a clue (it didn’t).

82F195B0-D43C-419A-B2AA-EA3C0159AAB6.jpeg
Pinball Pimp suggests using Rustoleum (and a couple of other brands) of paint, but Rust-Oleum don’t have a dark blue (so no luck there).

If anyone has an idea where I can find these Pantone colour codes for the cab/backbox, please let me know.


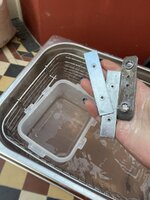
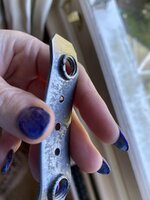
Somewhat excitingly (well, to me, anyway), my ultrasonic cleaner came and I’ve run several things through it. Unfortunately, I’ve discovered several things I thought were dirt weren’t (see right-hand side piece of metal). So, I’ve moved the tumbler to the conservatory and - on @David_Vi and other people’s recommendations, am going to leave it going overnight to see if it cleans up that piece of metal.

F9AEE294-2A1C-441E-A740-44DFDCC539B4.jpeg
 
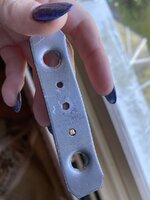
Here's the Alien Poker leg bolt plate after about 24-36 hours of tumbling. It's dramatically improved in terms of dirt levels, but - to be honest - I'm probably going to try to find a replacement part because it's scratched and pitted to all heck.

Alien Poker leg bolt plates 1.jpg

Alien Poker leg bolt plate 1.jpg
 
For the cab, I've ordered Rust-Oleum Painters' Touch gloss spray in cherry red, black, and a couple of blues (as unsure which is best) from Sprayster. I'm planning to prime with a Painters' Touch White Matt surface primer.


I still don't own an orbital sander (just a small mouse sander) and my pale-coloured wood filler has dried up in the tub since I filled the cracks in my living room doors. I need to sort that out before I get the screws off the bass speaker!

Sorry for so many details. I'm hoping to inspire someone who wants to do their own restoration of an 80s classic (or even an EM), but has no idea where to start (because I didn't).
 
Back
Top Bottom