What's new
Pinball info

Register a free account today to become a member! Once signed in, you'll be able to participate on this site by adding your own topics and posts, as well as connect with other members through your own private inbox!

In Progress Alien Poker - full restoration

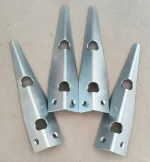
Those leg bolt plates are cheap enough - treat yourself to a full set of 4. The old ones get bent and the threads can be stripped
Yep, they're totally bent and £4 each for new ones from Pinball Mania.

It's all a bit of a balancing act. I don't want to replace literally everything on the pin. Not just because of the cost, but also because I may as well just scratch build a new one at that point. But, at the same time, I don't want to leave stuff that's worn and broken... So, it's getting a balance between 'make pin like new' and 'avoid erasing entire history of pin'.

It doesn't help that I don't know what half the stuff is supposed to look like! I thought the plates for the legs were supposed to be curved at the ends!!! :eek:
 
Last edited:
More questions. I've got a bunch of metal plates and bars, basically, which fit inside the pin. Plus, the coin door, shooter rod plate (note: c-clip now ripped off using the spiral screw remover), and the bar that sits at the bottom of the backglass.

I know some people seem to chrome plate literally everything, including all the mechs, and I've been recommended Douglas Plating for chroming locally (https://www.douglas-plating.co.uk). Thing is, I don't know what to chrome because there's a durability issue and, if I chrome plate stuff and it wears off, it's going to look instantly horrible. IIRC, @CHRIS B PINBALLS doesn't powder coat coin doors due to the risk of damage, but I'm not sure about plating (?).

So... all advice very welcome here on what exactly I should be plating?

tempImageKj0qrV.jpg

tempImage8ttKKS.jpg

tempImagerM5WyG.jpg
In many cases, where it's obviously zinc plated, I've have been spraying with instant spray-on zinc from a spray can I got from ToolStation. But I don't know what to do about stuff that's more visible. The sort of stuff that Haggis Pinball would chrome on a Fathom/Centaur Revisited.


Possible chrome underneath the playfield here (6 minutes 55 seconds in).


Do I just take everything in its little bags to the plating firm and get literally EVERYTHING replated? @stumblor, if you don't mind me asking, what did you do with your CFTBL (https://stumblorpinball.com/blogs/n...-black-lagoon-refurbished-by-stumblor-pinball). It looks like all the mechs went to the plater and the screws went in the tumbler?
 
Last edited:
I've spent a couple of hours this afternoon pressing on with Alien Poker in 29 degree C temperatures. We're currently in a heat wave, but I know I don't have much time to prep and paint the cab before winter. I'm desperate to get Alien Poker back working again - I keep wanting to buy a classic pin because I miss my existing classic so much 😭

Having ripped off the side rails, I'm now down to just a few staples (I've just bought a staple remover). Still have the backbox to strip, but at least I now can get the cab done (hopefully). I'm totally intimidated by this. I bought an orbital sander before I went on holiday, but haven't even unpacked it yet and I'm nervous about the gap filling process. Do I fill all the screw holes? Just some of them? Carpentry is not my strong suit... ♣️♠️♥️♦️

Alien Poker cab clear.jpg
 
Well done getting side rails off - those holes worth filling so when you tap in new screws they’re nice and tight. Wouldn’t worry about the others - the bigger wood screws fit back in the holes; if they’re spinning in there you could put the filler in later as needs be.

Looking good! 😎
 
I've spent a couple of hours this afternoon pressing on with Alien Poker in 29 degree C temperatures. We're currently in a heat wave, but I know I don't have much time to prep and paint the cab before winter.

😅 Yes know the feeling, it's pretty hot. Should be touching grass or jumping in the sea but gotta get it done.
 
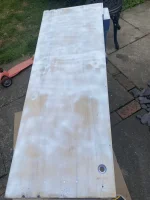
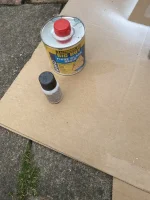
Okay. I’ve got a couple of days of busy-waiting for interviews and it’s a nice day, so the cab is currently sitting outside in my back garden. I’ve got a 125mm grit sandpaper attachment on the De Walt orbital sander, but it doesn’t seem to be doing a whole bunch (second picture is after sanding!).

So, is the idea of sanding to get the whole cab flat and smooth? Is it to take off all previous paint? Or is it to get the surface into a state where I can undercoat and see how many dents there are?

88F19032-BA40-413E-8247-D5BE12E3A7D2.jpeg

7D5FE1DC-12ED-4CD4-8893-92431A11EC3A.jpeg
 
Last edited:
YouTube video watching suggests I really go at the f****r. So, I’m now really going at the f****r with the P80 sanding disc that came with the orbital sander.

Not sure if I should remove the base and the wood supports stapled to the inside. The YouTube video did, but I’m not sure why…? It seems it’s okay to leave some residual paint, which is lucky because I’m not sure I can get paint from inside all the little nooks and crannies with reasonable effort.

70648DA5-D026-49EC-A002-2AA16DB5F995.jpeg
 
One side done (and my elderly neighbour popped out to complain about the noise)…

8167D89E-BB26-4C38-86E2-3D30068A31F2.jpeg

A couple of dodgy/flaking places that I might need to fix up with the fibreglass resin I bought.

A9A035E8-41DE-4963-AF15-D64A69F21344.jpeg
 
Please note, folks, that I have *no* idea what I’m doing here. I’m effectively the Monkey D. Luffy of pinball machines, driven forwards to an overly-ambitious goal by a mixture of eccentricity, optimism and blithe enthusiasm… (oh, and possessed of a silly hat)


“Oh, you know, I think I’ll just do a full restoration. Nope, never done anything like that before”…
 
I like to go 40 grit and then 80 grit to get everything off, then do any filling and resin-ing, then smooth that (and redo as necessary) with 120.

Then the fun part is 240 all the way up to 1000 (or 2000 if I am really getting in to the sanding vibe) for a perfect glassy finish before decalling. The added bonus is that your hands buzz for a few hours after from all the sanding.

If you are stencilling then you probably don't want to go above 600 or the paint will have nothing to key to and might dribble. Having said that I have stencilled wood that was sanded to 1000 without any problems.
 
For anyone who's following along (or comes upon this) for instructional purposes - for their own restoration - here is some advice on treating/preparing parts that have lost nickel coating, etc.:

 
And here I am with an update (and more questions).

I’ve done both sides and am working on sanding the back of the pin (which appears to be chipboard). I’ve also been using a mouse sander (pictured) to sand the plinth where the backbox sits on the cab, but I’m not making a great job.
  1. Is the back of the cab supposed to be chipboard?
  2. Do I need to get the plinth clear of paint? If so, do I have to remove the entire plinth? If not, how do I get into the nooks and crannies?
23745A73-FA40-4A67-A8C8-871B6973068B.jpeg
Socks, what socks?

38210647-1CEF-409F-9A09-04382C865C4B.jpeg
 
Now got to here. I’ve not got the box completely sanded as I’m worried about damaging it with the orbital sander. I’m probably going to give the mouse sander another go this afternoon, but there’s a limit to the extent I can get into the corners.

If I was any good at carpentry, I’d probably detach the plinth, but I’m not. Also, I’d still have to take the plinth apart to get into the corners :eek:

E7E09F7E-CDA6-46B8-BB16-1FFA019A0534.jpeg019D0D75-683F-42E4-B76D-94B935548B59.jpeg

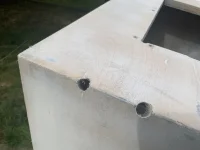
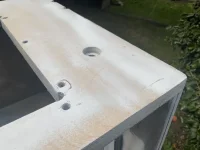
After a bit more sanding, it looks like this. Advice given to people on Pinside suggests that I don’t need to get all the paint off, so the next step is going to be filling with resin. There’s still some paint on the plinth, but it was *not* coming off with reasonable use of a mouse sander with P60 paper - at least, not without risking damaging the cab.

A901CC3B-D61C-4741-850C-01D3A140D1DE.jpeg
 
Use a sanding block or just do it by hand for the parts the mouse can't get in at
 
the plinth won’t come off easily. you don’t need to get all the paint off these anyway. just get it as smooth as you can. fill the dinks and holes
 
Might be worth investing in some battery operated tools for sanding. I use Makita myself but some will prefer DeWalt or Milwaukee, but there's nothing worse than getting tangled in those ****ing wires.
 
The weather changed in late September, meaning I couldn’t get the cab outside for spraying. After several months of not making much progress, partly due to kiddie illnesses, I’ve now got a UPS shipment booked for sending the Alien Poker legs, lockdown bar, backglass lift channel, and (new) side rails to Maldon Shot Blasting and Powder Coating.

ECB0AF90-4D5C-4E42-B49A-FDA1B4854B46.jpeg
It’s not just Alien Poker parts in the picture. I’m also sending some spare Stern backbox hinges, legs, lockdown bar and Godzilla side armour off, as well.

I’m powder coating the Alien Poker legs, lockdown bar, lift channel and side rails in Prismatic Powders Thunderkiss, which is probably going to cost about £230, so not something you do casually. I’m keeping the coin door as plain metal. Everything I’ve read suggests powder-coated coin doors can get chipped quite quickly due to ordinary wear opening the door.


I went for a silver chrome with rainbow metallic, as didn’t want it to look naff, but I also wanted to give it the intergalactic sparkly cheesy 80s retro disco feel I feel it deserves.

 
Back
Top Bottom