What's new
Pinball info

Register a free account today to become a member! Once signed in, you'll be able to participate on this site by adding your own topics and posts, as well as connect with other members through your own private inbox!

Afterglow 1.3 Board

Sure, flashing from the Arduino IDE should work just fine. I still need to find a volunteer to compile a binary of the configuration tool for Mac.
 
The 3D print looks fantastic in white. Looks pretty solid with the nuts in place as well. Are those standoffs under the machine screws on the left or black nylon lock nuts?
 
Basically it's just downloading the free GPL version of Qt Creator, opening the project file from the afterglow repository and compiling it. But I'm pretty sure that Murphy will play somehow into this...
I'll have a look into it, sick of trying to calibrate this 3d printer robot piece of s&^t anyway :)
 
I've nearly finished the MAC version of Afterglow Config. Need a bit more time on that, thanks @caponian for all your help. Steep learning curve having never used QT Creator nor compiled any software!

I have finished the design for the Afterglow PCB Holder. It's been uploaded to Thingiverse if you'd like to 3d print your own.
You will need 2 x 1/4" nuts, 2 x 3/4" No.8 (or 25mm M4) machine screws/bolts and 2 x No.8 nylon lock nuts (or M4 if using) for the adjustable feet.

Hope it helps someone out. If you don't have 3d printer capability and want one, send me a PM. £6 quid with the hardware plus postage to where ever you need it to go :) I'll order my super yacht now!
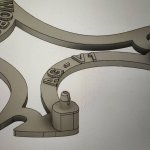
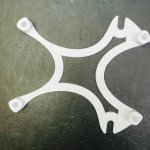
The picture below is a slightly older version, BEFORE the "PCB Nipples" were added to the right hand side. Nipples negate the need for 2 machine bolts and makes it easier to clip the PCB onto the frame.

Attach the PCB with 2 x 3/4" No.8 bolts on the front (left in pic) and snap on the back (right in pic). The bolts drop through PCB, through most of the frame and then need to be screwed through 3mm of the base of the frame. The bit that pokes out is then the leg.

Add the 2 nylon nuts on front (left in pic) for adjustable feet.

Pop a flat 1/4" nut on the existing hinge bolt at the back of the back box (keep the existing nut in place to hold your hinge!)

Slide board U shape between the existing nut and the new one you just popped on. Tighten down with fingers.

Put front U section over front bolt. Tighten down with flat 1/4" nut.

No drilling, no tricky angles for screwing things and you can still use the backbox wing nut!

Screenshot 2021-01-16 at 14.11.47.png

Below you can see the newly designed "PCB Nipples", to hold the board on. The 20mm bolts are still needed on the left hand side, to both hold the board on AND act as adjustable legs when used with the nylon nut.

Afterglow_PCB_Holder_7.jpg

Below the board snapped onto the frame with Nipples.

Afterglow_PCB_Holder_8.jpg
 

Attachments

  • Afterglow_PCB_Holder_5.jpg
    Afterglow_PCB_Holder_5.jpg
    45.7 KB · Views: 6
  • Afterglow_PCB_Holder_6.jpg
    Afterglow_PCB_Holder_6.jpg
    97.2 KB · Views: 6
Last edited:
@biglouieuk I'm putting together the list below. For the 1/4" nuts do you know what the thread was? 1/4" -20, 1/4" -28, or 1/4" -32?

2 x 1/4" nuts
2 x 3/4" No.8 (or 25mm M4) machine screws/bolts
2 x No.8 nylon lock nuts (or M4 if using) for the adjustable feet
 
Thank you. I'm ordering through Digikey.ca and the list they provide is long so anything to help narrow things down helps! I would grab from the local hardware store normally but everything is locked down.

@biglouieuk Oh, BTW, check it out. In fancy orange! Tip is forthcoming!

IMG_20210122_154136.jpg
 
Last edited:
Looks amazing in orange dude! Nice work and appreciate the tip. Very kind of you.

IMG_20210122_205534_610.jpg

I popped second board into Hurricane this evening after making some new cables, I should have printed on green! Damn. 👍
 
I thought you might like that orange. Yours does look pretty wicked though. I would have been happy with white too. I just ordered 2 screws, 2 nuts, and 2 lock nuts online. $3 + $8 shipping. Ha ha! Stupid COVID.

You need to cut those cable ties flush. You'll end up tearing your arms and wrists open with those nasty barbs. Trust me. I'm an installer by trade. If you don't have flush cutters, then use regular cutters but shave off the barb with a razor knife. Your wrists will thank me.

Did you get the software running? That will be my next step once I get my AG installed again.
 
Back
Top Bottom