What's new
Pinball info

Register a free account today to become a member! Once signed in, you'll be able to participate on this site by adding your own topics and posts, as well as connect with other members through your own private inbox!

In Progress Addams Family

Got a little more done yesterday. First up surveyed the first pass with the chemical metal. Didnt look good. I was scraping the dregs out of the tub and there were a couple of spots that hadnt mixed properly. Cue me scraping it all off to start again!
img.photobucket.com_albums_v660_elrikos_Addams_20Family_2020133b969871061d382148918df29cd87690.jpg

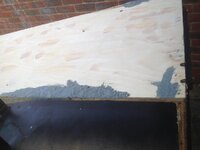
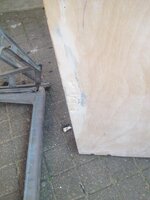
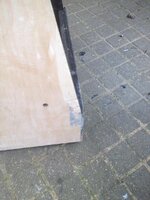
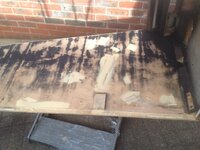
I used a different product this time. Called repair wood for good. Its a 2 part thing and having now bought it i'm pretty sure its very similar to P38 car body filler. The good news is that it sands easily! I filled and sanded the large chunks taken out of the cab side.
img.photobucket.com_albums_v660_elrikos_Addams_20Family_20201355fdadd0720c74cc04f71f6ea6606b6e.jpg
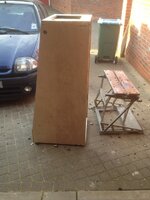
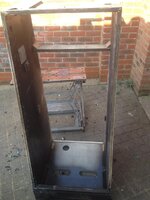
I removed all the decals from the cab using the scraper and the heat gun. I did buy a 4" scraper from screwfix to try to speed the process up a little but found that you couldnt heat that large a section of decal enough. I reverted to the 2" version which did the job admirably.
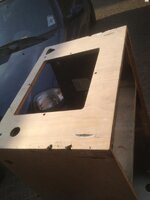
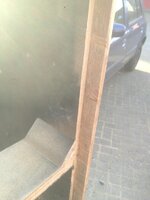
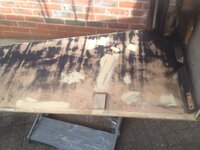
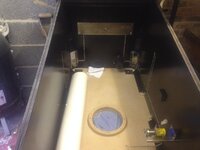
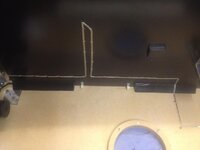
Here are the pics of where i'm up to. I've included a shot of the bottom of the cab shoing where i routed out the retaining strip. This will be replaced once the cab bottom is replaced.

img.photobucket.com_albums_v660_elrikos_Addams_20Family_2020134ed04f18626c00136b4cae08ae79be01.jpg
img.photobucket.com_albums_v660_elrikos_Addams_20Family_202013a492c219b01943fbe5df0500e988b29c.jpg
img.photobucket.com_albums_v660_elrikos_Addams_20Family_202013214e9e1395a52542cf81a9dbc9215f63.jpg
img.photobucket.com_albums_v660_elrikos_Addams_20Family_20201379ae7c54c88c89fd913fa3dffc391e6e.jpg
img.photobucket.com_albums_v660_elrikos_Addams_20Family_20201346538cfd20c084b8486b8d3d4544fbc3.jpg
img.photobucket.com_albums_v660_elrikos_Addams_20Family_2020137a5b3f5865bc5cdbd8c3a64ec9ffcc11.jpg


blimey,tough stuff to work with,they use it in work sometimes
 
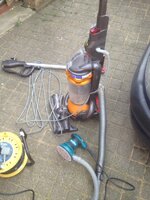
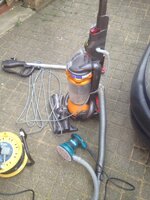
Bit more progress. I finally bit the bullet and picked up an electric da sander. Wish I'd done it before the Tom restore!! It's a fantastic piece of kit. Hooked up to the workshop vac (an old dyson) and no dust and it just are through the cab inside paint. Such a timesaver.
Been filling and sanding and I'm almost ready to varnish the cab in preparation for decals.
img.photobucket.com_albums_v660_elrikos_Addams_20Family_202013b19757d73880050cb3eaa5a72c291364.jpg
img.photobucket.com_albums_v660_elrikos_Addams_20Family_202013c4f40ea70b8f70abf73ede71ff3908c5.jpg
 
I suspect a Makita is out of my price range (don't suppose yours was a bargain?) but I'd been considering getting a random orbit sander for my pending cabinet restoration. Looks good!
 
You say that... Mine was £80 including delivery. Bo5031 model. There are cheaper ones but not many! The important bit is that it's a random orbital. The cheaper ones just vibrate and take forever. That's what put me off sanders before.
 
Looks good and Makita is excellent stuff. Still a bit pricey for me, however FERM do one for £30. I've got a FERM SDS drill and band saw, both of which have been excellent, so may give it a go.
 
If it does the job that's enough for me!
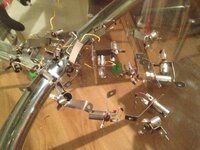
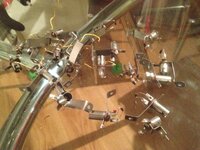
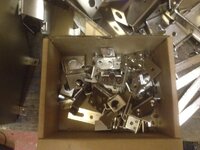
Little more progress this evening. You may see further up that I removed the corroded lamp holders to put them in the tumbler. They now look shiny
img.photobucket.com_albums_v660_elrikos_Addams_20Family_202013f3ecf863bf71e5a0e8f5fbb5c8483820.jpg

Which is the good news. The bad news is that it takes an utter age to solder them back on. 2 hours this evening and I managed 10!! Never again!! This may be less of an issue on a newer game but addams uses lots of individual lamp holders. Next time I'll use the dremel and a wire brush attachment to make them look a bit better. Live and learn though!
Looking good , I hear you about the time , I have not even looked at the lamp holders yet , I may do them one at a time , if I can be bothered , I just keep putting in off , it was bad enough re-soldering a few switches and lamps I had to remove from the ramps , kick out etc. you need the patience of a saint ! Drexel sounds like a good idea :clap:
 
I am going through the manual , and it tells me I should have 2opaque purple single rubber star posts , did yours have these and if so where do they go , it does not give the position of them in the book , thanks lee
 
A couple of observations...

1) chemical metal only good in 20deg heat

2) Soldering - did you use a large enough tip ? :cool:
 
I am going through the manual , and it tells me I should have 2opaque purple single rubber star posts , did yours have these and if so where do they go , it does not give the position of them in the book , thanks lee
I asked the same question and I think this part never happened on the delivered game and whilst I think they would suit the game, I can't think where only two would look the part.
 
Been banging my head against a wall for days on this! got the cab sanded nicely and painted with the same varnish i always use. Only problem was that the varnish didnt dry correctly so i was left with patches like chewing gum. That took a whole lot of sanding off!! Then decided that a decent primer was probably the way to go so i grabbed some cans of simoniz car primer. Went on one side beautifully but i worked out that it would be too expensive for the whole cab. I then bought some primer in a can. Applied with a roller. Looked great. came to sand and once again it looks like it hasnt dried correctly!
What does everyone else use to prime prior to decal application (if anything).

On a more positive note all the brackets etc have gone off to Bill for chrome plating. £60 for every bracket, support and doodad. I thought that seemed pretty reasonable. Should be back in a week (in Bills words so in reality, about 3 weeks!)
 
Finally something to report!! I felt i was banging my head against a wall with this one for ages!
The cabinet is almost finished. The amount of sanding and painting was ridiculous. A few pitfalls i fell into.
1) buy car primer in a spray can. Yes its more expensive than a tin from screwfix, but it actually works and you won't need to sand it all off!!!
2) electric sander makes the job so much easier.
3) when spending hours with a piece of MDF and a router making a new cabinet bottom, make sure you route the power switch hole on the correct side of the wood. You'll look like a right idiot if your final cut is wrong and you have to start again (DON'T ask how i know!!, i did wonder whether i could get away with mounting the switch box on the left of the machine!!).

Here's where i'm up to. I'm pretty pleased with the whole thing. One part i'm not that happy with is the cab decal. The front piece had a white section for the start button, problem is that the white piece is 3mm too big, meaning that there's a hole around the start button. Oh well!

img.photobucket.com_albums_v660_elrikos_Addams_20Family_20201352ea9d207216221681e5b9264e49ecc3.jpg

img.photobucket.com_albums_v660_elrikos_Addams_20Family_202013e554aa6e7b72b1cad5b83c9846f870e9.jpg

img.photobucket.com_albums_v660_elrikos_Addams_20Family_2020135761d297f2880d94da33ddd94c0fbc65.jpg


img.photobucket.com_albums_v660_elrikos_Addams_20Family_20201398c4c12f7d7821b125f4d7b7405015f7.jpg
 
Looking very very nice ,, Any news on when yr playfield is back from Henrik ?. its going to look so good when its all back together , if you don,t like the front decal , you can buy them seperately ! i know its more cost , but it depends on how much it is going to niggle you
 
Hi all,
long time no update! Thats mostly because not much has happened. I've been waiting on bill the polisher and Henrik to get things sorted. Henrik has just emailed to say my playfield is in the hands of DHL. Took about 6 months to get finished. Initial pictures look just brilliant. I'll update further when they arrive.
More orders from Phil and Andy Netherwood to get a few lingering parts ordered!
One bit i have been cracking on with is the backbox light board. It was the usual, stained and nasty.
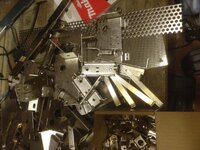
I pulled out all the lamp holders. The 455 blinkers sockets were corroded and nasty. For the sake of £1.30 each i'm replacing them.
I sanded down the wood front and back with the trusty makita (such a good purchase!).
For the front finish i decided that white primer would give a similar finish to stock. One can of simoniz white primer from eurocarparts.com cost me £4. It now looks as good as new. Just off out to the garage to get replacing all the parts.

I'm also working on the chair scoop. I don't like the bulbs sticking out the side of the chair. They look like a bit of an afterthought to me. I've pinched an idea from dreads in terms of lighting the scoop, but i'm looking to take it a little further by having a red and a yellow LED, linked to where the red and yellow lamps in the chair would have been, illuminating the scoop to indicate the shots. We shall see whether this idea works. If it does it's only cost me a couple of pounds from CPC. If not i shall certainly be going to Mr dreads for the standard scoop light. Also need to pick up the bookcase decal from him.

So, no pictures but hopefully lots of quick updates to come!! watch this space.
 
An update, finally with pictures!
I've been cracking on with the backbox. All finished now. Complete with the obligatory gold plated carriage bolts. I like the look of them
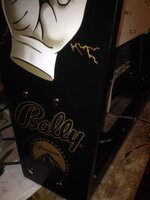
img.photobucket.com_albums_v660_elrikos_Addams_20Family_202013ce3abf11f088b96fe972d562449d1fed.jpg


img.photobucket.com_albums_v660_elrikos_Addams_20Family_20201331c783c5545f321e0f7d200025285f36.jpg

img.photobucket.com_albums_v660_elrikos_Addams_20Family_20201331c783c5545f321e0f7d200025285f36.jpg

And a present from Germany!!
img.photobucket.com_albums_v660_elrikos_Addams_20Family_202013c27c55ea071c6d223cb0ee589b8029ae.jpg

I was hoping for some more art, but heres what it looks like!
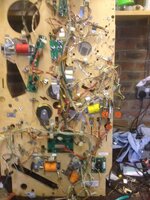
img.photobucket.com_albums_v660_elrikos_Addams_20Family_202013b8429a975d042d9b111d5a9681626ad0.jpg

OK, wrong side! I'll grab some pics of the pretty bit tomorrow! I've been working on transferring all the T nuts across. Each is getting a thorough clean before being refitted. Most of the posts are across too. The lamp loom is fitted and populated with #44's (can't get on with LED's im afraid!). I had labelled each lamp socket with a small cable tie with integrated label. Made it much easier to work out where each went! Only thing to bear in mind if cleaning the loom is that cillit bang is a fantastic cleaner for getting all the crap off the loom, however it does also remove permanent marker! Don't ask how i know.
This took up my afternoon.
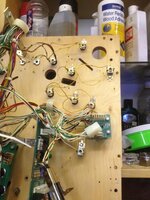
img.photobucket.com_albums_v660_elrikos_Addams_20Family_202013e35dd5d6b8fcff6f055e0e8468ead608.jpg
Resoldering each GI lamp socket. Would i do it again, probably not, though the sockets do look pretty spiffy!

Thing is lending a hand (couldn't resist!). New scoop fitted as the original had cracked where they all do. Someone had rewelded it, and done a fair job, but then sprayed it with zinc primer which makes it look a little messy! Does still work if anyone needs one.
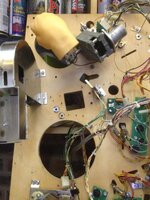
img.photobucket.com_albums_v660_elrikos_Addams_20Family_2020138c895e04a2eff68c9507b7530cdfb843.jpg

And a preview of the bottom of the playfield. It does look clean, though i say so myself. I took advantage of the website with coil wrappers and printed myself a load. The flipper coil text isnt the right size so i may be on the look out for the correct font.

I'll endeavour to take some before and after shots of the playfield. Overall i can say that Henrik has worked his magic again. One small spot that isnt perfect, but you'll never notice it and i'll never point it out!
So thats where we are. I need to buy some new targets. The ones i have are all worn, corroded and bent out of shape. I did contemplate refurbing them, however i then found out that some are the wrong colours also. that made my mind up. Phil or Andy will be seeing another order from me shortly.

One little teaser of something interesting to come. You'll have to squint to see it! I'll be learning a new skill to pull it off.
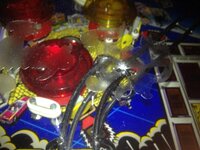
img.photobucket.com_albums_v660_elrikos_Addams_20Family_202013062fd9c6de753d5b28e1015444172a34.jpg
 
Last edited:
Hi there.
@Monkeyboypaul I did use the right URL. Edited as requested. All the rest of the wrappers are fine. Just the flipper ones the text is too small. I'll pm @Inkochnito and see what his thoughts are. For free I'm certainly very grateful!!
So, bit of an update. I've been pressing on. The underside of the pf is pretty much finished. I'm missing one doodad coil retaining plate but I'll see if Andy has one.
Topside is coming along. Bill Caulton has given my stainless ball rails a light polish. All done for £20. Bonus. Looks really nice! Here's some pics
http://smg.photobucket.com/user/elr...D-4B91-A8E7-0C3E9FBB609C_zps1qg9ptvt.jpg.html
http://smg.photobucket.com/user/elr...5-45B9-ACC2-D4FEBCFBFD86_zpspbq9pfja.jpg.html
http://smg.photobucket.com/user/elr...1-4BCC-954C-67A07F6F45B9_zpsrwjfpro9.jpg.html
http://smg.photobucket.com/user/elr...8-4F66-9BAA-AC677E522CE1_zps7gyuelun.jpg.html
 
Hi there.
Yes. Not to hand though. If you google bill Caulton his number should pop up. He now knows some common pinball part names so explaining what you need is easier!
Top man and great quality work, just not fast.
 
Bit more progress. I finally bit the bullet and picked up an electric da sander. Wish I'd done it before the Tom restore!! It's a fantastic piece of kit. Hooked up to the workshop vac (an old dyson) and no dust and it just are through the cab inside paint. Such a timesaver.
Been filling and sanding and I'm almost ready to varnish the cab in preparation for decals.
img.photobucket.com_albums_v660_elrikos_Addams_20Family_202013b19757d73880050cb3eaa5a72c291364.jpg
img.photobucket.com_albums_v660_elrikos_Addams_20Family_202013c4f40ea70b8f70abf73ede71ff3908c5.jpg
thats a good tip will have to remember that with the vacuum
 
Back
Top Bottom