What's new
Pinball info

Register a free account today to become a member! Once signed in, you'll be able to participate on this site by adding your own topics and posts, as well as connect with other members through your own private inbox!

In Progress Addams Family

elrikos

Registered
Joined
Jan 4, 2012
Messages
316
Location
Aylesbury
Hi All,
first things first. I haven't forgotten to update the theatre of magic shop log. I'm still waiting for the gold plated siderails to come back again. As soon as they are i will do the final "complete" update!.
So here's another one. An Addams. I picked this one up from Neil Fellender in Weston. Super chap. I intended to dash in and out in half an hour. I left 5 hours after i arrived!

Anyway here's the base machine. Neil said it came from Weston pier and had sat for some time. It is DIRTY!!
http://smg.photobucket.com/albums/v660/elrikos/Addams Family 2013/null_zps75045f0e.jpg
http://smg.photobucket.com/albums/v660/elrikos/Addams Family 2013/null_zpscb31e27a.jpg
http://smg.photobucket.com/albums/v660/elrikos/Addams Family 2013/null_zpsd014ed78.jpg
http://smg.photobucket.com/albums/v660/elrikos/Addams Family 2013/null_zps5c6a4b5d.jpg
http://smg.photobucket.com/albums/v660/elrikos/Addams Family 2013/null_zps3f86a4d9.jpg

Sooo first things first. I was getting a few error messages by the time i got it home and set up.
first was that the thing flips opto wasnt working. I dug into that a bit and found that the transmitter and reciever side of the opto pair was broken. Not only were the actual electronic components not functioning but the plastic supports were snapped. A new pair installed and away we went!

Next up, thing hand was complaining. In switch test i could see a fluttering opto. Oh dear!
So i disassembled the thing assembly and found the linkage from the motor was really sloppy and loose, causing the hand to flap about and miss the opto. I tightened everything up again and gave the opto's a good clean. Put back together and the problem went away!

Other than that everything works ok. I updated the ROMS to gold ones (you'll see why shortly!).

So the plan......I sent a few pictures to playfield restorers to get an idea of the costs to sort out the damage. All came back to me and said the costs would be high and the outcome uncertain. Based on this i started looking for a new playfield. Thought i'd come up trumps with a fully restored "as new" playfield from an american company who's name is similar to pirate booty inlet. It arrived and, although VERY nice, there are some repair techniques that i don't agree with. I'll be looking to sell it shortly if anyone has any interest in it.
I've since found an original playfield that will need some restoration. I'm working out the logistics of getting it from Leeds to Bucks. Then i think i'll try my hand at airbrushing.

The cab on this game has a large chunk knocked out of it. A quick trawl around the usual parts suppliers showed me that cab decals are not available. Luckily Darren on here helped me out and i have a set of gold cab decals.

Stay tuned and i'll post up what i'm up to. Don't expect anything fast though!
 
After reading your last lot on the ToM, I'm sure another great read is just around the corner. :)

Keep up the great work!
 
Good luck with the rebuild/restore, it's a bummer when parts are unavailable but a great buzz when you do eventually find them.

I'm looking forward to reading this thread!
 
Thanks for the positive comments. once i've got the addams working reliably it'll be time to strip it all down and get going. I've had an intermittent ground short on rows 4-6. Unplugging the opto board solved it so i've replaced and socketed U2 (LM339) and initial results look pretty promising.
 
When Neil says Weston pier, i don't ever remember there being a TAF on there (And i was local and visited most weekends in my youth). However I DO remember one that lived in "olympia" arcade just down the road opposite the pier. I went in one day and played it a LOT, went back 3 days later and the owner told me he had sold it, and it was out the back. I was gutted - someone had beaten me to it!!!!!
 
Hi All,
first things first. I haven't forgotten to update the theatre of magic shop log. I'm still waiting for the gold plated siderails to come back again. As soon as they are i will do the final "complete" update!.
So here's another one. An Addams. I picked this one up from Neil Fellender in Weston. Super chap. I intended to dash in and out in half an hour. I left 5 hours after i arrived!

Anyway here's the base machine. Neil said it came from Weston pier and had sat for some time. It is DIRTY!!
http://smg.photobucket.com/albums/v660/elrikos/Addams Family 2013/null_zps75045f0e.jpg
http://smg.photobucket.com/albums/v660/elrikos/Addams Family 2013/null_zpscb31e27a.jpg
http://smg.photobucket.com/albums/v660/elrikos/Addams Family 2013/null_zpsd014ed78.jpg
http://smg.photobucket.com/albums/v660/elrikos/Addams Family 2013/null_zps5c6a4b5d.jpg
http://smg.photobucket.com/albums/v660/elrikos/Addams Family 2013/null_zps3f86a4d9.jpg

Sooo first things first. I was getting a few error messages by the time i got it home and set up.
first was that the thing flips opto wasnt working. I dug into that a bit and found that the transmitter and reciever side of the opto pair was broken. Not only were the actual electronic components not functioning but the plastic supports were snapped. A new pair installed and away we went!

Next up, thing hand was complaining. In switch test i could see a fluttering opto. Oh dear!
So i disassembled the thing assembly and found the linkage from the motor was really sloppy and loose, causing the hand to flap about and miss the opto. I tightened everything up again and gave the opto's a good clean. Put back together and the problem went away!

Other than that everything works ok. I updated the ROMS to gold ones (you'll see why shortly!).

So the plan......I sent a few pictures to playfield restorers to get an idea of the costs to sort out the damage. All came back to me and said the costs would be high and the outcome uncertain. Based on this i started looking for a new playfield. Thought i'd come up trumps with a fully restored "as new" playfield from an american company who's name is similar to pirate booty inlet. It arrived and, although VERY nice, there are some repair techniques that i don't agree with. I'll be looking to sell it shortly if anyone has any interest in it.
I've since found an original playfield that will need some restoration. I'm working out the logistics of getting it from Leeds to Bucks. Then i think i'll try my hand at airbrushing.

The cab on this game has a large chunk knocked out of it. A quick trawl around the usual parts suppliers showed me that cab decals are not available. Luckily Darren on here helped me out and i have a set of gold cab decals.

Stay tuned and i'll post up what i'm up to. Don't expect anything fast though!
waiting for the next up date . Also i might be interested in the playfield you got from the US, let me know how much , details of it etc.
I have just got TAF , and it has developed a couple of problems , so i might rack your brains if you don,t mind
Regards Lee
 
Hi all,
sorry i've been rubbish at updating this! a little has happened over the past 2 months so i'll do my best to fill you all in.

1) Playfield. I bought paint, frisket and an airbrush before remembering that i am hopeless at any kind of art. Cue me ebaying the paint. Airbrush and frisket will still be used for a few things! I found a better playfield from a forum member which is now on its way to Henrik. Hopefully i can convince him to do a photo log of how he's getting on with it. The treasure cove playfield went to @RetroRepair and will be part of his project. I'm looking forward to seeing how he gets on.

2) Plastic set. Got lucky here. I managed to find a brand new set at illinois pinball. Postage was set to be insane ($150 on a $150 part!) but Pam at Pinbits stepped in and helped me out by remailing it for me with some parts from her. They've arrived and look great (incidentally the pinbits trunk eddy board for TOM is a total must buy. Much more sensitive and reliable than the original). Not sure if you've seen on pinside but it looks as though IPB is no more. Got in just in time!

3) Started stripping the playfield down. It is HORRIBLE! All three scoops have been repaired (pretty well i have to say but still, not what i was after). I've ordered replacements along with all sorts of other bits. All corroded parts are going through my tumbler. Hopefully it'll bring them back.

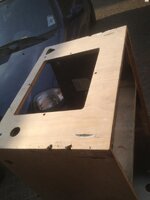
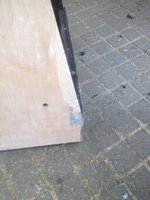
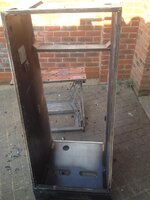
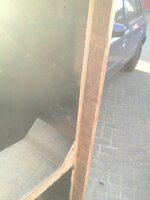
4) Cabinet. Not good! It had a huge chunk taken out of the side. Thats fillable. The worst part is the bowed out bottom panel. It took some head scratching and tril and error before i came up with what i hope was the plan. First off is important to note that the bottom panel sits is a slot routed out of the sides. I thought (wrongly!) that the best solution here would be to break one corner of the cab open to release the base. It popped nice and easily but didnt help much in getting the bottom out. Note to those who follow me. Don't do that!! Step 2 was to take the trusty router and remove the bottom part of the lip. that allowed the cab bottom to come out. I repaired the damage to the corner with gorilla glue and the nail gun and tidied up the sides of the cab to accept a new base.
Base came courtesy of homebase and their 15mm MDF. They cut a piece to size for me. 1285mmx535mm. It took a half board which cost £18. I have enough spare to make another base if i need it. Routed out the speaker and power switch holes. Speaker hole enlarged to take an 8" woofer rather than the standard 6 1/2".

5) Harnesses. Begun to clean these. They are filthy black. My dishwasher method is not an option for me due to the demise of said dishwasher (for reasons that i hope are unconnected to the previous washing of wiring harnesses in it! I chose cillit bang grease remover and hanging the harnesses over the bath. Takes a bit of scrubbing but they are starting to look ok. A few connectors are crispy so i've ordered replacements from RS.

6) Plating. I'm using Bill Caulton again on this project. All the metalwork is dull and corroded so its being loaded into a bucket and sent to him for chrome dipping. No polish but it'll make the parts look better.
Coindoor, siderails and lockbar and going to be done in gold as per the TOM.


Right, thats all up to date! I promise to post more often and add pictures and better descriptions of what i'm up to.
 
@Paul i think you're right. When i upended the cab there was a piece of parcel tape attached saying that it belonged to an amusement company in Weymouth. I'll find out the name when i head out to the garage.
 
Little more done this evening. When cleaning the cabinet harness i noticed that the J101 connector was a little brown. I've ordered replacement trifurcon pins from RS as well as the connector itself. I spent some of the evening replacing the header pins on the driver board. As well as the J101 i replaced the GI header( J120 and 121) and GI secondary (J115) as a matter of course. Incidentally does anyone know what game williams upgraded J115 to a black trifurcon connector? My addams has the standard white connector, whereas my TZ has the heavier duty black one.
Anyway no pictures as not much to photograph!
 
http://www.wedelivertheworld.co.uk/tracking/tracker-page.php?awb=15505796017859P

its on its way. Currently near Stuttgart. I guess itll probably arrive on Monday. For future info for others. Cost to send was £15 plus insurance which knocked it up to £27. I found the perfect thing to package the PF well was a bicycle box. I grabbed one for free from Halfords. Just hte cardboard box that new bikes are delivered to the store in. The interesting thing is that it appears that the only way to get anything like a sensible postage quote is for the box to be no bigger than 120x68x23. If you increase the 68 or 23 by 1cm the price increases to £68 and if you increase the 120cm to 121cm the price goes to £160!!!
My box was 130cm long so cue some fun with a saw and some old coil wire to stitch the box back together!!!
 
So, playfield has arrived with Henrik. Just waiting on update 1 from him as to what the plan is.
I managed to get a few hours in this afternoon. Mostly spent cleaning plastic parts at the sink. Did i mention that this game is bloody filthy!! Anyway, all the pop bumpers are now clean. |Te skirts are all chipped so they went in the bin but bodies and bases are staying original. I also managed to transfer the switch harness over from the old swamp scoop to the shiny new one. That was a fun bit! The first time i've actually put something back together and it is the first part of the game that is actually finished!

Had a head scratcher trying to locate some of the triangle section furrings that support the cab base. The old ones got broken when i was removing the old base. I ended up at my local Jewsons who happen to have a timber mill. £9.50 later and i hope to collect 4 metres of the stuff tomorrow. I call that decent value!

I've counted up all the nasty old coils i have on the game and pinged a message to @RudeDogg1 so hopefully he can supply me some of his top notch coil wrappers.

The pile for Bill the plater is getting big. Worryingly and expensively big!
 
Be well worth it for ya in the end,never realised how good TAF's were until I played one a lot more - especially like the TILT sound - brilliant
 
little more done today. Managed to get one side of the cab decals removed. I have previously just pulled at the vinyl which has pulled the grain on the wood up. This time i used a heat gun as recommended by others. Worked really well. It still left some white residue which needed a bloody good sanding but i hardly had to fill any grain in! I started on repairing the massive hole in the cab. Looks like the cab was sat on the floor and moived sideways as a large section of the plywood delaminated and was removed. I used my trusty chemical metal to start the repair. Its hardening now. Photos of this to follow tomorrow.

I spent the evening trying to sort the lamp loom out. The lamp holders all look horrible. Corroded, dull and some are a little rusty. No good! I expermented with putting lamp holders in my tumbler and got some excellent results. This evening was spent carefully removing all the lamp holders from the lamp loom. I used cable ties with an attached label to label each wire. Then up to the bathroom and attacked the loom with clillit bang kitchen. It works brilliantly, but a little too well as it removed the permanent marker labels from the cable ties! i managed to salvage the situation and each wire now has 2 labels, 1 pre cilliting and 1 post! What a pain! The lamp holders are now whirring around the tumbler. I'm going to replace all the 1n4004 diodes when i reassemble as they look a little past their best.

img.photobucket.com_albums_v660_elrikos_Addams_20Family_202013537ce06f2f1405f0f9063e239aa20641.jpg
img.photobucket.com_albums_v660_elrikos_Addams_20Family_202013be8ed4079a4416a0875318078970004a.jpg


In other news i managed to find a cheap source of semi tubular rivets. Theyve been mentioned here before. Sapphire products. www.sapphireproducts.co.uk . They are supplying me with a variety of length rivets at a very reasonable price. Ideal!

Next up nyloc nuts. I don't reuse these as they aren't designed to be reused. Also they are cheap! I use www.modelfixings.co.uk. 70p for 10 stainless ones. We use no 6 (6/32" UNC), No 8 (8/32" UNC) and No 10 (10/32 UNF) in pins. The postage is very reasonable from these guys and the service is fast

Not much more to update so far!
 
Wish I could take full credit but I found the link here. I've searched but can't find it now so can't properly credit whoever it was the really found it! I'm expecting my delivery sometime next week.
 
I'm gonna mail them and see if they do the presses for the rivets that they sell :) hope so :)
 
i'd be tempted to call them. An email went unanswered and they needed "reminding" about my enquiry by phone. All sorted nicely but they seem pretty busy.
The setting tools do seem tricky to find. I had the husband of a friend make a set. Stupidly easy to do for someone with a lathe. Took him less than 2 mins to do both. Unfortunately there have been some marriage issues so further sets arent possible. I've looked on ebay and there are similar looking tools for tubular rivets that sell for less than £10 from China. May be worth a punt to see if they do the job?
 
The hammer ones are useless and stand more chance of wrecking the ramp itself. I'll give them a call later... :) Cheers elrikos :)
 
Have to confess i have cracked a ramp with one once! If you have any joy do let me know.
Cheers
Rich
 
Rich , have you still got the old playfield that came with the TAF, I'm going to attempt a playfield touch up and clear coat , but I want another playfield to hone my skills on ! :rolleyes:, or shall I put it a different way , if I get another one , I will have 2chances !
 
Hi Lee,
i do. I'm going to need it for a few weeks (not stripping everything off it until i get the restored on back from Henrik). Was going to pop it on eBay afterwards. Shoot me a PM and we'll see if we can work something out.
 
Got a little more done yesterday. First up surveyed the first pass with the chemical metal. Didnt look good. I was scraping the dregs out of the tub and there were a couple of spots that hadnt mixed properly. Cue me scraping it all off to start again!
img.photobucket.com_albums_v660_elrikos_Addams_20Family_2020133b969871061d382148918df29cd87690.jpg

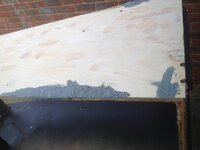
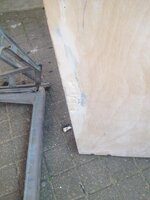
I used a different product this time. Called repair wood for good. Its a 2 part thing and having now bought it i'm pretty sure its very similar to P38 car body filler. The good news is that it sands easily! I filled and sanded the large chunks taken out of the cab side.
img.photobucket.com_albums_v660_elrikos_Addams_20Family_20201355fdadd0720c74cc04f71f6ea6606b6e.jpg
I removed all the decals from the cab using the scraper and the heat gun. I did buy a 4" scraper from screwfix to try to speed the process up a little but found that you couldnt heat that large a section of decal enough. I reverted to the 2" version which did the job admirably.
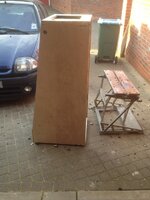
Here are the pics of where i'm up to. I've included a shot of the bottom of the cab shoing where i routed out the retaining strip. This will be replaced once the cab bottom is replaced.

img.photobucket.com_albums_v660_elrikos_Addams_20Family_2020134ed04f18626c00136b4cae08ae79be01.jpg
img.photobucket.com_albums_v660_elrikos_Addams_20Family_202013a492c219b01943fbe5df0500e988b29c.jpg
img.photobucket.com_albums_v660_elrikos_Addams_20Family_202013214e9e1395a52542cf81a9dbc9215f63.jpg
img.photobucket.com_albums_v660_elrikos_Addams_20Family_20201379ae7c54c88c89fd913fa3dffc391e6e.jpg
img.photobucket.com_albums_v660_elrikos_Addams_20Family_20201346538cfd20c084b8486b8d3d4544fbc3.jpg
img.photobucket.com_albums_v660_elrikos_Addams_20Family_2020137a5b3f5865bc5cdbd8c3a64ec9ffcc11.jpg
 
Just wondering why you are using chemical metal and nod a two part wood filler ?
 
Just started with chemical metal as it was the hardest stuff i could find. i usually use it for around legs so i know it wont break when pressure is applied. Having said that it is a sod to sand and the new stuff seems just as hard!

@RudeDogg1 My plan is to drop the new bottom in, then cut thin strips of 6mm ply to replace the lip. This will all be filled, sanded and painted so hopefully invisible (either that or i've screwed it up badly!)
 
I started with chemical metal, and ended up with Two part wood filler. Chemical metal was too difficult to work with and took too long to cure.
 
Back
Top Bottom