If I can finish it in time and get permission from the management I'll see if I can squeeze it in with VECTOR for 8bitflipYou have to bring this to one of the shows to let everyone drool over how good she looks.
Pinball info
You are using an out of date browser. It may not display this or other websites correctly.
You should upgrade or use an alternative browser.
You should upgrade or use an alternative browser.
In Progress 1983 Bally GOLD BALL - Further Adventures in Budget Restoration
- Thread starter Nedreud
- Start date
That would be awesome.If I can finish it in time and get permission from the management I'll see if I can squeeze it in with VECTOR for 8bitflip
Pressure is on to get the machine playing - you'll need a Gold Ball. I saw this over on pinside about polishing a bronze bearing for the job which I thought may appeal. I love the way they talk about 'popping to your local bearing store' - I'm sure there's one between Greggs and the Pound Shop  Saying that on my machine the Gold Ball hardly looks any different when it emerges.
https://pinside.com/pinball/forum/topic/the-gold-ball
https://pinside.com/pinball/forum/topic/the-gold-ball
Thanks, @astyy. I'd read that article comparing the gold balls that are actually plated with real gold. Bit insane. A bronze bearing is an interesting idea but I'd agree with the last post that it will tarnish quickly, especially in GOLD BALL as it makes such an infrequent appearance (if it was a regular ball in constant play would probably stay shinier).
I'll think one of those gold balls from Pinball Center EU will do the trick. If you're still interested we can do an order together to save postage and then meet up at Special When Lit, maybe on a regular Friday night?
I'll think one of those gold balls from Pinball Center EU will do the trick. If you're still interested we can do an order together to save postage and then meet up at Special When Lit, maybe on a regular Friday night?
I'm not sure they look similar to what I have and I'm a bit put off by this comment below as Gold Ball has (well soon!) a metal plate over the targets. Next we meet I'll bring it to show you.
"The balls are not suitable for pinball machines with e.g. metal plates over the target banks (see GoldenEye). If the ball rebounds with great force against a metal edge, the surface might be damaged."
"The balls are not suitable for pinball machines with e.g. metal plates over the target banks (see GoldenEye). If the ball rebounds with great force against a metal edge, the surface might be damaged."
Yeah, I noticed that too @astyy. I'm going to take the chance because (a) any other gold ball is just prohibitively expensive (real gold and from the US), (b) it isn't the main ball in the game and (c) I'm going to make us a crafty protector plastic that sits underneath the metal plate but is just slightly larger so when it does get hit by a ball most, if not all, of the force will be against a plastic edge and not metal 
FIRST RULE OF PINBALL CLUB:
Never assume the list of rubbers in the manual is correct either in terms of numbers, sizes or part codes.
For f***'s sake... Small order for more white rings heading your way soon @pinballmania.
Never assume the list of rubbers in the manual is correct either in terms of numbers, sizes or part codes.
For f***'s sake...
In my limited experience the manuals have always been wrong when it comes to rubbers.FIRST RULE OF PINBALL CLUB:
Never assume the list of rubbers in the manual is correct either in terms of numbers, sizes or part codes.
For f***'s sake...Small order for more white rings heading your way soon @pinballmania.
Yeah, I should have known better. And GOLD BALL is the worst Bally manual I've read. Errors in the schematics, wrong part values. It's terrible. I now know there are several sizes missing from the rubbers listIn my limited experience the manuals have always been wrong when it comes to rubbers.
Small order for more white rings heading your way
What are you missing? I have some spares from my last order - mainly the small post rings. It took me a couple of orders to get it right.
Thanks, @astyy. I'm good. I remembered I had a full rubber set from VECTOR and had some nearly-new from PARAGON so snagged a few from there. Half of it was my fault as I wrongly ordered four 1-1/4" white rubber rings instead of 1-1/2". The slightly smaller ones fit but are a bit snug! I've got some on order now.
March 2015
RE-POPULATING THE PLAYFIELD PT.5
Nearly half way through another month and I've made almost bugger all progress with GOLD BALL. Chances of it getting to 8bitflip are very slim.
Polished and fitted the two small bell-posts to the left inlane plastic. Neither of them was is good shape and to be honest, they're on the limit of acceptability after being polished! May have to source some new ones. Still, better than before:
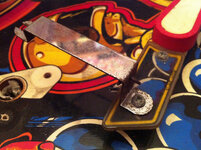
The inlane gate and wire polished up a treat, very pleased with that. I need to sort through the remaining star posts and find the odd one out. It's medium height, between the short and tall, and supports the other side of the gate:
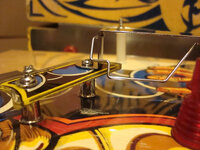
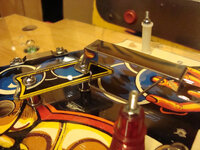
Next, it was time to start working on the upper-left corner of the playfield by fitting star posts and rubbers:
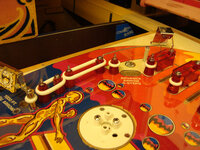
I realised I'd incorrectly fitted a ring to the upper post of the left-most rollover lane guard. This should have had another star post next to it with a ring stretched around both:
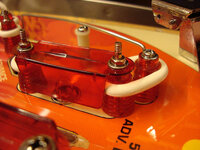
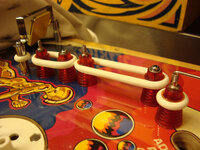
And I also fitted the wire rail:
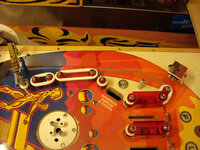
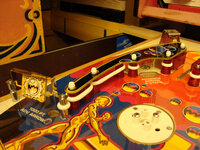
Then it was time to fit the plastic! Really beginning to look like a pinball machine now
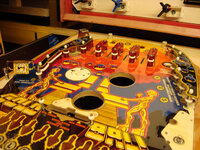
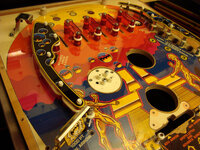
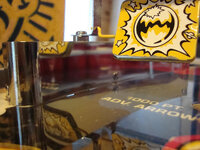
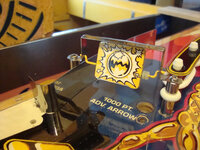
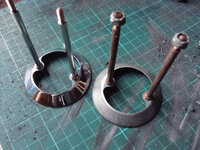
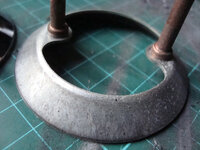
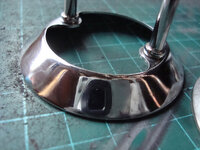
And the final piece for this installment, the mirror polished wall to the left of the spinner. This was quite badly rusted on the front curve and although it's still quite dimpled it's cleaned up quite nice.
Before:
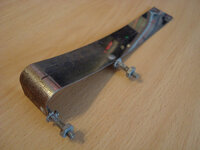
After:
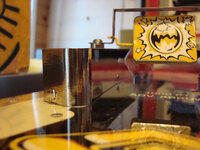
RE-POPULATING THE PLAYFIELD PT.5
Nearly half way through another month and I've made almost bugger all progress with GOLD BALL. Chances of it getting to 8bitflip are very slim.
Polished and fitted the two small bell-posts to the left inlane plastic. Neither of them was is good shape and to be honest, they're on the limit of acceptability after being polished! May have to source some new ones. Still, better than before:

The inlane gate and wire polished up a treat, very pleased with that. I need to sort through the remaining star posts and find the odd one out. It's medium height, between the short and tall, and supports the other side of the gate:


Next, it was time to start working on the upper-left corner of the playfield by fitting star posts and rubbers:

I realised I'd incorrectly fitted a ring to the upper post of the left-most rollover lane guard. This should have had another star post next to it with a ring stretched around both:


And I also fitted the wire rail:

Then it was time to fit the plastic! Really beginning to look like a pinball machine now


And the final piece for this installment, the mirror polished wall to the left of the spinner. This was quite badly rusted on the front curve and although it's still quite dimpled it's cleaned up quite nice.
Before:

After:


Last edited:
March 2015
ULTRASONIC CLEANING POP BUMPER BODIES
Today I managed to clean and refit the white plastic pop bumper baseplates to the playfield, so next I turned my attention to the bodies.
The skirts are really grotty and made of that slightly transparent white plastic which I don't like so I've decided to ditch them and fit the nice milky white ones I bought for PARAGON.
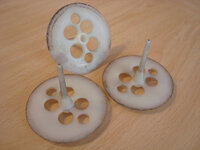
But the bodies were super-grot so I had nothing to lose by dropping them into the ultrasonic cleaner with a mix of bleach, Viakal and and bathroom cleaner!
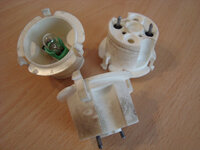
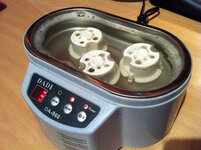
20 minutes later and a little scrub in the corners with a soft brush they look much better!
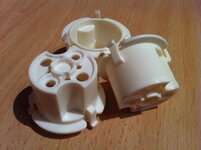
ULTRASONIC CLEANING POP BUMPER BODIES
Today I managed to clean and refit the white plastic pop bumper baseplates to the playfield, so next I turned my attention to the bodies.
The skirts are really grotty and made of that slightly transparent white plastic which I don't like so I've decided to ditch them and fit the nice milky white ones I bought for PARAGON.

But the bodies were super-grot so I had nothing to lose by dropping them into the ultrasonic cleaner with a mix of bleach, Viakal and and bathroom cleaner!


20 minutes later and a little scrub in the corners with a soft brush they look much better!

Last edited:
Hi, Peter,
I don't mean to upset, but will those bodies be suitable for Paragon?. Between building Paragon and GoldBall, Bally introduced a new type of bumper (it actually came out with Eight Ball Deluxe).
You can tell I'm not properly awake yet - I didn't take in that it was the skirts that you'd bought for Paragon.
Last edited:
They weren't too shabby to start with but all three have one of the three clips that hold the printed centre onto the flat ring missing. They still seem to stay clipped on just fine but someone had used Sellotape to hold them on which had dried up and fallen off leaving crusty white adhesive. So, I tried some of my new GOO GONE which @Hiro996 recently acquired for me. I was a bit worried about the plastic and screen printing so proceeded very cautiously but it was fine. All the goo has, well... gone!
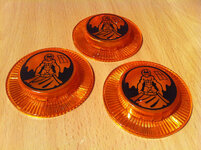

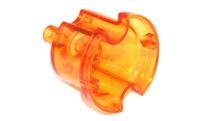
The bodies pictured are from GOLD BALL and I'll be refitting them. You're right, they are different from PARAGON, which uses the old EM-style bodies that are flared:Hi, Peter,
I don't mean to upset, but will those bodies be suitable for Paragon?. Between building Paragon and GoldBall, Bally introduced a new type of bumper (it actually came out with Eight Ball Deluxe).
You can tell I'm not properly awake yet - I didn't take in that it was the skirts that you'd bought for Paragon.
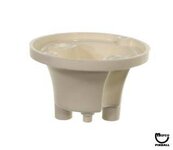
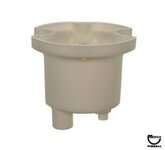
Most other pins use this style:
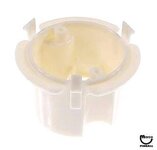
But the later 80s pins including GOLD BALL use this style with little clips on the top:
And now I've woken up too and re-read your message and realised that you realised what I'd said about the skirts. DOH!
Exactly that @astyy. We've got the weirdo bumper bodies that weren't used on many games. I think the choices are white, white or white. Actually, it's worse than that as Marco list them as "cream" which is marketing cover for "this white plastic is so **** it isn't white so we'd better give it a warm, fuzzy name."
I didn't realise the orange bumper cap is two pieces. So is the removal procedure to pry off the printed centre first, then the flat ring off the three housing clips of the body? I'm sure these are going to be brittle so better I know for sure before wading in.
I don't like the sounds of cream plastic either get the old stuff off and into the bleach bath!
I don't like the sounds of cream plastic either get the old stuff off and into the bleach bath!
I didn't realise the orange bumper cap is two pieces. So is the removal procedure to pry off the printed centre first, then the flat ring off the three housing clips of the body? I'm sure these are going to be brittle so better I know for sure before wading in.
I don't like the sounds of cream plastic either get the old stuff off and into the bleach bath!
Yes, astyy, the decorated and unique to GoldBall centre part has a number of locating tangs holding it to the outer plastic ring, which in turn has three holes to accept the prongs from the bumper body. Gently push in the tangs, one of which can be seen in the photos (at the bottom of the central cap) to release it. Then the outer ring can be removed by pressing inwards on the prongs holding it down.
Just that @astyy. The orange cap is two pieces. The hot-stamped centre part is held on with 3 clips with each clip fitting into a hole in the ring. I have a broken clip on each of my caps. If you look on the side you'll notice a pair of slits where each clip is located. Gently press between the slits to bend the clip inwards to remove the caps.
The rings clip onto the top of the white bodies using the 3 body clips. The inside of the ring is notched so that it can be rotated so that the picture on the cap can be rotated into position.
The rings clip onto the top of the white bodies using the 3 body clips. The inside of the ring is notched so that it can be rotated so that the picture on the cap can be rotated into position.
March 2015
POP BUMPER REBUILD
I always like to know how something is supposed to go back together and what all the parts are so I found on the internet this very handy exploded diagram of A967-00053-000 THUMPER BUMPER ASSEMBLY from the BALLY / MIDWAY GENERAL PINBALL PARTS CATALOG 1986:
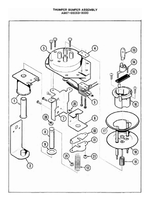
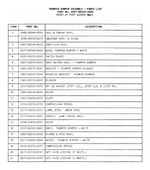
Having cleaned the plastic bodies and caps (see earlier posts) I moved on to the metal parts, namely the FLANGE & STUD ASSEMBLY (#17) and COMPRESSION SPRING (#19). These were polished with my trusty Dremel along with the pins on the LAMP SOCKET (#14).
Lamp wires were fed back up through the holes in the BASE (#3) and COMPRESSION SPRING (#19) placed in the centre:
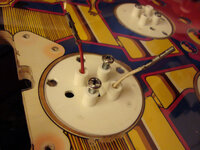
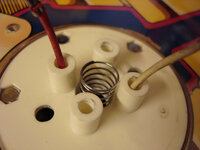
The LAMP SOCKET (#14) with new #555 LAMP (#13) was clipped back into the bottom of the BODY (#16) ensuring polished pins are protruding fully:
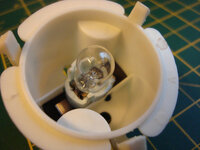
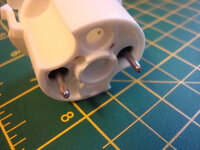
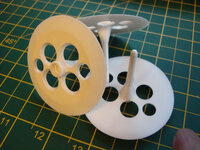
A brand new WHITE WAFER (#18) was placed on the BASE ensuring the two outer holes line up with holes in the BASE for the FLANGE & STUD ASSEMBLY:
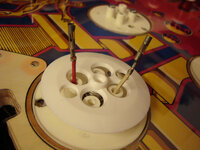
The FLANGE & STUD ASSEMBLY was then dropped down through the WAFER and BASE:
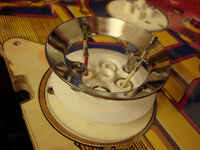
And the studs aligned with the holes in the holes in the PLATES (#10 and #11) that are on the end of the coil PLUNGER (#8):
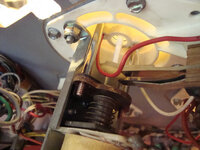
The two 6/32" LOCKING NUTS (#21) were fitted and tightened onto the ends of the studs. Back on the topside the red and white GI wires were reconnected to the LAMP SOCKET after slightly closing the connectors with pliers to ensure a tight fit and good electrical connection that won't work loose:
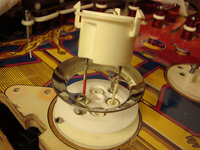
The BODY was then tightened down with two polished machine screws:
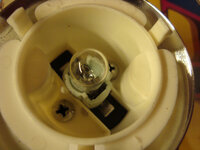
Effectively, we now have a working pop bumper!
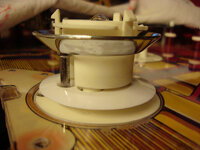
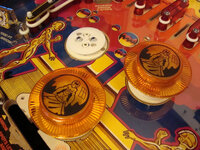
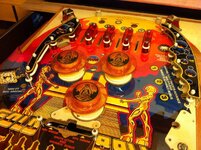
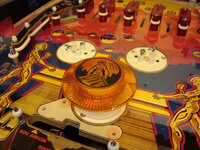
Final job was to fit the cap ring and printed cap:
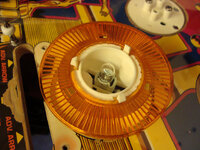
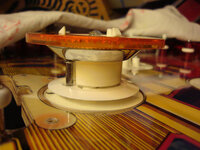
One finished pop bumper Two more to go... then all three will need the MAKE SWITCH ASSEMBLY (#5) cleaning and adjusting. I don't think it will be necessary to replace the plastic "spoon" that is part of the MAKE SWITCH ASSEMBLY as these pops all worked really well beforehand and I didn't noticed any wear in the spoons at all.
POP BUMPER REBUILD
I always like to know how something is supposed to go back together and what all the parts are so I found on the internet this very handy exploded diagram of A967-00053-000 THUMPER BUMPER ASSEMBLY from the BALLY / MIDWAY GENERAL PINBALL PARTS CATALOG 1986:


Having cleaned the plastic bodies and caps (see earlier posts) I moved on to the metal parts, namely the FLANGE & STUD ASSEMBLY (#17) and COMPRESSION SPRING (#19). These were polished with my trusty Dremel along with the pins on the LAMP SOCKET (#14).


Lamp wires were fed back up through the holes in the BASE (#3) and COMPRESSION SPRING (#19) placed in the centre:


The LAMP SOCKET (#14) with new #555 LAMP (#13) was clipped back into the bottom of the BODY (#16) ensuring polished pins are protruding fully:


A brand new WHITE WAFER (#18) was placed on the BASE ensuring the two outer holes line up with holes in the BASE for the FLANGE & STUD ASSEMBLY:


The FLANGE & STUD ASSEMBLY was then dropped down through the WAFER and BASE:

And the studs aligned with the holes in the holes in the PLATES (#10 and #11) that are on the end of the coil PLUNGER (#8):

The two 6/32" LOCKING NUTS (#21) were fitted and tightened onto the ends of the studs. Back on the topside the red and white GI wires were reconnected to the LAMP SOCKET after slightly closing the connectors with pliers to ensure a tight fit and good electrical connection that won't work loose:

The BODY was then tightened down with two polished machine screws:

Effectively, we now have a working pop bumper!

Final job was to fit the cap ring and printed cap:


One finished pop bumper

Nice work. You're edging ever closer to the Gold Ball target plate and cover! I was wondering if the Gold Ball bullet target couldn't be covered in Gold Leaf and then sealed in some way - that would be a cheap piece of real gold bling.
My neighbour with the CNC machine has finally found a small business unit so he's moving out of his home garage! He's a great bloke and said if I need a day working away from home for a change of scenery I can use his office. I'll get over there soon, help him set up a bit and then spend an evening with the CNC 
I was hoping it was brass. That would be an even cheaper piece of blingNice work. You're edging ever closer to the Gold Ball target plate and cover! I was wondering if the Gold Ball bullet target couldn't be covered in Gold Leaf and then sealed in some way - that would be a cheap piece of real gold bling.
PIN PORN ALERT! PIN PORN ALERT! PIN PORN ALERT!
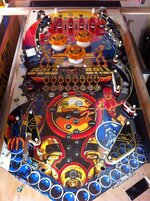
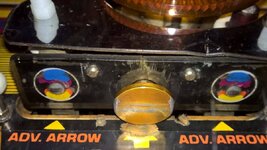
Got up at 7am this morning for some Sunday Morning Worship at The Altar of Pinball whilst the rest of the family slept in till 10am! Managed to finish off the right-hand mid-level lane (has the star rollover), the slingshots, apron clip, left-hand in/out-lane mini-post and spinner mini-post. Really beginning to look and feel like a pinball machine again Need to finish the left-hand walls and all the mechs that sit under the apron, then it's onto the under playfield stuff like flippers, rollover switches and stand-up targets. GB has 2 star rollovers, 7 wire rollover switches, 7 stand-up targets and 5 rebound switches but only a single active slingshot (right).

Got up at 7am this morning for some Sunday Morning Worship at The Altar of Pinball whilst the rest of the family slept in till 10am! Managed to finish off the right-hand mid-level lane (has the star rollover), the slingshots, apron clip, left-hand in/out-lane mini-post and spinner mini-post. Really beginning to look and feel like a pinball machine again
Last edited:

