Pinball info
You are using an out of date browser. It may not display this or other websites correctly.
You should upgrade or use an alternative browser.
You should upgrade or use an alternative browser.
Complete Twilight Zone, now minty
- Thread starter Happypin
- Start date
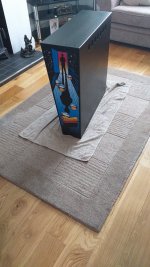
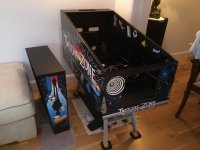
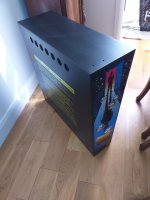
Enjoyed todays jobs, putting parts on the cabinet is very rewarding. While waiting for all the metal parts to return I will crack on with the mini playfield tomorrow as I have all the parts needed, I also have a few mods that I’m keen to share with you, T.Z owners may want to add to their machine.
Attachments
I’ve been wanting to do mine for years, it was Ant on here that kept encouraging me to go for it, so! I’m blaming Ant but at the same time thanking him for all his help and putting up with me messaging him on a daily basis.wow, now stop it please, making me want to do mine
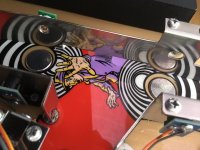
Today I worked on the mini playfield, supplied by Mirco and yes I know it has some text missing, now it’s together it doesn’t bother me as my T.Z has lots of things that are not original.
With everything off the mini playfield any items that fit in the tumbler went in for 2 days or was polished on my wheel.

Over the years I’ve added a few mods to this mini playfield.
1) camera mod
2) Twilight Zone lamp mod
3) Cliffy to protect the wood
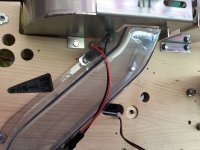
4) Col’s plastic that replaced the card that protects the cables.
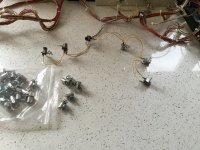
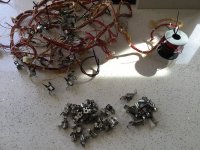
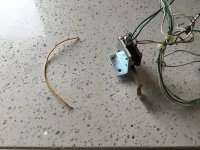
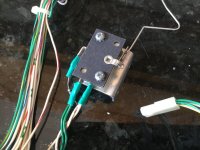
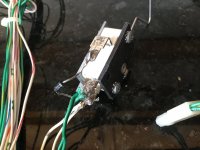
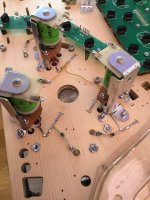
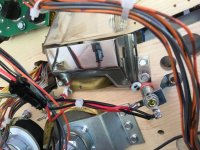
Two additional mods I‘m going to do is replace all the switches to the low level ones which comes with new brackets, the 2nd which I found on youtube is the red LEDs that flash when you flip to battle the power, for this mod I tapped into the 5v line that supplies the lamp, the positive goes to a reed switches which lays next to each magnet the other side goes to the LED, the negatives supplies both LEDs directly. I hope the photos are clear for you to see.


The new mini playfield indentations was spot on apart from the right magnet but the old one was slightly out from factory so identical error which was very simple to adjust to the original.
Job still to do is replace the opto’s which are on order. I couldn’t get the rivets back on the two plastics the metal brackets wouldn’t allow me to this so I’ve had to use screws which I will replace with something better later.


Really pleased with it so far, the new switches are definitely better than the originals and will score more points as they are more sensitive.
With everything off the mini playfield any items that fit in the tumbler went in for 2 days or was polished on my wheel.
Over the years I’ve added a few mods to this mini playfield.
1) camera mod
2) Twilight Zone lamp mod
3) Cliffy to protect the wood
4) Col’s plastic that replaced the card that protects the cables.
Two additional mods I‘m going to do is replace all the switches to the low level ones which comes with new brackets, the 2nd which I found on youtube is the red LEDs that flash when you flip to battle the power, for this mod I tapped into the 5v line that supplies the lamp, the positive goes to a reed switches which lays next to each magnet the other side goes to the LED, the negatives supplies both LEDs directly. I hope the photos are clear for you to see.
The new mini playfield indentations was spot on apart from the right magnet but the old one was slightly out from factory so identical error which was very simple to adjust to the original.
Job still to do is replace the opto’s which are on order. I couldn’t get the rivets back on the two plastics the metal brackets wouldn’t allow me to this so I’ve had to use screws which I will replace with something better later.
Really pleased with it so far, the new switches are definitely better than the originals and will score more points as they are more sensitive.
Last edited:
Your mini playfield looks tidy , great job!
Thank you. Waiting for metal from the platers so I can make a start on the main playfield.Your mini playfield looks tidy , great job!
Thanks mate, so many parts to this T.Z, just hope I’ve taken enough photos.Great job Alan, it's looking really minty mate.
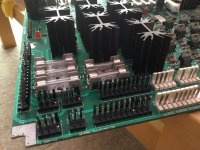
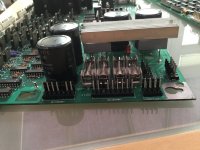
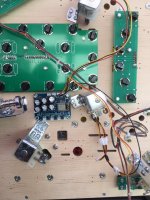
Today jobs was tidy up the boards.
2 years ago I replaced all the capacitors and the 2 rectifiers for longer leg type that helps with keeping them cooler.
All that was needed was clean the boards as gentle as I could and replaced the sockets that once had the wires soldered directly to the pins, my OCD I ended up changing more than was needed.
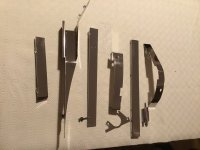
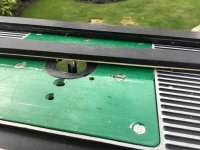
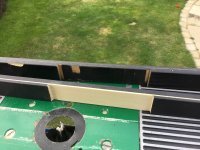
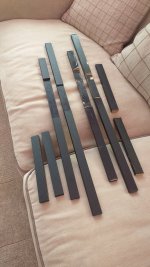
2nd job was cut and router the wooden side rails that I got from Pinball Life.
2 years ago I replaced all the capacitors and the 2 rectifiers for longer leg type that helps with keeping them cooler.
All that was needed was clean the boards as gentle as I could and replaced the sockets that once had the wires soldered directly to the pins, my OCD I ended up changing more than was needed.
2nd job was cut and router the wooden side rails that I got from Pinball Life.
Attachments

Today I replaced all the lamp sockets, black heat shrink for a bit of protection plus they look neater.
Also I’ve run cables up the harness ready where a 12v 5v board was before in the back box, this will supply the lollipop board which previously was connected to the G.I circuit.
Also I’ve run cables up the harness ready where a 12v 5v board was before in the back box, this will supply the lollipop board which previously was connected to the G.I circuit.
Attachments

As I’m still waiting for the platers and the powder coating to be completed I’m just sorting out a few odd jobs.
Thanks to Ant who sorted me out a load of labels and my sister in law, printed me the mini Playfield instructions with laminate which looks better than the original.
I also went over the switch harness and cleaned up any bad soldering, a short wire that was a mystery was identified in my photographs and fitted back.
Chemo is this Thursday so I’m not expecting to do anymore work on the T.Z for a few days after.
Attachments
Last edited:
Looking very nice, a lot of work goes into these. I found twighlight zone a joy to work on the engineering and the way it's designed is really impressive, the fact they put metal brackets on the end of the under playfield ramps and made it modular is great, fat better design and easier to work than sttng, but I suspect that was a cost saving exercise rather than a design problem.
I must say when you take a machine apart you really do appreciate the work and design that went into making these brilliant machines. Roll on the switch on.Looking very nice, a lot of work goes into these. I found twighlight zone a joy to work on the engineering and the way it's designed is really impressive, the fact they put metal brackets on the end of the under playfield ramps and made it modular is great, fat better design and easier to work than sttng, but I suspect that was a cost saving exercise rather than a design problem.
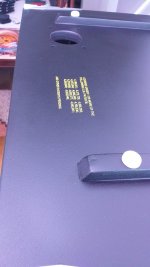
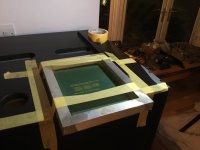
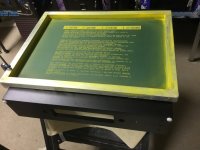
Love itManaged to get the screen printing done before my time out.
Thanks ScottLove it
This as you know has helped me so much keeping me focused on the positives of life, not sure about my conservatory turning into a workshop.

Better than a Kitchen mate.Thanks Scott
This as you know has helped me so much keeping me focused on the positives of life, not sure about my conservatory turning into a workshop.
Keep up the good work!
You did a good job there mate. Not as hard as you thought was it.Managed to get the screen printing done before my time out.
Thanks mate that means a lot, as you know you only get one chance to get it right. Nice to have the cabinets completed.You did a good job there mate. Not as hard as you thought was it.
Great job Alan looks fantastic … ant you better watch yourself this guys after your jobThanks mate that means a lot, as you know you only get one chance to get it right. Nice to have the cabinets completed.
 learning from the best Alan nice work
Thanks PaulGreat job Alan looks fantastic … ant you better watch yourself this guys after your job
Being watched from all angles, yes I’m trying to keep up with others that do this for a job. Happy so far.
Ive already mentioned to @Gonzo that your up for screen printing your TAF on camera when you get to that jobThanks mate that means a lot, as you know you only get one chance to get it right. Nice to have the cabinets completed.

He can have itGreat job Alan looks fantastic … ant you better watch yourself this guys after your job
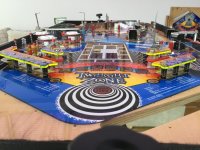
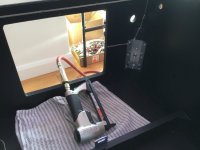
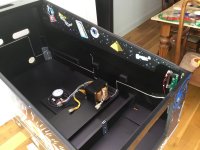
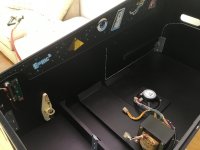
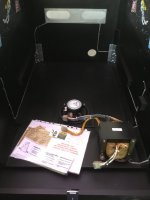
Added the 3rd magnet and the opto’s are in place, a chap on pinside sold the kit.
The piano scoop and slot machine I added lights sometime ago linked with the little lights under the clock, they look great and are more obvious when lit for those two shots to start the mode.
The lollipop mod that Stumblor makes has been reinstated in the new playfield linked to the slingshots that lights up 6 star posts when hit.
Attachments
Looks mint al fair play to youAdded the 3rd magnet and the opto’s are in place, a chap on pinside sold the kit.
The piano scoop and slot machine I added lights sometime ago linked with the little lights under the clock, they look great and are more obvious when lit for those two shots to start the mode.
The lollipop mod that Stumblor makes has been reinstated in the new playfield linked to the slingshots that lights up 6 star posts when hit.
I’m hoping for a very tidy clean mean machine when completed.Looks mint al fair play to you
don't need to hope pal with ants help it will be mintI’m hoping for a very tidy clean mean machine when completed.
