And I thought it was just me, backboard needed work on the arch insert, plastics near the thing box were all out. 3 hours I reckon to get it working and looking perfect. I won’t even mention the dimples.Looking good - I do not think I have ever had any pinball machine that had it's replacement playfield fit correctly ! Always something needs sanding or something.
Pinball info
You are using an out of date browser. It may not display this or other websites correctly.
You should upgrade or use an alternative browser.
You should upgrade or use an alternative browser.
In Progress The Addams family, teaching my brother pinball minty skills.
- Thread starter Happypin
- Start date
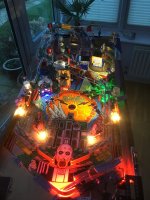
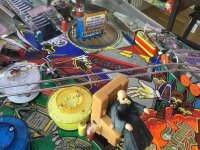
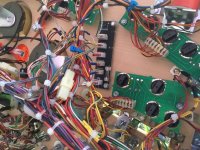
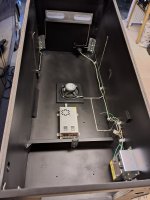
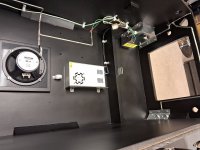
We finally got the playfield finished, plus all additional lights on the scoops, spot lights x4, trough lighting kit and the shooter lane.
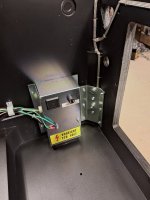
Thanks to Stumblor for treating me to his mod outlet board which I’ve used to plug in all my extra lights to brighten up the playfield, I have a separate 12v 5v board keeping any extras off the power driver board.
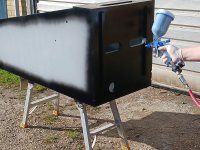
Roll on a warmer day so I can spray the cabinet.
Thanks to Stumblor for treating me to his mod outlet board which I’ve used to plug in all my extra lights to brighten up the playfield, I have a separate 12v 5v board keeping any extras off the power driver board.
Roll on a warmer day so I can spray the cabinet.
Attachments

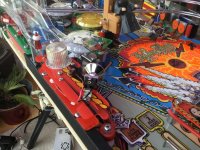
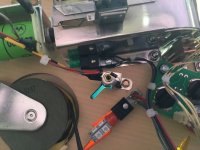

Another thing we did which I forgot to mention, I’ve done away with the inline magnet fuses, that’s a mod to save burnout if a magnet locks on. The single fuse that’s underneath the playfield I’ve replaced with four fuse holder 3 are wired to the magnets. Pinball life sell these fuse holders.
Attachments
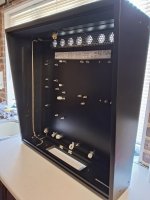
Still waiting for less wind and better temperatures so we can get the cabinet and transformer sprayed.
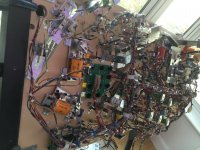
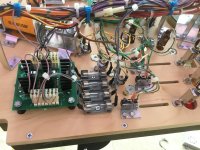
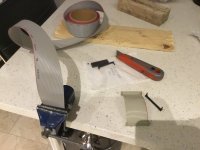
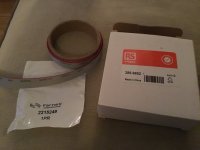
Today all that’s left was to make up some new ribbon cables, everything else is cleaned or new and waiting to go back into the cabinet.
Today all that’s left was to make up some new ribbon cables, everything else is cleaned or new and waiting to go back into the cabinet.
Attachments
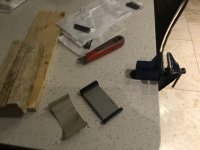
Hold on, the pitch of the cable is 1.27mm but the connector is dual row and those pins are 2.54mm.
This is caused by the connector taking each individual cable in the ribbon and alternating between the two rows in the connector. To achieve this, and not have a connector that didn't fit the ribbon, it needs to double the gap between pins, making the connector pitch 2.54mm.
I think I learnt something.
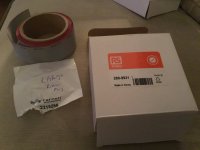
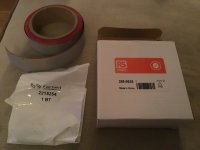
I can put the part numbers on here later for the plugs which I got a few weeks back ?Hold on, the pitch of the cable is 1.27mm but the connector is dual row and those pins are 2.54mm.
This is caused by the connector taking each individual cable in the ribbon and alternating between the two rows in the connector. To achieve this, and not have a connector that didn't fit the ribbon, it needs to double the gap between pins, making the connector pitch 2.54mm.
I think I learnt something.
I have already pulled the trigger on some but it is information worth sharing if you have the time.
I am building a test rig for WPC89 boards and being able to make up some cables quickly, to test solving an issue, felt like a good move.
I am building a test rig for WPC89 boards and being able to make up some cables quickly, to test solving an issue, felt like a good move.
Will post later.I have already pulled the trigger on some but it is information worth sharing if you have the time.
I am building a test rig for WPC89 boards and being able to make up some cables quickly, to test solving an issue, felt like a good move.
I got the cable from R.S a few years ago, Farnell I got the plugs a few weeks ago. Best to get both from Farnell I would say.Will post later.
Attachments
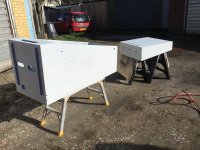
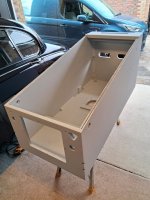
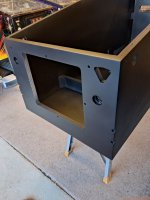
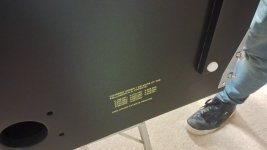
Been a long while getting the second primer on due to weather and treatment, today was the perfect day. Me and Alfie gave the cabinet a good sand down with more filler needed, the second coat was then applied. Of course more filler is needed to get it totally mint.
Next week, hopefully it will be ready for top coat.
Next week, hopefully it will be ready for top coat.
Attachments
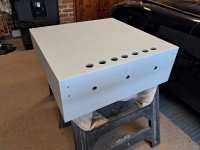
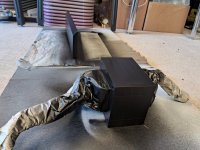
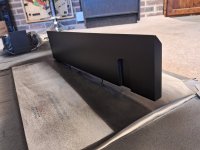
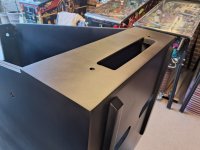
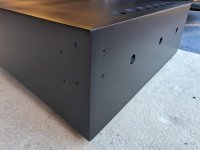
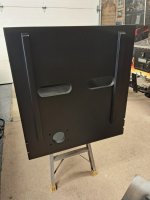
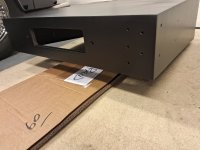
A very warm day, so me and Alfie got all the paintwork finished.
Screen printing is the next job.
Screen printing is the next job.
Attachments
-
 20240330_163947.jpg194.9 KB · Views: 36
 -
 20240330_164041.jpg163.7 KB · Views: 35
 -
 20240330_164059.jpg123.7 KB · Views: 32
 -
 20240330_164124.jpg117.6 KB · Views: 29
 -
 20240330_164150.jpg133.5 KB · Views: 32
 -
 20240330_164456.jpg77.6 KB · Views: 30
 -
 20240330_164205.jpg137.2 KB · Views: 31
 -
 20240330_164530.jpg141.9 KB · Views: 32
 -
 IMG-20240330-WA0000.jpg228.3 KB · Views: 34
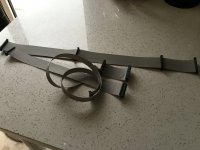
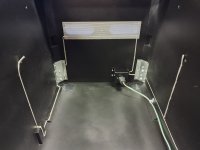
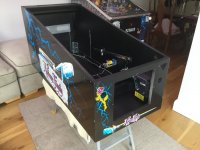
Today I ran the earth braiding. Fitted some lighter parts. Hopefully next week the screen printing will be done. Decals a few days after
Definitely the best part of the refurb, fitting parts back on that have been ready for months.
Definitely the best part of the refurb, fitting parts back on that have been ready for months.
Attachments
Last edited:
@Ant-H came over last night. We exchanged help on several jobs. Screen printing was professionally done by Ant.
I will now get the decals on next week, with help from my brother.
I will now get the decals on next week, with help from my brother.
Attachments
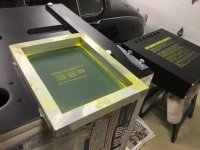
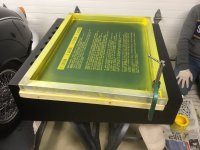
Watched videos of both Ant-H and Chris (HEP) do screen printing, and it looks like one of those jobs that appears so easy but in reality takes experience.@Ant-H came over last night. We exchanged help on several jobs. Screen printing was professionally done by Ant.
I will now get the decals on next week, with help from my brother.
Strangely pleasing to watch though

More great work

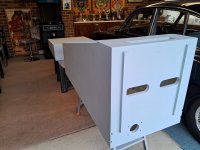
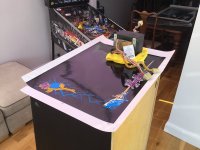
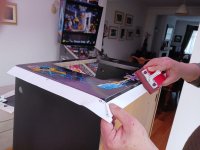
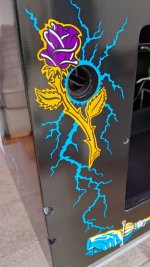
Over the last year, I’ve watched a lot of HEP restorations. He sands the decal edges and peals the waste off, I’ve always wanted to do this, but was worried I might mess up the decals. After chatting with Ant, he said he has tried this method and it was so much easier, the finish is amazing.
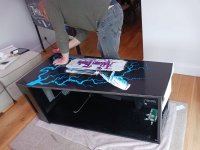
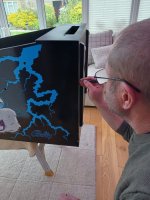
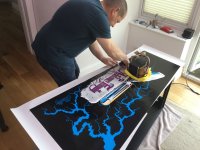
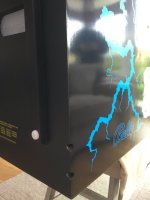
So!! Me and my brother gave it a go on the main cabinet. Wow!!!! So much easier. The results was amazing, no more cutting the decals 2mm from the edge. Tomorrow we shall decal the back box.
So!! Me and my brother gave it a go on the main cabinet. Wow!!!! So much easier. The results was amazing, no more cutting the decals 2mm from the edge. Tomorrow we shall decal the back box.
Attachments
-
 IMG_6202.jpeg124 KB · Views: 55
 -
 IMG-20240418-WA0016.jpeg97.1 KB · Views: 53
 -
 IMG-20240418-WA0015.jpeg129.1 KB · Views: 54
 -
 IMG-20240418-WA0010.jpeg114.3 KB · Views: 55
 -
 IMG_6207.jpeg129.2 KB · Views: 53
 -
 IMG_6208.jpeg127.2 KB · Views: 49
 -
 IMG_6210.jpeg66.4 KB · Views: 46
 -
 IMG-20240418-WA0017.jpeg84.8 KB · Views: 50
Sorry i added a bit more probably as you replied .. is the pen pic sealing the edge and I guess covering bit of white edge you are left with on decal?
It’s just to cover the white caused by sanding.Sorry i added a bit more probably as you replied .. is the pen pic sealing the edge and I guess covering bit of white edge you are left with on decal?
I've only done arcade machine art its alot different than the pins with having the T-moulding.
You have both done an amazing job on that TAF
You have both done an amazing job on that TAF
Looks a great technique to get neat edges. What grit did you use?
120GLooks a great technique to get neat edges. What grit did you use?
Doesn’t need much sanding before you can peal it off.
It’s the only way I do it now. Takes literally less than a minute to do and you get a better finish.
However the first time you try it, it’s definitely squeaky bum time as all your thinking is you shouldn’t be sanding decals

However the first time you try it, it’s definitely squeaky bum time as all your thinking is you shouldn’t be sanding decals
I was feeling confident after chatting with you. I practiced on the top edge first.It’s the only way I do it now. Takes literally less than a minute to do and you get a better finish.
However the first time you try it, it’s definitely squeaky bum time as all your thinking is you shouldn’t be sanding decals
