What's new
Pinball info

Register a free account today to become a member! Once signed in, you'll be able to participate on this site by adding your own topics and posts, as well as connect with other members through your own private inbox!

In Progress The Addams family, teaching my brother pinball minty skills.

Happypin

Site Supporter
Joined
Aug 30, 2018
Messages
1,040
Location
London
Alias
Alan Adair
With the Twilight Zone completed it’s straight on with my TAF but this time my brother Alfie will be doing most of the work with my help of course.

Keep the log short and sweet as we have seen Ant’s restoration in much more detail, this will be done to a high standard and definitely be getting some tips from him along this journey.

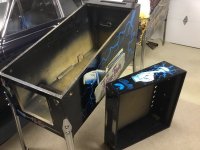
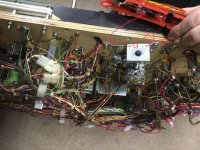
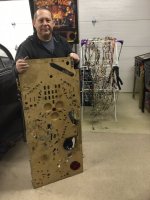
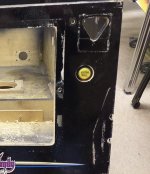
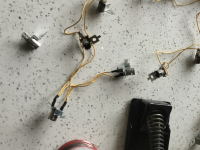
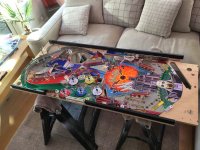
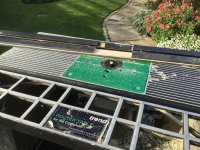
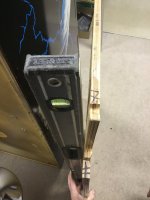
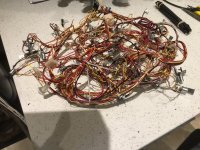
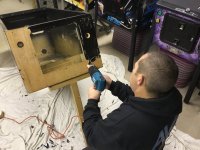
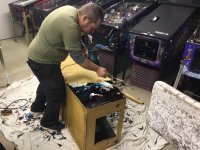
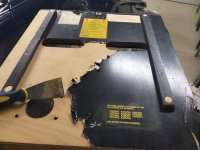
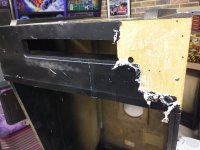
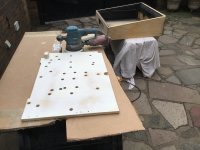
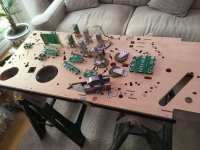
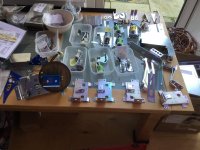
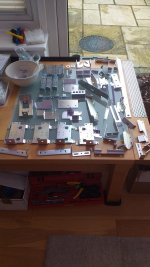
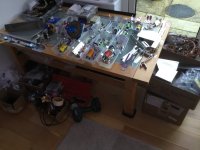
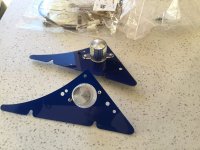
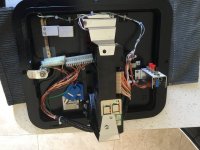
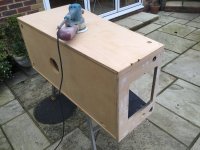
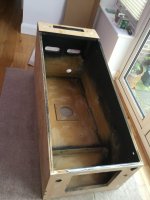
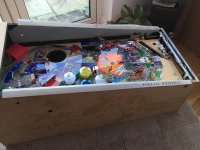
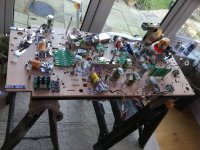
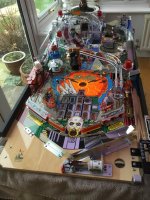
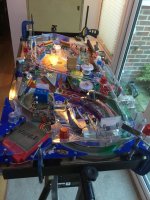
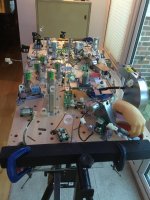
As you can see Alfie has been busy emptying the cabinet, I’ve been taking loads of photos and making notes to make it easy for him to put back together, although he helped a little with my T.Z this is his project. I said to Alfie get all the metal parts out that need zinc plating, chromed or powder coating as priority as this held me up last time, the zinc took 5 weeks as they were very busy last time I used them.
 

Attachments

  • IMG_5679.jpeg
    IMG_5679.jpeg
    136.9 KB · Views: 58
  • IMG_5694.jpeg
    IMG_5694.jpeg
    198.2 KB · Views: 57
  • IMG_5735.jpeg
    IMG_5735.jpeg
    119.5 KB · Views: 56
cables are all washed and the tumbler is on 24/7.
If you have gold roms then we might as well fit the extra ball button.
 

Attachments

  • IMG_5794.jpeg
    IMG_5794.jpeg
    108.7 KB · Views: 46
  • Screenshot_20231209-172744_WhatsApp.jpeg
    Screenshot_20231209-172744_WhatsApp.jpeg
    91.6 KB · Views: 45
What method do you use to clean the loom?
Sonic cleaner, i asked Ant the same question and it brings them up very clean. I don’t remove the switches it all goes in.
T.Z switches after a good clean are all good.
 
Last game we played with the glass off before the strip down we noticed the shooter rod was not hitting the middle of the ball, thinking we had cabinet troubles it was something to check before decals are fitted but as you can see from the photos the playfield is a banana.

Side rails are from pinball life, all we had to do was router the cut outs and paint. we have fitted a few parts to the new playfield. Cable ties have been replaced to most of the cables and new lamp sockets have been fitted with heat shrink for safety.
Tomorrow we will spend some time on the cabinet.
 

Attachments

  • IMG_5973.png
    IMG_5973.png
    1.2 MB · Views: 57
  • IMG_5935.jpeg
    IMG_5935.jpeg
    184.1 KB · Views: 53
  • IMG_5872.jpeg
    IMG_5872.jpeg
    267.8 KB · Views: 54
  • IMG_5983.jpeg
    IMG_5983.jpeg
    92.1 KB · Views: 50
  • IMG_5981.jpeg
    IMG_5981.jpeg
    82.2 KB · Views: 50
  • IMG_5966.jpeg
    IMG_5966.jpeg
    221.2 KB · Views: 51
Never seen this before, decals on the rear and top. must of reused a damaged cabinet from the factory.

A few more bits have been fitted to the new playfield, until the weather is dry to work on the cabinet.
 

Attachments

  • 20231219_090903.jpeg
    20231219_090903.jpeg
    149.2 KB · Views: 54
  • 20231219_084628.jpeg
    20231219_084628.jpeg
    137.5 KB · Views: 54
Last edited:
While Alfie is out in the wind sanding I was in the warm modifying the lamp flashers to the new plastics, secured down the plastic to a piece of wood, using a 38mm cutter made the hole for the easy twist cap. Changing the bulb will be a lot easier.
 

Attachments

  • IMG_6071.jpeg
    IMG_6071.jpeg
    217.4 KB · Views: 61
  • IMG_6070.jpeg
    IMG_6070.jpeg
    158.8 KB · Views: 54
  • IMG_6069.jpeg
    IMG_6069.jpeg
    165.3 KB · Views: 56
  • IMG_6067.jpeg
    IMG_6067.jpeg
    128.4 KB · Views: 58
Finally got the zinc plating back, chrome promised for Tuesday. Now Christmas and new year is out the way we can get going again. The cabinet we need good weather to progress but the playfield parts can be reassembled which is the jobs we have been working on today.
 

Attachments

  • IMG_6087.jpeg
    IMG_6087.jpeg
    124.3 KB · Views: 38
  • IMG_6086.jpeg
    IMG_6086.jpeg
    194.2 KB · Views: 34
  • IMG_6094.jpeg
    IMG_6094.jpeg
    138.1 KB · Views: 32
  • IMG_6085.jpeg
    IMG_6085.jpeg
    183.4 KB · Views: 32
  • IMG_6091.jpeg
    IMG_6091.jpeg
    152.3 KB · Views: 34
  • IMG-20240105-WA0008.jpeg
    IMG-20240105-WA0008.jpeg
    102.3 KB · Views: 33
Everything is now ready to fit to the playfield, we have even cut off the old cable ties and replaced with new.
We are mad I know!!

modded the last flasher to the twist top.
 

Attachments

  • IMG_6098.jpeg
    IMG_6098.jpeg
    140.2 KB · Views: 27
  • IMG_6097.jpeg
    IMG_6097.jpeg
    147 KB · Views: 26
Got a lot going on with other stuff like my boiler packed up and moving furniture around so I can have some games in the house, garage/ games room is too long to warm up.

Hopefully we will get back on the TAF at the weekend, today I put the coin door back together, got something done at least.
 

Attachments

  • IMG_6116.jpeg
    IMG_6116.jpeg
    142.3 KB · Views: 23
Despite the cold weather back working on the cabinet. More filler, more sanding, more filler and much more sanding.
Later today I will test the playfield before going any further to make sure all lines up.
 

Attachments

  • IMG_6117.jpeg
    IMG_6117.jpeg
    160.7 KB · Views: 21
  • IMG_6119.jpeg
    IMG_6119.jpeg
    82.4 KB · Views: 21
Despite the cold weather back working on the cabinet. More filler, more sanding, more filler and much more sanding.
Later today I will test the playfield before going any further to make sure all lines up.
Not gonna lie, glad I could do that part inside the house. Its too bloody cold at the moment!
 
12 degrees is on its way, the sooner I get this cabinet done the better. All parts are zinc plated and chromed, looms are washed and the cable ties replaced. Everything is ready apart from me.
 
12 degrees is on its way, the sooner I get this cabinet done the better. All parts are zinc plated and chromed, looms are washed and the cable ties replaced. Everything is ready apart from me.
Problem is, i bet the rain comes back with it!! :mad::mad:
 
The original playfield was bowed resulting with the plunger hitting the top of the ball. Today just to confirm all is now ok we test fitted the playfield before we went any further.
Green light for us.
 

Attachments

  • IMG_6123.jpeg
    IMG_6123.jpeg
    160.5 KB · Views: 23
  • IMG_6122.jpeg
    IMG_6122.jpeg
    173.6 KB · Views: 22
we got a lot done today on the underside of the playfield. We had to router the back board so the thing box didn’t rub when it opened, I kept taking more off until it was perfect.
Very satisfying day. Tomorrow topside.
 

Attachments

  • IMG_6125.jpeg
    IMG_6125.jpeg
    202.2 KB · Views: 16
  • IMG_6124.jpeg
    IMG_6124.jpeg
    165.1 KB · Views: 16
  • IMG_6127.mov
    22 MB
  • IMG_6126.jpeg
    IMG_6126.jpeg
    109.6 KB · Views: 16
Topside complete, spent quite a lot of time trimming plastics around the thing box as the box was catching or rubbing on the new plastics. I’m now ready to fit the first wiring harness.
 

Attachments

  • IMG_6128.jpeg
    IMG_6128.jpeg
    165.2 KB · Views: 26
  • IMG_6130.jpeg
    IMG_6130.jpeg
    130 KB · Views: 26
  • IMG_6129.jpeg
    IMG_6129.jpeg
    116.3 KB · Views: 26
Back
Top Bottom