What's new
Pinball info

Register a free account today to become a member! Once signed in, you'll be able to participate on this site by adding your own topics and posts, as well as connect with other members through your own private inbox!

In Progress Rocky & Bullwinkle Shop Log

Well it's all been a bit quiet in here lately but work has been ongoing in the background.

It became clear that the woodworking needed was beyond my basic skills so I initially tried getting quotes to have the work done professionally. I have no idea why, but I can only presume that joiners and carpenters have enough work that they can pick and choose. I asked 3 seperate people for prices and a week later I was still sat waiting. A few more e-mails and phone calls and still nothing. So I pretty much gave up on that as a bad job.

I've now taken the plunge and bought a donor cab from Manny. The big sticking point for me wasn't actually the cost of getting it back to Lincolnshire but more the fact that none of his photos showed the rear of the cabinet. He's subsequently fixed up the back of the cabinet and posted photos; I have no idea what state it was in before but it was clearly nowhere near as bad as mine and the sides were fully in tact. So hopefully that will land here in the next week or so, although to be fair i'm away with work again so no huge rush.

I've also been experimenting with paints because it became clear that to spray my R&B blue both inside and out using rattle cans was going to be extremely expensive - at £10-£12 per can I estimated i'd be looking at close to £200. Of course the problem is that it was only an estimate and I couldn't even buy a single can to test the coverage because there could be subtle differences in the colour between batches. Of course the cost-effective way to do it would be to get the paint sprayed using a compressor but that also has it's own costs associated with it (either buying the equipment to do it, hiring it - which is almost as expensive as buying, or finding someone who could do it for me and paying them).

It was suggested to me that in fact I could try using a regular emulsion - it's something which i'd never even considered and I was always led to believe that painting wood with emulsion was a bad idea. I don't know if the fact that the cabinet has been primed first would make a difference and given that I now have a spare back box I figured it might just be worth a go. After all if it looked crap or I decided against it then I could either sand it back and repaint or I could simply use the spare that i've acquired. Since doing the painting i've read more online and for some reason it seems to be considered a big no-no but i'm interested to know why that is before going any further. I have to say that part of me feels that it's wrong; and given i'm about to stick £200+ worth of decals on top I want to make sure i'm absolutely happy with it before I go any further.

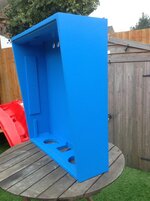
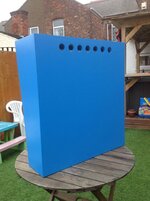
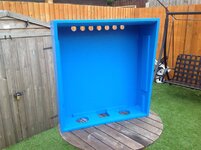
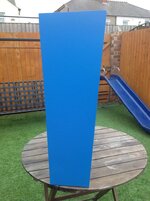
Here's how it looks - I have to say that the finish looks quite nice but the paint still feels a little tacky and I believe it could take a week or two before that fully disappears. I'm worried about the durability of the paint if i'm honest and once the decals are on then there's no going back. (And yes, it's VERY blue, of course once the stuff is all back in place and the backglass is in place it won't look quite so 'full on')
2014-09-20 11.58.15.jpg

2014-09-20 11.58.38.jpg 2014-09-20 11.58.50.jpg 2014-09-20 11.59.00.jpg

The paint used was a silk emulsion and it was applied in very very thin layers using a foam roller (and a fine brush for areas where the roller wouldn't go). Each layer was left until fully dry (typically 1-1.5 hours) before another was applied and every few coats i'd sand it back lightly before starting again. I lost count of how many coats it's had but i'd say at least 8 seperate applications. The biggest pain in the **** from an application point of view is simply that it's very time consuming. I'd presume spraying would be quicker.

So come on folks, explain to me the error of my ways and how I shouldn't go this route. It feels wrong to me and the general concensus online seems to agree. I want to make sure this R&B is as nice as possible so getting this bit is fundamental to me...... ;-)
 
Last edited:
Unusual to use an emulsion? But looks great! :clap:

Get some satin finish clear lacquer to seal it in now as emulsion wont do much to protect to wood from damp etc
 
Wow! My retinas are still tingling from looking at that blue paint job. FECKIN' AWESOME!

Nothing wrong with emulsion. Modern paints are incredibly tough and doing lots of light layers, knocking back between each, will give you a very hard wearing finish because as it gets scratched or chipped it'll likely only take a few layers off and still look blue. As @deathrow recommended, seal it with some laquer and it'll be as 'ard as nails.

Keep at it. Your methods are unconventional but your dedication can only produce a brilliant end result!
 
Thanks for the comments Peter. (and also - check your PM's :p)

Any more feedback grateful received.

Looking around I maybe over-estimated the cost for spray cans. A local place quoted me £12 per can but i've found these online which work out a lot cheaper:

http://www.buckandhickman.com/find/keyword-is-AMBERSIL/product-is-2517643 at £6.26 per can
http://www.lubricantsupplies.co.uk/...lic-paint-blue-ral-5015-x-400ml-box-of-6.html at £30.40 for 6 cans, which works out a little over £5 per can

Of course the other option is too look at buying the paint in liquid form and then try spraying it myself. I didn't fancy investing megabucks in a spray gun and compressor but I wonder if this would work:

https://www.machinemart.co.uk/shop/...ctric-airless-spray-gun?da=1&TC=SRC-spray gun

Just considering all options right now. The back box is one thing - but once I start on the main cabinet i'm really committed to following it through.
 
I've got a similar spray gun that I bought to spray the fences with wood preservative, a job which it did admirably. I'm not sure it's up to the job of applying a perfectly smooth layer of acrylic paint to the standard you'd be hoping for. That's not to say it won't do it and I freely admit I haven't tried it for that sort of work, but it didn't have much finesse when it came to splurting brown gunge all over the fences!
 
Interestingly the emulsion sands back smooth so I could just do that before fitting the decals. There's more surface to sand on the backbox because I painted the full sides but obviously when I do the main cab i'll only be painting the edges where the decals are going to be trimmed back. I really don't mind a textured finish on the back of the cabinet or the top of the backbox.

It would appear that the texture is actually a result of using a foam roller as there's no such texture on areas where i've had to apply by brush so i've also tested one side of the backbox with a layer of paint which i've thinly brushed on - it'll be interesting to see how that turns out.

Still tempted to grab some acrylic rattle cans, especially as Lee Ellison has confirmed that a couple should be sufficient for doing the interior of the cab. That means that a half dozen cans at £30 should pretty much do the lot. Nowhere near the £200 I was originally thinking. That's partly because the coverage on the colour coat is a lot better; it makes sense to be fair - that's part of the reason for taking the time and effort to prime it.

Irrespective of that i've gone ahead and ordered a polishing kit so that I can shine up some of the metal parts. I'll also order some clear lacquer because i'll need that anyway to seal the back plate once it's polished to a high shine.

The replacement cab should turn up this week according to Manny but i'll be away with work the back end of the week anyway so realistically it won't get looked at until the weekend. Once that lands the priority is to get the whole lot sanded back - yaay, more sanding!!! :)

Once that's done I can get the whole lot primed and consider which paint method to go with......
 
Last edited:
Just remember when you lacquer the backplane to double-check where you will need to attach the earth. You'll either have to scratch off the lacquer or a neater job would be to mask it before spraying. You probably need to keep a little ring of metal bare around one or two mounting holes. Some of the little ring binder reinforcers would be perfect:

http://www.amazon.co.uk/gp/product/B00HQHIQ9C/
 
Thanks for the reminder Peter. Paul mentioned that very point in his backbox refurb article too so it was already in mind, but always good to have a reminder :)

The DE backplanes differ slightly to the Bally ones because the standoffs aren't removable so i'll also need to mask off the top of each standoff before spraying. Not abig deal - i've got a load of sticky labels I can cut to shape and size before spraying. Once done they'll just scrape off leaving me unlacquered areas where required.
 
Are the DE backplanes a proper sheet of steel? One up on the Bally backplanes which are not much more than uber-thick tin foil! The one in PARAGON is at least a very thin sheet of metal, but still thin enough that it's folded around the sides of the backbox and stapled in place. The one in GOLD BALL is little more than metallised card! I don't think it would cut the mustard for modern standards.
 
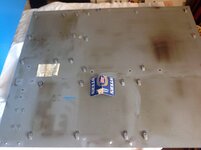
The backplane isn't what i'd call substantial. It's probably about 1mm-1.5mm thick and sounds like Rolf Harris's wobble board if you give it a bit of a shake. Hopefully it won't take too much work to get it looking a bit more shiny than it does right now. That's presuming of course that the material it's made from will even go shiny.

2014-09-22 11.12.45.jpg

Also pictures is one of the many beermats I found lodged down the backs of the PCB's. I can only presume that this was to prevent the backs of the PCB's contacting the metal plate if they were reinserting the connectors with the power on. Quite why you'd do that is beyond me.

Although i'm tempted to put some 1mm thick adhesive backed cork behind the PCB's just for that very reason. I'm not likely to mess around with the connectors without first turning it off but it might just bullet-proof it a bit more in case it does end up in anyone elses hands.

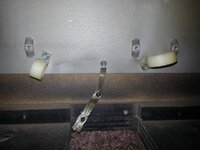
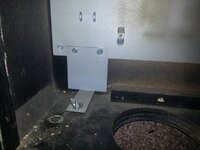
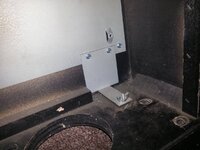
There's actually a few things I need to consider regarding earthing. There's this part which goes to the top half of the rotolock (the idea being that when the lock is engaged the earth is continued to the bottom half with then feeds the braid in the main cabinet).

2014-07-24 21.56.38.jpg

And then on the left and right side there are these brackets which provide earthing clamps for the DMD/speaker assembly to connect up to.

2014-07-24 21.57.16.jpg 2014-07-24 21.57.20.jpg
 
Not a huge amount of progress recently. I've taken some 160 grit sandpaper to one side of the cabinet to see if any of the texture from the rolled paint can be removed. Sure enough it's come up smooth although sanding emulsion is a bit odd. It's known as latex paint in the USA and when you take sandpaper to it you can clearly see why. Lots of balls of rolled up paint come away so it can get quite messy - the final result was smooth enough to probably lay decals over though without the texture being visible through it.

I've ordered a polishing kit and some clear satin arcylic so I can get the backplane all cleaned up and sealed. I may also spray a coat of the clear over the side of the cabinet that i've sanded back to see how it looks.

Other than that i'm really just waiting on the new cabinet arriving. Once that turns up i'll be focussing on getting it sanded back. I have a feeling that i'm going to end up painting that one with acrylic because although this has worked it's a huge amount of work. It's taken me almost two weeks just to get the back box done so I dread to think how long it will take to get the main cabinet done, especially when i'm looking to paint it both inside and out.
 
The polishing kit and clear lacquer turned up at the end of last week so i've made a start on polishing up the back plane. I figured I might as well be doing something whilst I wait for the spare cabinet to turn up.

I'll post some pictures once i've got it all nice and shiny.

In other news I was talking to a colleague at the head office whilst I was there last week and it turns out we have a roller scanner there which can scan artwork up to a meter in width. So it looks like I might have found a way to get a scan of my decals done before fitting them. Might be handy to have.......
 
Back in the day i had a roller scanner. It was around 100mm wide, and was a complete pain to use. You had to carefully drag the scanner along, and during the scanning there was a little speed bar in the software which you had to keep it in the green. If you slipped, and went to fast with the bar in the red it would stretch, and distort the image... grrrr
 
That really does sound like a PITA Dave.

I'm hoping the one they've got at the head office is fairly sophisticated - they apparently have a lot of expensive reprographics kit, including the stuff that prints directly onto vinyl. So having a set of duplicate decals for my pin wouldn't be out of the question. Of course I don't need them now so the plan is just to get mine scanned before applying them so at least i've got a fallback plan if I really do screw things up.
 
Well nedreuds love of shiny things and his demonstrating of how nice things look once all polished up has made me invest in a polishing kit which i'm now slowly using to shine up the back plate on my R&B. It's a job I can do whilst waiting for the replacement cab to turn up (which, incidentally, has been taking a while to turn up - it seems Manny doesn't check his messages so often). I have no doubt it'll turn up soon enough so in the meantime i'm finding other jobs to do.

So here's where we are with the polishing.

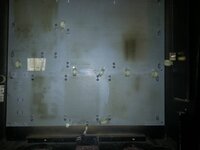
What the back looks like. This is basically how the front looked when I started.

2014-07-24 21.58.47.jpg
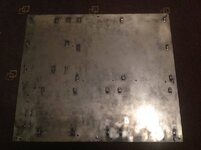
And here is how the front looks now.

2014-09-30 18.56.47.jpg

Yes, there is still a fair bit more to do. So far i've mainly been using a black and green compound with a rough and mid-range wheel on the drill. Working in the middle room in the house was a bit of a pain as the lighting in there is very poor so it's hard to see where you've still got a dull spot. Time is also very limited of late so that's not helping. I'd estimate the above has taken about an hour and it still needs more work as my aim is to get it super shiny (yes, I know most of it won't be seen as it'll be behind the boards - but i'll know). I probably need to invest in some Autosol again too to give it a final buffing up with that as well.
 
Just to let people know I haven't falled off the planet.

Polishing on the back plate is still ongoing - it's taking longer than anticipated and to be honest i'm just not getting the time needed to do it. Darned real life getting in the way.

Replacement Cab still hasn't showed up. Getting a bit tired of waiting now. :-(
 
Replacement cabinet has been collected and is on it's way - be nice to get stuck back into it again.

Also - polishing has been taking place - photos will follow in the coming days.
 
Hurrah!! My replacement R&B cabinet turned up today. Nice!! :D

2014-10-23 11.52.55.jpg

Look, this one actually has a back to it. I think the rails are added by Manny - no complaints from me on that although i'll need to remove the plastic rests before sanding it back.

2014-10-23 11.53.18.jpg

And this one has the grills fitted. I think I might very very carefully remove these as mine sustained some damage before. I might be able to clean them up and prevent me having to try to source new.

2014-10-23 11.53.35.jpg

A comparison shot showing the back of the two cabinets side by side. The one at the back is really gnarly. It was going to cost more to have it fixed up than it cost me to buy this one and have it shipped from Brighton.
2014-10-23 11.54.50.jpg

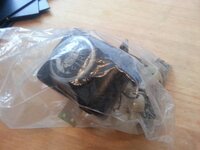
Also included was a back of nuts, screws, bolts and a replacement launch button. The housing has the brackets connected but the housing itself has a small amount of damage. Unfortunately it's missing the metal insert shim. Still, nice to have.
2014-10-23 11.56.12.jpg

So I can now finally get started on the restore. First order of the day is to sand the new cabinet and back box (not pictured) back to bare wood.
 
You sure are a perfectionist. That cabinet looks good enough to me without being sanded down and repainted / expensive stickers added
 
The backbox i've done already was more of a test to see how it would look if I used regular emulsion paint.

To be honest the finish isn't half bad but the amount of effort it took was pretty massive so I shudder to think how long it would take to do a main cabinet that way. For one thing the finish had a texture to it which WOULD show through the decals. That means I had to flatten it off using fine grade paper and the 'rubbery' nature of the paint made it time consuming and messy.

Given that i'm going to do the main cab using rattle cans I really need to do the same to the back box to make sure the colours match.

The cost for the rattle cans shouldn't be so bad as i've found a place online which is considerably cheaper (almost half the price). But the priority for now is to get it sanded and primed.
 
You sure are a perfectionist. That cabinet looks good enough to me without being sanded down and repainted / expensive stickers added
Well the decals have already been bought, paid for and delivered so it'd be a shame not to use them.

And to be honest I prefer the lighter blue colouring of them over the dark and gloomy black.

The cabinet isn't in bad shape but it still has its fair share of dings and scrapes. The back box has a fairly big chunk out of one corner too so it needs sanding back and filling anyway so we can fix that. It's not going to be original of course but the intention is to make it as nice as possible.
 
Progress on this is going to be on a go slow for a while now.

We're having a new kitchen delivered on 18th November and ahead of that the old kitchen has to be removed so we can have the damp course done before fitting the new kitchen. That means that the 'pinball repair lair' is now being used for storage. Boooo!!

I'm still hoping to have the cabinet sanded, repainted and redecalled before Christmas but we'll see how things go.
 
Well, what can I say? It's been a long time since i've posted in here. It's partly been down to having a new kitchen fitted, but also due to the really crappy dark winter and bad weather. Unfortunately I don't have anywhere under cover that I could do the required sanding on the cabinet so as a result the donor R&B cabinet I got has been sat upstairs in the middle room looking all forlorn.

You may recall that my R&B's cabinet had some pretty major damage at the rear and despite Dans' best efforts to patch it up I really wasn't happy with it. I even got a few joiners and cabinet makers around to quote me on having it all fixed up but none of them seemed that keen on taking on the job. It was then that I spied a donor cab that Manny had listed on eBay. It was more than I really wanted to pay but still substantially less than any of the very few quotes I had to have my cab fixed up. I then took the decision to take the plunge but then started a long protracted wait whilst Manny got it up to me (I discovered later that the haulier used keeps their prices down by only delivering when they have multiple shipments for a given area and this was what contributed to the big delay).

Anyway, enough waffling. The good news was the gods smiled on me today. I had to work 6-2 because of a job I had to do in the office which couldn't be done during normal working hours. After finishing at 2pm I managed to get out in a sunny (if a little chilly) garden and get stuck back in again.

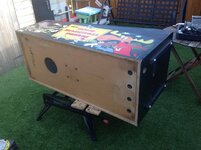
Here's the donor cab. Looks in pretty good shape but as i've got some nice decals and prefer the lighter blue colour i'm going to sand it back, fill the divots, sand if more with various grades of paper before respraying it in a light blue and applying the decals. Sacrilidge to some i'm sure as it won't be original, but hopefully it will leave me with a very nice tidy example of an R&B, and probably something a little more unique (particularly as the decals aren't massed produced).

Here's the cabinet out in the lovely sunshine.

2015-03-25 15.51.11.jpg
2015-03-25 15.51.18.jpg

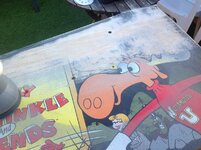
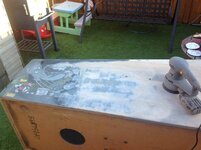
The first job was to give it a run over with 40 grit disks using the random orbital sander. This is just to get the majority of the design removed. I think most DE tables (including this one) don't use decals but instead are screen printed directly onto the cabinet. After a while we started to make some progress.

GOING!

2015-03-25 15.58.27.jpg

GOING!!

2015-03-25 16.14.58.jpg

GONE!!!

2015-03-25 20.37.31.jpg
The section below the head still needs a bit more of a going over and the other side is yet to be done but it's good to be started again. I also need to remove the old fitments from inside as I plan to give it a bit of a going over inside as well because when I respray i'll be doing the interior as well (obsessive I know, but if i'm going to the trouble of getting the compressor and spray gun going I might as well go the whole hog).

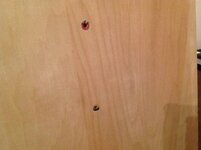
One interesting thing is the recesses on either side. Obviously this paint isn't sanding out because the bolts being tightened in place has recessed the timber slightly. Is it ok to leave these like this as they'll be covered by the bolts? Or is it worth sanding it out by hand? Advice please folks :)

2015-03-25 20.38.12.jpg

So yeah, that's it for now. Time to do this sort of work is still in short supply so i'm not going to set any stupid goals that I can't achieve. If I can get everything sanded back, filled and then sanded with finer grade papers to a smooth finish before the end of April then i'll be happy. Then hopefully in May I can get it sprayed up and the decals fitted. Once that's done I might finally dare to start on the playfield which has been stood to one side in the middle bedroom for the past 6 months.
 
Last edited:
much love and respect. this hobby needs people like you, you are going all out to make this game like new, and i bet my bottom dollar you're enjoying every step of it.

gif beavis and butthead - dance.gif

/high five from one nerd to another
 
Cheers Dan.

I have to say i've been pretty gutted to not get more done over the past few months. But never mind - back on track now. The missus has also realised that i'm keen to crack on with it so hopefully with her onboard i'll get a bit more time to finally get it moving. Fingers crossed I can do a job that NewDOS and Nedreud would be proud of; i've been reading their shop logs with interest and they've done some stella work. If this turns out anywhere near as good as theirs then i'll be really pleased.

Oh, and i've missed 'Wrong Hat!!'. Really need to get it done so I can play it again.
 
You don't miss "wrong hat" and if you do then you're not all there.
l am still scared for life after being subjected to that R+B that was turned up loud at a show and in got imprinted in my brain for ever. Still having therapy for the damaged it's done to me.
 
I think it could be argued that anyone with this pinball addiction isn't all there. ;-)

I'm clearly not - so much obsessing over stuff that won't even be seen. I'm certain i'm at least borderline OCD.
 
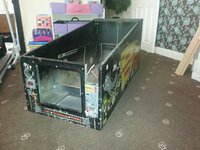
Well today the weather conspired against me which meant that getting any more sanding down of the cabinet simply wasn't going to happen.

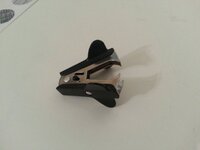
So instead I had an appointment of a few hours with one of these.

2015-03-28 19.12.13.jpg

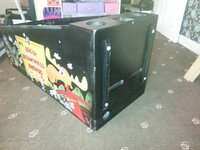
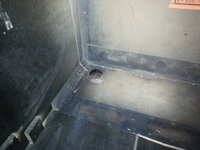
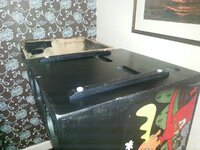
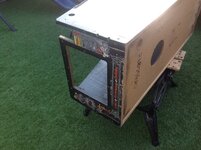
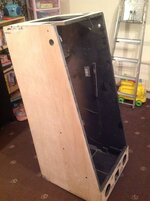
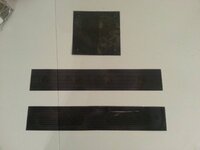
I'm going to be respraying the entire cabinet both inside and out so the last of the fitments inside the cabinet needed to be stripped out. This included the old cabinet braid, the various stickers and labels and a couple of metal plates. One of these is for the coin box lock and the other was a strike plate for the knocker.

Also removed were the plastic grills that cover the speaker opening and the vents at the bottom and rear of the cabinet. I've no idea if replacements for these are easily obtainable so needless to say I was VERY careful when removing them. Should be fine to use them again once they've been cleaned up a bit or if I can source replacements then I might go that route.

2015-03-28 19.13.19.jpg
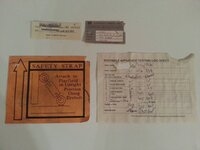
Unfortunately the various labels didn't come off quite so easily. The PAT Testing label was actually glued in place so that suffered the most. The other items have been put somewhere safe and i'll most likely end up making reproductions to replace them.

2015-03-28 19.13.48-1.jpg
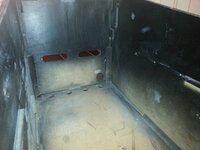
So with that now done we have a nice empty cabinet which is ready for sanding both inside and out. Hopefully the weather will brighten up a little for tomorrow.

2015-03-28 19.16.14.jpg

2015-03-28 19.16.23.jpg
 
Back
Top Bottom