What's new
Pinball info

Register a free account today to become a member! Once signed in, you'll be able to participate on this site by adding your own topics and posts, as well as connect with other members through your own private inbox!

Complete Hook - The Restoration You've Been Waiting For!

Good to see you back and shopping away.

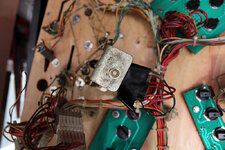
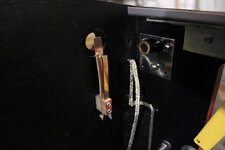
I've noticed on my Hook that the left slingshot mech appears to be 'foreign' (and end stop broken) - silver vs everything else brassy coloured - is that the same on yours? I cant fully make out from the pic below.

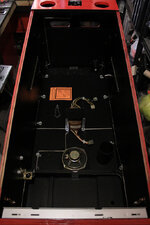
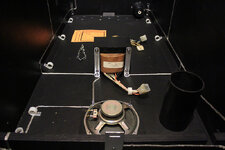
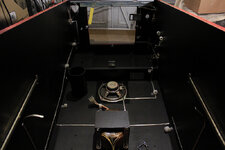
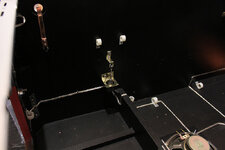
Also, are you nylon rollering or spraying the satin black on the inside?

I'm looking forward to see how you approach the outside cab painting.

Uh huh...

farm8.staticflickr.com_7698_17333686175_84197776c4_c.jpg
 
Good to see you back and shopping away.

I've noticed on my Hook that the left slingshot mech appears to be 'foreign' (and end stop broken) - silver vs everything else brassy coloured - is that the same on yours? I cant fully make out from the pic below.

Also, are you nylon rollering or spraying the satin black on the inside?

I'm looking forward to see how you approach the outside cab painting.

On my Hook the slingshot mechs are a silvery colour, but the flipper plates are brassy coloured.

On the interior I roll on the black satin. It absorbs into the wood grain enough that you don't see any orange peel effect from the roller. On the outside I spray as much as I can, in this case it's just the back. The rest has to be touched up with rollers and brushes but I'll spray clear over it for a nice finish.
 
Some more progress on the back of the cab.

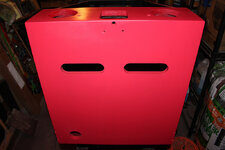
Filling and sanding now complete, primed and first coated with red. Looks a little pink here for some reason but it is actually a nice deep red perfectly matching the parts which were covered by the side rails.
farm1.staticflickr.com_713_21318661741_fe14919615_c.jpg

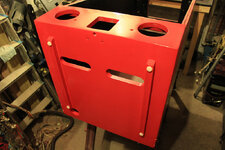
One thing that always irks me about Data East and Sega cabinets is the lack of support rails on the back, like Bally/Williams cabinets, which lift the cab up enough to stop it from getting all chewed to bits. So, I've added them myself. I know this isn't true to the original but it will help keep the cabinet in better condition for years to come.
farm1.staticflickr.com_737_21318667471_79799fa28d_c.jpg

That's all the messy stuff dealt with. Quite pleased with how it's turned out. Now I need to move on to touching up the artwork on the other 3 sides.
 
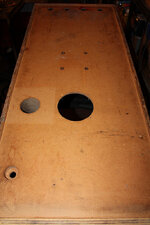
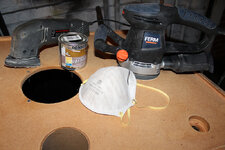
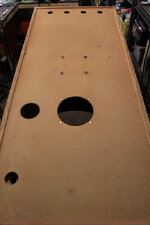
Moving on to the rest of the cabinet, the underside is a little dirty and although nobody will see it, it just wouldn't feel right making the rest of the cab nice and leaving this out.
farm1.staticflickr.com_653_20827615254_11314a2e70_c.jpg

Tools required for this are an Orbital Sander, a Detail Sander, clear Satin Varnish, and a dust mask of course.
farm1.staticflickr.com_579_21450441665_88efa5b693_c.jpg

20 minutes of sanding later and it's looking a lot cleaner. I'll roll on that satin varnish to seal the wood and give it a nice finish.
farm1.staticflickr.com_603_21450416605_b4749acff8_c.jpg

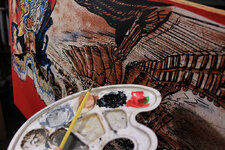
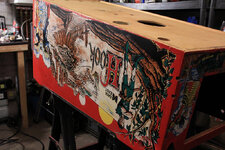
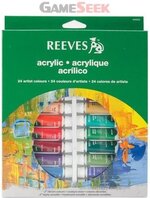
While waiting for that to dry, I've now started the laborious task of repainting Hook's artwork. All of the red is being repainted, most of the black lines will need going over, anything knicked and scratched will be repainted and I've also got to entirely redraw the worn away areas near the flipper buttons. So my artist brushes are out. I'm using Reeves Acrylic's for this.
farm6.staticflickr.com_5742_21262551808_32f7bc134c_c.jpg

Slowly getting there, but still loads to do. This is the least amount of fun I've ever had. I think pulling my own teeth out would be more fun than repainting all of this.
farm1.staticflickr.com_751_21439379632_acab8526de_c.jpg
 
Last edited:
Can you snap a few close-up shots of before/during/after doing the cabinet repaint. I know @astyy will be interested to see how it's done but so will I! How do you do the colour matching, etc?
 
Sure can, although luckily Hook uses quite basic colours. The main red I found an exact match ready made with Reeves 'Rose Madder'. Black is black, but the one I'm using is 'Mars Black'.

The only colours I need to mix are the small amounts of light blue and dark green, and a bit of light brown. I'll take some photos of me doing that tomorrow.
 
@PeteB this Tony Hart stuff is new to me and I'm concerned if I mix paints they'll change colour as I work around the cab. What are the best base colours for starters so I can buy them in.

Red = Rose Madder
Black = Mars Black
White = Titanium White
Yellow = Lemon Yellow?
L Brown = Terracota?
L Blue = Cerulean Blue?
D Green = Viridian?

Thanks.
 
I know. I've changed the colour of my font to white and have insulted a few forum members which you can clearly see below


Sorry to anyone I've offended
:rofl:
 
@PeteB this Tony Hart stuff is new to me and I'm concerned if I mix paints they'll change colour as I work around the cab. What are the best base colours for starters so I can buy them in.

Red = Rose Madder
Black = Mars Black
White = Titanium White
Yellow = Lemon Yellow?
L Brown = Terracota?
L Blue = Cerulean Blue?
D Green = Viridian?

Thanks.

Hook's red is an almost exact match for Rose Madder. Mar Black is good for the blacks. I bought an artists pack with a variety of colours in the smaller tubes. As most of Hook is red and black, you're good to go with those. Dont mix them. The other colours can just be mixed on the spot as you touch them in.

Btw just a lil fact when you say "black is black" it's not infact black and white are the hardest colours to match

Well I did say im using "mars black" :p
 
You told me thepaint goes a long way so perhaps something like this for starters? (£6.45 on eBay)

i.ebayimg.com_00_s_NTQxWDQxMQ___z_brIAAOSw0e9UyiLP___12.JPG
 
The acrylic paint set they do in Lidl every now and again is very handy for cabinet touch ups.

Cant remember how much it was but nothing extortionate from what i remember, I also got the artists paint brush set they do now and again also (bizarely they dont do them at the same time over here)
 
Yes, @astyy I would stick to the Reeves paints. That pack you posted is the same as what I bought from The Range.

@BigIan I've had cheap acrylic paints before but they're too watery. The pigments aren't very strong and you have to keep going over, and over them.
 
Great work and log @PeteB . Just wondered how you get an even finish on the cab touch up and prevent the uneven feel of brush strokes? Up to now I've touched up cabs using an airbrush.
 
@PeteB this Tony Hart stuff is new to me and I'm concerned if I mix paints they'll change colour as I work around the cab. What are the best base colours for starters so I can buy them in.

Red = Rose Madder
Black = Mars Black
White = Titanium White
Yellow = Lemon Yellow?
L Brown = Terracota?
L Blue = Cerulean Blue?
D Green = Viridian?

Thanks.

Ok here's the paints I ended up using, it's not too different from your list. I found these colours were good enough match straight from the tube and the only one I had to mix was for brown:

Reds = Rose Madder
Blacks = Mars Black
Whites = Titanium White
Blues = Blue Hue
Yellows = Deep Yellow
Greens = Phthalo Green
Browns = A 50/50 mix of Burnt Sienna and Orange. If you find it's still a bit too dark after testing, just add a tiny bit more Orange.

Great work and log @PeteB . Just wondered how you get an even finish on the cab touch up and prevent the uneven feel of brush strokes? Up to now I've touched up cabs using an airbrush.

When using a brush I got with the wood grain so it blends in more. Artists brushes are so fine they don't leave much of a stroke but the clear coat going on top smooths things out nicely anyway.
 
Updates...

The cab is now at a point where I'm pretty happy with it. To be honest, I could go on forever touching up and repainting areas but there comes a point when you have to say "that's enough". It isn't perfect, but a touched up cabinet never will be.

After a couple of light coats of clear, here's how it's looking:
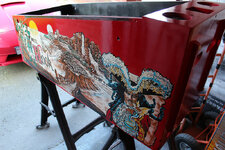
farm1.staticflickr.com_762_21500557809_ab955ddcee_c.jpg

Difficult to get decent shots of the sides at the moment due to being over loaded with pins in my workshop. I need more space!
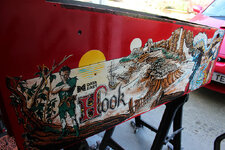
farm6.staticflickr.com_5693_21066482153_58098d34e4_c.jpg

And the front. Note that the marks you can see are from the shooter housing and coin door being pressed up against the cabinet. All of that will disappear once it's back together.
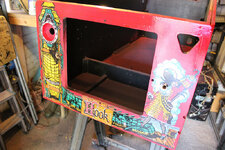
farm6.staticflickr.com_5643_21499433720_dd87ffdbff_c.jpg

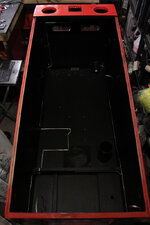
Ground braid and other basics have been put back in. I always find doing the ground braid to be an enormous faff:
farm1.staticflickr.com_568_21499414880_82ded191e0_c.jpg

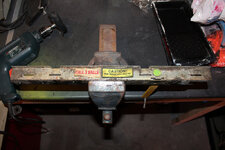
That's one hideous lock bar receiver:
farm6.staticflickr.com_5799_21675931222_10bcfed510_c.jpg

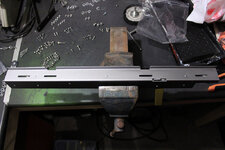
After clearing away all that mess with the wheel, it was too pitted to be polished. So, a nice thin coat of Argent Silver fixes it up nicely. Just needs new labels now:
farm1.staticflickr.com_703_21499519848_5aca459190_c.jpg

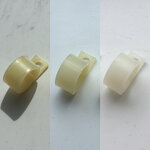
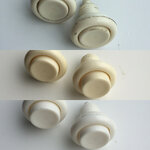
I've been experimenting with bleaching plastics back to white, using Vanish and then Cream Peroxide as described by @Wiredworm in this post: Rocky & Bullwinkle Shop Log

Here's some wire hoops. The first photo is original condition, then after soaking in Vanish for a few hours, then after a couple of days in the Cream Peroxide, left in the sun.
farm1.staticflickr.com_687_21499584450_75efc7baea_c.jpg

And even flipper buttons. Overall I'm very happy with the way they've turned out. The photos don't do it justice but this is a really cool technique which I'm going to use more often:
farm6.staticflickr.com_5654_21661462156_2b1b34a907_c.jpg

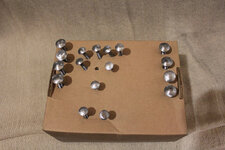
This is how I do bolts. First rough them up a bit with the wheel so the paint has some tooth to grip. Then pop them in an old box and spray few light coats of Plastikote BBQ paint:
farm1.staticflickr.com_621_21687359025_6c204aa5b3_c.jpg
https://flic.kr/p/z19E2s
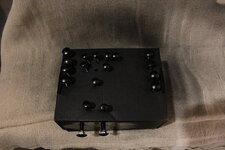
And now after baking with the heat gun, they are ready:
https://flic.kr/p/z19E2s
farm6.staticflickr.com_5716_21687342775_b14f243fe0_c.jpg
https://flic.kr/p/z19E2s

More to come soon!
 
Pete's shop logs read like tutorials for anyone wanting to learn, i love em
a Pete restoration thread would make a nice pdf teaching tool like the Vid ones over on Pinside
 
What spray do you use here Pete, cans of gloss? Can you add a link please? Cheers mate looking great!

I always use 2k clear from a spray gun, but for rattle cans I've used Halfords Heavy Duty PU Lacquer in the past. It goes on thin though so be careful of runs and also takes a couple of days to harden up.

Pete's shop logs read like tutorials for anyone wanting to learn, i love em
a Pete restoration thread would make a nice pdf teaching tool like the Vid ones over on Pinside

Haha thanks! Guess that's why I'm sharing with these shop logs, so it could help somebody. I've picked up loads of tips off here and Pinside.
 
@PeteB just wondering if the Vanish soaking has much affect on the final outcome ? have you tried skipping it with any bits and noticed a major difference ?

Just thinking the peroxide might be enough, also where do you find this sun you speak of ?
 
The Vanish or other "Oxy" laundry booster should be part of the retr0bright gel mixture you can make up to do this.

This whole whitening of plastics was perfected by an Amiga nerd from Manchester, who is a chemist by profession, around 2008. It involved lots of nerdy discussions on the Amiga boards but they eventually deduced the yellowing is due to Bromine, used in plastics as a flame retardant, and came up with a process for reversing/removing it. They called it "retr0bright" and the whole story, theory, mixture and method is detailed at length here: http://www.retr0bright.com/
 
@PeteB just wondering if the Vanish soaking has much affect on the final outcome ? have you tried skipping it with any bits and noticed a major difference ?

Just thinking the peroxide might be enough, also where do you find this sun you speak of ?

It did. If you look at the pics of the wire hoops and flipper buttons, stage 2 was after soaking them in a bowl of hot water and vanish for about 2 hours. It definitely made a difference. The main thing I noticed was on the flipper buttons, they had ingrained dirt between the button and the housing. That just lifted straight off, I didn't need to get in with a brush or anything.

As for sun, the cream peroxide just needs UV light, so even on a cloudy day it'll work. I just chucked the ziplock bag on top of my shed roof and left it there for a couple of days.

The Vanish or other "Oxy" laundry booster should be part of the retr0bright gel mixture you can make up to do this.

This whole whitening of plastics was perfected by an Amiga nerd from Manchester, who is a chemist by profession, around 2008. It involved lots of nerdy discussions on the Amiga boards but they eventually deduced the yellowing is due to Bromine, used in plastics as a flame retardant, and came up with a process for reversing/removing it. They called it "retr0bright" and the whole story, theory, mixture and method is detailed at length here: http://www.retr0bright.com/

Oh, looks like I've been doing it wrong then. I didn't think I had to mix the Vanish with the Cream Peroxide. Will try that next time, but doing it separately also worked. Perhaps just not as effective as mixing it though.
 
It seems adding the Oxy to the Cream Peroxide works as an accelerator. It also turns the liquid peroxide into a paste which can be spread over the surface and doesn't run off. Key ingredient though is UV, either from sunshine or a lamp. Really speeds things up! Like you said, no harm the way you did it, probably just faster together. Whatever you plastic came out like a Persil advert so I wouldn't worry!
 
I soaked mine in Oxy first and then did the peroxide thing.

Can't say it took that long for them to go white - I think they were outside for maybe a couple of days but it wasn't especially sunny.

Great work on the shop log Pete - really learning a lot from it. :)
 
More updates...

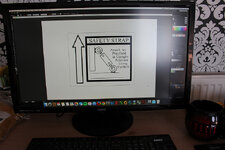
So the old "safety strap" label was a complete mess. I decided to have a bash at making one since I couldn't find any online to download. For this I just scanned the old label, imported it into Adobe Illustrator and used the auto tracing function to copy the pattern into a vector format. The text looked like crap, but luckily the faithful old Times New Roman font is an almost exact match, so I replaced the text manually:
farm1.staticflickr.com_746_21527047550_83f0e1142f_c.jpg

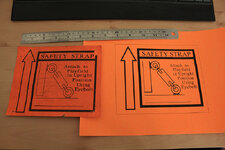
I had some fluorescent orange card stock lying around and it's a close enough match, so I laser printed the label on to this and trimmed it:
farm1.staticflickr.com_631_21528149429_e3a3ac309e_c.jpg

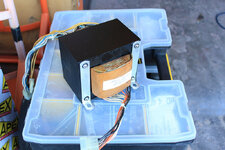
Cleaned up the transformer and it's wiring. Took the brackets off, brushes them up, and painted the black housing. Put it all back together after polishing the bolts and hey presto:
farm1.staticflickr.com_705_21093961233_caa6ab6bbc_c.jpg

Rebuilding of the cabinet interior is coming along nicely:
farm1.staticflickr.com_570_21092242294_28eafb6363_c.jpg

That transformer and the new ground braid all looks a bit sexy doesn't it?
farm1.staticflickr.com_651_21527123828_3916e31238_c.jpg

Mmmhmm:
farm1.staticflickr.com_599_21528126799_d40585c6d9_c.jpg

Love a nicely polished tilt mech:
farm6.staticflickr.com_5673_21688896346_dac2dcdeda_c.jpg

Shiny switches and things:
farm6.staticflickr.com_5618_21528123479_e3913a62c8_c.jpg

Gotta get all the wiring back in tomorrow.
 
Looking good, Pete, looking good!

What did you paint the transformer with? Got 3 rusty Bally lumps that need some love ;)
 
My favourite.... Plastikote BBQ paint and bake with heat gun. :D

Attacked it with the wire brush wheel on my drill first just to freshen it up prior to painting.
 
My favourite.... Plastikote BBQ paint and bake with heat gun. :D

Attacked it with the wire brush wheel on my drill first just to freshen it up prior to painting.
Looking good! Question (again) does the heat gun just speed up the drying or does it make it harder than letting it dry naturally? I'm going to tart up my lock down bar side rails and legs on a tommy, is it worth buying a gun for? Can I use a hair dryer? Have you ever though about having your own q&a thread? :hmm:
 
Back
Top Bottom