What's new
Pinball info

Register a free account today to become a member! Once signed in, you'll be able to participate on this site by adding your own topics and posts, as well as connect with other members through your own private inbox!

Complete Bram Stokers Dracula Shop Log

ronsplooter

Site Supporter
Joined
Jul 21, 2011
Messages
6,496
Location
Nottingham
Alias
Chris
Even though I'm in the middle of working on my Fish Tales and the stripped cab is sat in my Dads garage I feel the need to have an ongoing project at my house. So I've decided to shop out one of my other games at the same time to keep me off the streets of an evening :) After a bit of wheeler dealing in the last few months, all three of my other games are newish to me and need shopping so I had to pick one to take apart. I'm playing TAF constantly at the moment so it can't be that and I just can't face ripping IJ apart yet so BSD it is!

I'm going to start the teardown tomorrow evening and will start putting pics up then but there are some obvious bits that need need sorting that I already know about:
  • Just ordered some red lightning flippers from Pinball Center to replace the standard size yellow ones that are currently on it.
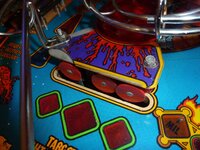
  • The centre bank death targets are all red and the middle one should be yellow. Big thanks to Replicas who gave me the correct yellow target to replace it.
  • The plastic above the death targets is damaged (common issue) but again, big thanks to Replicas who gave me a replacement with the pin.
  • The left sling plastic is damaged (top corner chipped off) and I can't find replacements in the UK or Europe so I'm on the scrounge. If anyone has an undamaged left sling plastic (or pair) for sale then give me a shout.
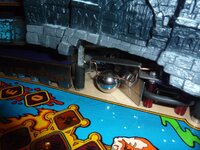
  • The right mist gate is missing the steel wire that holds the ball in. Darren made a temporary fix using copper wire bent to shape but if it takes a few hits it will bend out of shape and stop the ball being released until you bend it back. If anyone has got a spare right side mist gate they would sell me or a length of the hard steel wire then let me know.
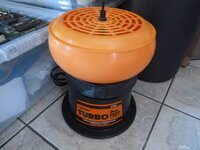
I've also decided that I've had enough of spending days standing at my sink hand cleaning all the metal parts when I shop a game......especially the nuts and screws :eek: With that in mind I'm going to order myself a tumbler tomorrow and do it properley. The plan is to use my ultrasonic cleaner to get major grime off and then chuck everything into the tumbler :)
And so it begins........
 
Last edited:
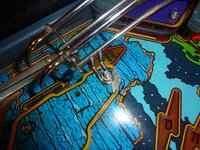
  • The right mist gate is missing the steel wire that holds the ball in. Darren made a temporary fix using copper wire bent to shape but if it takes a few hits it will bend out of shape and stop the ball being released until you bend it back. If anyone has got a spare right side mist gate they would sell me or a length of the hard steel wire then let me know.

Could be useful if you fancy a bit of wire bending :)

http://pinside.com/pinball/forum/topic/help-making-new-bsd-left-mist-gate

Piano wire - probably .055 size would do ?

http://www.ebay.co.uk/itm/Piano-Wir...afts_Other_Crafts_EH&var=&hash=item3a80a7d962
 
Ron,

When you get to put the machine back together, take care with the connectors for the Coffin ramp (scoring switch) and the subway entry. They're in the same area under the playfield, and the wiring tech specified the same two pin connector on each. Twice I've seen these swapped over when shopping this machine. It's tricky to get the coffin open when you have to make the sink hole shot repeatedly to do so, yet the m/c made it to a site like that before I noticed.
 
Cheers Ive, that piano wire looks perfect for the job.

Thanks Jay, I'll keep an eye out for that. I always label both sides of connectors with a permanent marker before I take things apart so hopefully that will keep me out of trouble.
 
I'll watch this thread carefully to help when I finally get mine home. E bay America often have slingshot plastics for bsd and last week even a complete new old stock set of plastics.
I like the look of some of dreads mods for this as well.
Happy shopping and please post up lots of photos.
 
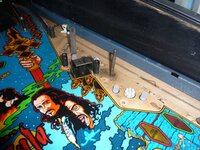
Here's a few pics of the bits that need fixing, first the damaged sling plastic....

P1040188.JPG

Here's the incorrect death target (the middle one should be yellow) and the smashed up plastic.....

P1040192.JPG

And the mist gate that needs new wire, you can see it's a bit bent out of shape from the last time I played.....

P1040197.JPG
 
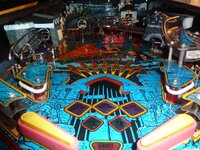
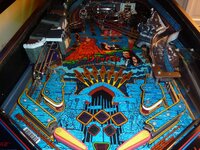
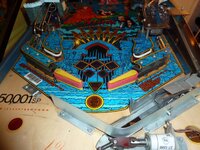
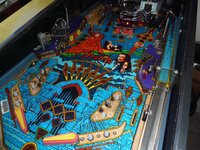
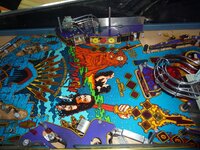
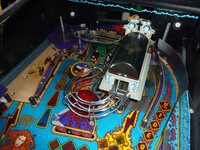
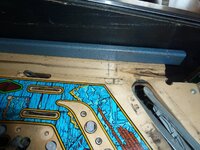
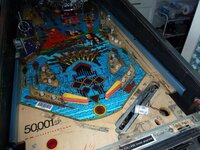
And a few pics of what I'm starting with. The playfield is in great nick from what I can tell, this one should come up really nice :)

P1040193.JPG

P1040194.JPG

P1040198.JPG
 
This is all well and good but how am I supposed to come round and play it now?
Talk about inconsiderate.
And after I did absolutely nothing to help you get it in your house as well.


Well, I just hope you can ultrasonic clean your conscience.
 
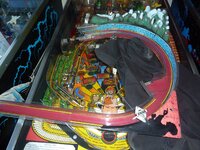
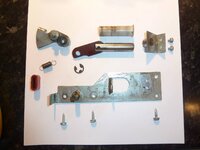
Grrrrrrr :mad: Someone needs to have a word with Barry Ousler, BSD is bloody awkward to strip down. The amount of other stuff that needs to be untangled and taken off just to get the ramp off is ridiculous. Finally managed to liberate it from the machine.....

P1040249.JPG

Here's a few pics of where I'm up to with the teardown. All the ramps are off so now I can get to the rest of it and the first batch of metal parts have gone into the tumbler. The awkward design looks to continue underneath as well cause the subways are going to be a bitch to remove, one to look forward too :rolleyes:

P1040301.JPG

P1040302.JPG

P1040303.JPG
 
Nice one Chris. I'm in the middle of shopping out my FH which is also a bit of a pain. Can't really be ****d at the moment but really want it in the new game room so gotta pull my finger out. How's that timber working out for ya? Still thinking about getting one myself!
 
How's that timber working out for ya? Still thinking about getting one myself!

I'm gonna assume your on about the tumbler mate ;) Looks good so far, just the fact that I'm not going to have to clean all the small metal parts by hand is a godsend. If you shop a lot of games then it's deffo worth investing in, if your only doing a one off then probably not worth it. 65 quid delivered off Amazon....bargain as far as I'm concerned :)
 
Ha ha, yes mate Tumbler!! Bloody mars bar fingers and an iphone!!! Think I'm gonna get one this week. I really want to do a number on FH as its my "grail" pin.
Looking forward to seeing your progress mate.
 
Ron,

In that picture showing the coffin, is that lead for the two lamps on the headstone?. If I remember properly, that ought to go through the playfield with the other coffin-associated wiring. I definitely recall resorting to using a sticker next to the hole for the coffin wiring, saying how many wire harnesses went through (four).
 
Yep thats the lead for the coffin lamps and your right it does go through the pf (hole just behind the coffin). I've disconnected it and pulled it through in preparation for removing the coffin :)
 
That machine is in really good condition and its going to look even better once cleaned up and all back together.
I knew it would clean up good but its in a cracking condition and is going to look sweet once done.
 
I knew it would clean up good but its in a cracking condition and is going to look sweet once done.

Planning on bringing it to Northern Lights so you'l be able to check it out in person :) Not got much further today as didn't get back from work till late. I left the tumbler running all day while out at work but haven't had chance to check it so will bang it on again tomorrow and then put the next batch in.

I've changed my approach for this shop as normally I'd completely strip the pf in one hit and individually bag the various parts with their screws and nuts but for tumbling I'm chucking a load of the metal parts in at once. So I don't lose track of what goes with what, I'm stripping the pf in parts to make up enough metal bits for a batch in the tumbler then put the bits back with their plastics etc before I strip the next bit. Batch 1 has been apron, all the ramps, slings and inlane/outlane dividers.
 
Planning on bringing it to Northern Lights so you'll be able to check it out in person :) Not got much further today as didn't get back from work till late. I left the tumbler running all day while out at work but haven't had chance to check it so will bang it on again tomorrow and then put the next batch in.

I've changed my approach for this shop as normally I'd completely strip the pf in one hit and individually bag the various parts with their screws and nuts but for tumbling I'm chucking a load of the metal parts in at once. So I don't lose track of what goes with what, I'm stripping the pf in parts to make up enough metal bits for a batch in the tumbler then put the bits back with their plastics etc before I strip the next bit. Batch 1 has been apron, all the ramps, slings andy lane/outlane dividers.
Will be great to see the machine again and even more so all minty fresh. Look forward to you bringing it up to NLP we are very grateful for the support.
Wise decision doing the strip down in stages as when using a tumbler things tend to all get jumbled up and the less to sort out when cleaned up the better.
 
They do look great. I got tired of autosol and polishing on Creech but have the offer of borrowing a tumbler for IJ work. You have convinced me.
 
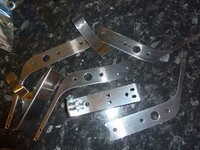
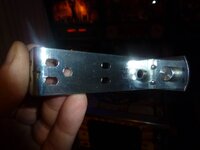
Managed to spend some time on BSD today and stripped down another bit of the pf to make batch number 2 for the tumbler.

P1040373.JPG

P1040378.JPG

P1040379.JPG

P1040380.JPG
 
They do look great. I got tired of autosol and polishing on Creech but have the offer of borrowing a tumbler for IJ work. You have convinced me.


Dont forget to throw autosol in with the media for that shiny shiny finish ;)
 
Are you gonna upgrade Ron Jeremy in the coffin?

No, I want to keep the original. Looks fine as far as I'm concerned.

Dont forget to throw autosol in with the media for that shiny shiny finish

Yep, have been doing. A couple of slugs of Autosol seems to do the trick :)
 
Back
Top Bottom