Pinball info
You are using an out of date browser. It may not display this or other websites correctly.
You should upgrade or use an alternative browser.
You should upgrade or use an alternative browser.
Complete World Cup Shocker
- Thread starter s000m
- Start date
Regarding the provision (or not) of locations for anti-return wires on replacement playfields; I saw a thread about fitting one to an Earthshaker. The original item had four outlined blank circles in the artwork for them, but left un-drilled, or even dimpled. The flyer showed the wires fitted, but that prototype didn't have a mini-post between the flippers, so it must have been changed at a late stage. Anyway, the replacement playfield had one eliminated and one left in place, on each side.
Last edited:
Doing a playfield swap is a nightmare - a lot of patience and attention to detail required. You are making it look easy but the reality is one mistake and your £800 playfield is f***ed.
I've got my eye on refurbing a WCS so it's good to see the issues documented in advance. keep it up.
My theory is that if the original factory template has something out / not done then the CPR will follow. One of the holes on my CPR Whirlwind was in the wrong place for a ball guide but it was also wrong on the original playfield. The factory had just put a screw in and moved on. I obviously spent hours doing what you did to protect the art on the new playfield.
It didn't feel like banter, but we'll move on.Called a bit of banter, a joke, joshing around or bit of jestChill out
I apologise if I upset you
Apology accepted.
Doing a playfield swap is a nightmare - a lot of patience and attention to detail required. You are making it look easy but the reality is one mistake and your £800 playfield is f***ed.
I've got my eye on refurbing a WCS so it's good to see the issues documented in advance. keep it up.
My theory is that if the original factory template has something out / not done then the CPR will follow. One of the holes on my CPR Whirlwind was in the wrong place for a ball guide but it was also wrong on the original playfield. The factory had just put a screw in and moved on. I obviously spent hours doing what you did to protect the art on the new playfield.
Utterly agree, it's getting through the clear coat and lining up the holes just right when they don't exist.
It's a lot of risk, I'm used to Mirco playfields having missing holes, but this particular playfield was missing 3. One by the flippers, another by an assist hole and a 'strut' for the outside plastics.
That's a new record for me.
There's always a high risk you end up stressing the clear coat too much and it fractures.
Without the burring bit I wouldn't even attempt it.
It's a life saver.


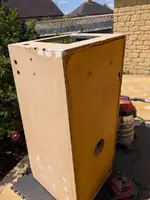
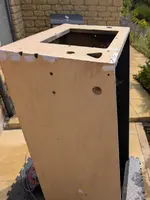
With the cab fully sanded I focused on the repair.
I used epoxy resin for the large holes on the side of the cab, presumably used for a large retention bar over the coin door.
Lots of random little damage to the sides of the cabinet like small 3mm holes, no idea.
Usual rear damage and leg area damage.
I sanded the bottom as it was basically black. I also sanded the inside.
Did the first coat of primer.
Attachments
Last edited:
When it started raining I moved back to the playfield.
It was mainly an exercise of drilling and carefully placing then what I just call thumping in the metal.
Then I moved onto plastics, new plastic set so I had to remove the rivets from any attached metals and migrate them over.
'Riveting' I know. (Bad dad joke)

Neil couldn't find a replacement mini playfield so I cleaned up the old one.

I also cleaned up the old playfield as it's operating as a workbench for now.

Just waiting on the ball guides to come back so I can continue.

It was mainly an exercise of drilling and carefully placing then what I just call thumping in the metal.
Then I moved onto plastics, new plastic set so I had to remove the rivets from any attached metals and migrate them over.
'Riveting' I know. (Bad dad joke)
Neil couldn't find a replacement mini playfield so I cleaned up the old one.
I also cleaned up the old playfield as it's operating as a workbench for now.
Just waiting on the ball guides to come back so I can continue.
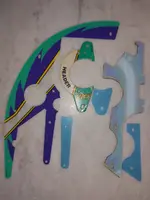
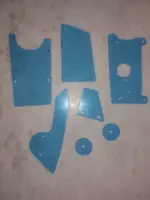
@Colywobbles did me a set of protectors for my wcs94 including protectors for the long plastic to the left of the goal and for the kick plastic. You may want to get these 2 from him as he already has the templates.
Actually he did 3 protectors for me plus the slings and the clear ones so he has templates for them all. The 3 are in the first pic and all the clears are in the second. Blue plastics as they still have their protective film on.
Attachments
Last edited:
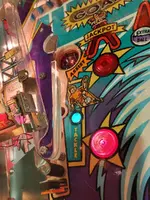
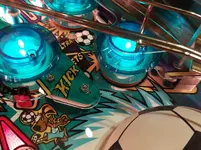
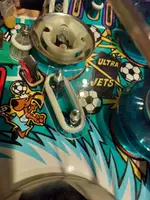
And a few shots during installation and in situ. Note I always put the protectors under the stud posts not on top as this is where they should be.
Attachments
Our WCS has those little holes in the cabinet too. I don't know why, I thought it was unique to ours.
It's exactly where the official fifa sticker goes. Maybe something to do with that. Don't know about mine as sticker is covering.
I'll speak to Neil, I think he thought he bought some but it turned out to be a additional set of clear plastics from the original set.Actually he did 3 protectors for me plus the slings and the clear ones so he has templates for them all. The 3 are in the first pic and all the clears are in the second. Blue plastics as they still have their protective film on.
One of our plastics broke in a few weeks. The one by the tackle insert which has a protector in that pack. I really thought I'd bought the protectors but I couldn't find them and now it's too late 
Such a big plastic to replace too
Such a big plastic to replace too
It's the set of 3 that you need. They are the 3 plastics that are always broken on wcs. One of my protectors broke so I need to get a new one from Col but it shows that it did its job as the header plastic remained intact. The pop bumper action on wcs with the spinning ball in close proximity is insane.
They are definitely holes an old security bar. Your Road Show had them as wellOur WCS has those little holes in the cabinet too. I don't know why, I thought it was unique to ours.
I'll push Neil to get them.One of our plastics broke in a few weeks. The one by the tackle insert which has a protector in that pack. I really thought I'd bought the protectors but I couldn't find them and now it's too late
Such a big plastic to replace too


So the second side hit issues, the decals arrived with soot or dirt on the underside. Like it had been dragged on the floor. Also had some crumpling in certain area's.
Had to pull and tighten the decal to sort some of it out. Despite that I ended up with flecks. Really frustrating.
Planetary have been sent off a request for replacement set. It's only minor but you do see them when you catch them in the light which just triggers my OCD.
Camera doesn't really show them.
Condition of the decal before application.


Once applied.

Also had to apply the sticker that goes on the cab separately I imagine the original was hence this separate sticker.
Had to cut to size which was a bit of a pain.

I should add it's just me wanting to look as good as it can. When you put 20+ hours into cab prep to be let down by defects however small it can feel deflating.
Had to pull and tighten the decal to sort some of it out. Despite that I ended up with flecks. Really frustrating.
Planetary have been sent off a request for replacement set. It's only minor but you do see them when you catch them in the light which just triggers my OCD.
Camera doesn't really show them.
Condition of the decal before application.
Once applied.
Also had to apply the sticker that goes on the cab separately I imagine the original was hence this separate sticker.
Had to cut to size which was a bit of a pain.
I should add it's just me wanting to look as good as it can. When you put 20+ hours into cab prep to be let down by defects however small it can feel deflating.
Oh definitely, the old game was full of holes and water damage.Looks a hell of not better than it did. I'd be tempted to get some freebie replacements off planetary and include them in any future sale.
Neil's on the case as he ordered them.
Tonight I'll finish the backbox and hopefully the interior elements if the cab.


New parts arrived so I switched out the err switches.
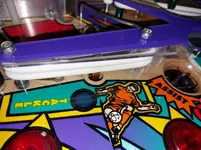
I also replaced the slingshot kickers.


I've also replaced the old purple kick out plastics which is quite a bit of hassle.
Got to clean up in the morning and will assess if I can complete everything else when it's inside the cab.
From memory I've got the following left.
- ball guides (awaiting return)
- wireform (awaiting return)
- plastic ramp (awaiting replacement)
- hook up of top side switches
- mounting of associated ramp hardware
- Installation of bulbs in backbox and remaining missing bulbs on playfield
- installation of rubbers

I also replaced the slingshot kickers.
I've also replaced the old purple kick out plastics which is quite a bit of hassle.
Got to clean up in the morning and will assess if I can complete everything else when it's inside the cab.
From memory I've got the following left.
- ball guides (awaiting return)
- wireform (awaiting return)
- plastic ramp (awaiting replacement)
- hook up of top side switches
- mounting of associated ramp hardware
- Installation of bulbs in backbox and remaining missing bulbs on playfield
- installation of rubbers


