You won't be disappointed, brutal but so satisfying when it all comes together.Enjoying this thread so far, its really making me want to get a BSD!
Pinball info
You are using an out of date browser. It may not display this or other websites correctly.
You should upgrade or use an alternative browser.
You should upgrade or use an alternative browser.
In Progress Williams - BSD
- Thread starter James
- Start date
Really enjoyed this thread mate.
I wouldn't be too bothered about it not being minted. I often wonder if people would want to play a minted pin. You would cry if anything happened to it.
Could you imagine owning that chrome t2 that Chris did? You wouldn't go near it without gloves on, it's that nice.
I thought you only had room for two pins? Starting to mount up now ?
I am trying to get a fourth right now too- the sofa in the pinshed is going, reckon I can get 5 in there

Haha, And so it continues... "Do we really need a bathroom, we only ever use the downstairs shower"
What the hell do you need a sofa for in a pinroom? That's space for pins that is...I am trying to get a fourth right now too- the sofa in the pinshed is going, reckon I can get 5 in there

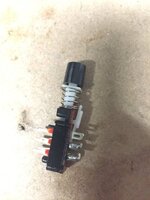
So started trying to figure out why the test menu wasn't working on the game, checked the continuity across the wires on each of the switches, and found that actually the ENTER switch wasn't working. I have removed currently to "Hotwire" the switch test menu, I will test and adjust up as I rebuild, don't want to get into rebuilding and find actually an opto somewhere or a solenoid isn't working - so will keep on top of that.
Tested all switches and opto's currently on the playfield, inlane switch needs adjustement, all opto's that are on the PF are working, slings all good and I knew that pops were good prior but they are on the rebuild list, so obviously not working right now.
Had an issue previously with the flippers not working, this was due to the EOS plug (906??!?!? don't have schematic) not being plugged in properly after I had to repin. Switches all working now, one solenoid (right side) not firing for some reason, but will get into it next time.
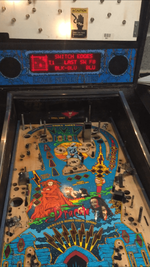
Still happy after sorting some issues with just 20 minutes in it tonight. This pinball lark isn't all that bad hey

Tested all switches and opto's currently on the playfield, inlane switch needs adjustement, all opto's that are on the PF are working, slings all good and I knew that pops were good prior but they are on the rebuild list, so obviously not working right now.
Had an issue previously with the flippers not working, this was due to the EOS plug (906??!?!? don't have schematic) not being plugged in properly after I had to repin. Switches all working now, one solenoid (right side) not firing for some reason, but will get into it next time.

Still happy after sorting some issues with just 20 minutes in it tonight. This pinball lark isn't all that bad hey
Last edited:
Just a bit of advice, James,
The large hole for passing wiring through the playfield, below the Coffin ball popper, has 4 separate pieces of wiring going through. I even put a label marked '4' on the underside of the ones I worked on, as a reminder to have all of them routed through before finally securing anything
Also, two of the switches, Coffin Ramp 'made' and Sink-hole, have the same connector, and can get swapped over. This doesn't cause a short-circuit in the switch matrix (even the assignment of Column/Row wires in the housings is the same), but it is awkward, and makes a hard game even more so
Last edited:
Just a bit of advice, James,
The large hole for passing wiring through the playfield, below the Coffin ball popper, has 4 separate pieces of wiring going through. I even put a label marked '4' on the underside of the ones I worked on, as a reminder to have all of them routed through before finally securing anything
Also, two of the switches, Coffin Ramp 'made' and Sink-hole, have the same connector, and can get swapped over
Lol I managed to have the wrong ones connected when I did my old one
I have labelled up all of the wires with a good old fashioned Sharpie and numbers which should help but yes one thing I may have missed was the number of wires through each area - appreciate the support gents, can't wait to have it up and playing 
I love operator mods, the key is a classic! I bet that op was thrilled with himself when he discovered the key fit through the drop target bracket

So I am off this week and looking to crack on with this as much as I can - want to start playing the thing and isn't haloween coming up :O
Lots of little hacks on the underside of the playfied, little chock blocks here and there....
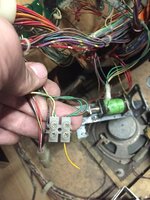
Or just black insulation tape covering bits and pieces up - just made a quick fix for this, the switch needs replacing, so up to two switches now that I need to order in
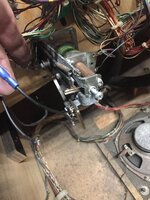
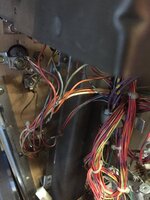
Of course I managed to sort out those with some shrink tape didn't take an after picture though. That subway might want a clean too hey
Thank you to @Toxteth O'Grady for sending over the switch, this is helping getting everything into test mode for switch testing.
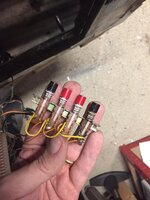
Upgraded the pop bumper fixings, as you can see another choc-block mod by the operator I have repaired here too.
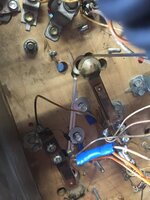
All pops cleaned and rebuilt - could probably use a new saucer there - but got it working for now which is great and has all been cleaned up...
Whilst I was under here I pulled some of the light boards...
Before
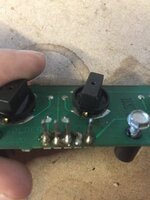
After
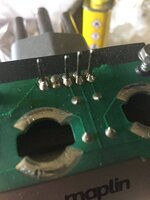
Little more work on the topside too
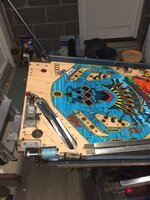
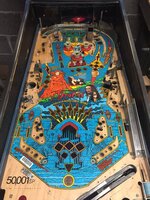
Adding the LED's too
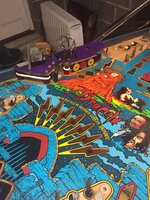
Rebuilding the left hand side too now which has cleaned up nicely - but of course... the gate needs rebuilding too...
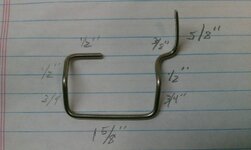
Found this on pinside so I will make another one up - tried using some extra that @stoptap sent me after being an absolute legend and helping with my SS but I need to order a bulk and give it another go and get it right, luckily Pinside had this so I should be able to rustle something up
Lots of little hacks on the underside of the playfied, little chock blocks here and there....

Or just black insulation tape covering bits and pieces up - just made a quick fix for this, the switch needs replacing, so up to two switches now that I need to order in


Of course I managed to sort out those with some shrink tape didn't take an after picture though. That subway might want a clean too hey
Thank you to @Toxteth O'Grady for sending over the switch, this is helping getting everything into test mode for switch testing.

Upgraded the pop bumper fixings, as you can see another choc-block mod by the operator I have repaired here too.

All pops cleaned and rebuilt - could probably use a new saucer there - but got it working for now which is great and has all been cleaned up...
Whilst I was under here I pulled some of the light boards...
Before

After

Little more work on the topside too


Adding the LED's too

Rebuilding the left hand side too now which has cleaned up nicely - but of course... the gate needs rebuilding too...

Found this on pinside so I will make another one up - tried using some extra that @stoptap sent me after being an absolute legend and helping with my SS but I need to order a bulk and give it another go and get it right, luckily Pinside had this so I should be able to rustle something up

Checked all the solenoids are doing what they should and found two issues - the up/down on the coffin and the diverter - I am going to need better provisions on my socket set so after taking the wife to lunch will be heading to B&Q - I love buying tools.
The diverter had a spring in it that had somehow sheared in two - I have a few springs from who knows what and lucking managed to get one with the right size and tension to resolve after striping the mech (adjusting out the massive bend it had in it too - probably causing the sheared spring) and rebuilding.
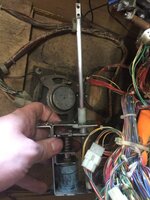
I’ve taken the subways out as they were a bit dirty....
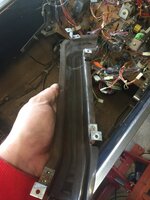
Like the rest of the machine they came up ok though
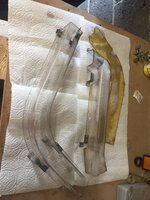
The light boards will all come out now too, get the LED treatment and any soldering that needs sorting will get sorted too.
The diverter had a spring in it that had somehow sheared in two - I have a few springs from who knows what and lucking managed to get one with the right size and tension to resolve after striping the mech (adjusting out the massive bend it had in it too - probably causing the sheared spring) and rebuilding.

I’ve taken the subways out as they were a bit dirty....

Like the rest of the machine they came up ok though

The light boards will all come out now too, get the LED treatment and any soldering that needs sorting will get sorted too.
Don’t forget it’s an imperial socket set you will need
Thanks @RudeDogg1 had a decent ish set of both metric and imperial but the extension was short - bought a neat screwdriver which acts as an extension bar too! Which is pretty cool.
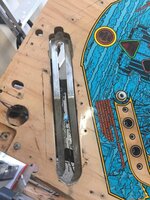
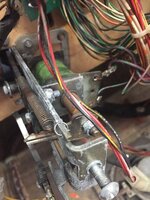
Had the ramp mech out - I knew something wasn’t right but wasn’t sure what...
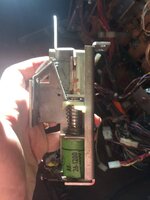
Looked in the book and could see that this lever when engaged should sit on the plastic bracket
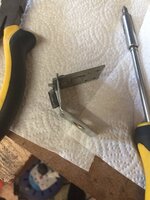
Got it all apart and cleaned down as there was some resistance from the rust on the unit, cleaned that up and made a slight “adjustment” whilst in the vice..
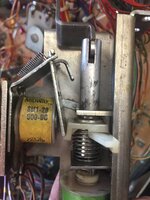
Ahh ******** I’ve put that back together wrong - FFS I’ll go get that out whilst I remember...
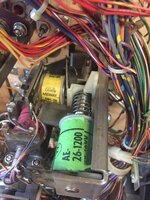
Good good...
Annoying when the inserts you reworked look much better from the bottom...
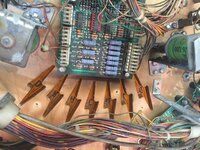
I have a lot of lights still out on the topside - but also have a couple of boards out too... I’m guesing that causes some rows to be broken if the board is out? Not that it matters as that’s a tweak to me - not a major mech issue as above and is generally just board work right..
Had the ramp mech out - I knew something wasn’t right but wasn’t sure what...

Looked in the book and could see that this lever when engaged should sit on the plastic bracket

Got it all apart and cleaned down as there was some resistance from the rust on the unit, cleaned that up and made a slight “adjustment” whilst in the vice..

Ahh ******** I’ve put that back together wrong - FFS I’ll go get that out whilst I remember...

Good good...
Annoying when the inserts you reworked look much better from the bottom...

I have a lot of lights still out on the topside - but also have a couple of boards out too... I’m guesing that causes some rows to be broken if the board is out? Not that it matters as that’s a tweak to me - not a major mech issue as above and is generally just board work right..
Last edited:
Just checked over the insert issue, getting no lights on the Red - Brown and Red - Black light circuit - I’ve switched the driver board power and return between the two options (can’t remember the socket numbers) and the problem persists, I’m giessing this is a trace issue problem through the “loom” as it were...
Can you do the old trick where you crock clip the pin to earth and see if you get a reading off of it? Eliminating the pin as the issue? Seems strange to have two rows out.. and it be “off” the board but hey... needs investigating.
Can you do the old trick where you crock clip the pin to earth and see if you get a reading off of it? Eliminating the pin as the issue? Seems strange to have two rows out.. and it be “off” the board but hey... needs investigating.
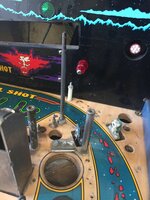
So made that wire gate up off of the dimensions found on pinside, then used @RudeDogg1 suggestion and made up a metal bracket to catch it up, it’s not pretty but it works...
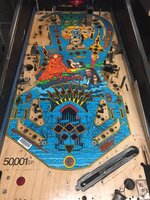
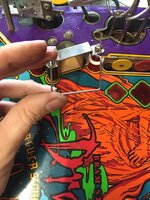 Lots more done top side, as you can see
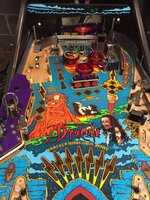
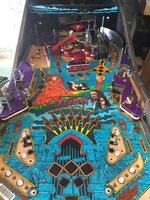
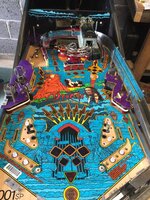
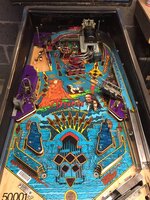
What you can’t see apart from the tumbling is the wet and dry taking off the rust off the wire forms which have come up lovely. Every screw has been tumbled but I took the time to wire brush them all too, that’s a job in its own right. Oh - thanks @carl lawrence for the advice on the switches, which have all been tested and the long range opto etc is all working too.
Bloody (get it) loving this restoration.
 Lots more done top side, as you can see


What you can’t see apart from the tumbling is the wet and dry taking off the rust off the wire forms which have come up lovely. Every screw has been tumbled but I took the time to wire brush them all too, that’s a job in its own right. Oh - thanks @carl lawrence for the advice on the switches, which have all been tested and the long range opto etc is all working too.
Bloody (get it) loving this restoration.
Finally getting there - flippers now adjusted too and both working (is that the worst job in pinball!?!?)
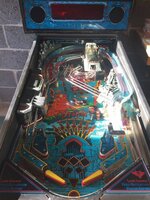
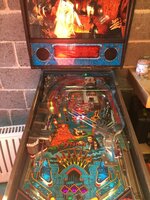
Two light rows are currently out - which is frustrating and need to order some chips and resistors up to fix that issue - there were some operator hacks on the TIP102’s which I have now sorted but need to socket the chips and swap some out - a bit confused on the GI but I’ll have that worked out soon enough - I’m getting playfield GI but not backbox for some reason - yet buzzing out the adjoining pins is giving a good reading...


Two light rows are currently out - which is frustrating and need to order some chips and resistors up to fix that issue - there were some operator hacks on the TIP102’s which I have now sorted but need to socket the chips and swap some out - a bit confused on the GI but I’ll have that worked out soon enough - I’m getting playfield GI but not backbox for some reason - yet buzzing out the adjoining pins is giving a good reading...
So couple of updates on the board work that needed doing - the two rows that are out... the two TIP102’s have previously tried to be replaced but the operator didn’t put the resistors back, I’m guessing this may have also ruined the 339 - so I’m going to docket that too when the parts arrive Tuesday from RS... the pads were also gone on the TIP102’s and no continuity to the pins... so I’ve added jumpers onto the board and buzzed them out okay now.
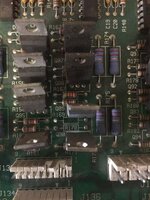
I just couldn’t get workout what was going on with the GI in the back box... the header on the playfield one was a bit crispy but the playfield GI was fine, swapping them over would still give the playfield light power - so whilst I was sure I wasn’t getting power issues but I tested to ensure. I then buzzed out each wire to the terminating connector in case there were some connection issue - nope all good.
I checked the connector and the connector looked great, no toasting at all... in fact it looked new.. then it hit me...
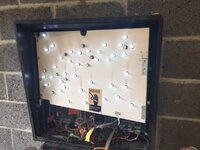
New female connector wired up in reverse - so you can’t plug the blinking thing in the corrrect way.
Both will be redone with new female connectors - also on order from RS now.
10uf caps on order for sound board too as sound is a bit crap.

I just couldn’t get workout what was going on with the GI in the back box... the header on the playfield one was a bit crispy but the playfield GI was fine, swapping them over would still give the playfield light power - so whilst I was sure I wasn’t getting power issues but I tested to ensure. I then buzzed out each wire to the terminating connector in case there were some connection issue - nope all good.
I checked the connector and the connector looked great, no toasting at all... in fact it looked new.. then it hit me...

New female connector wired up in reverse - so you can’t plug the blinking thing in the corrrect way.
Both will be redone with new female connectors - also on order from RS now.
10uf caps on order for sound board too as sound is a bit crap.
So she was all working - all switches up and running, just a few lights out and some washers to add the the ramp, but it’s playing well and that makes me happy. It’s out at another forum members at the moment where there’s space.
Still to do.
- Recap sound board
- 4 Light Holder Replacements
- 2 Lamp Sockets on the cross that are beyond working
- Washers to stop airs off Castle Lock
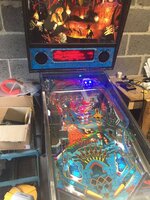
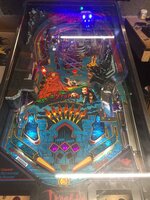
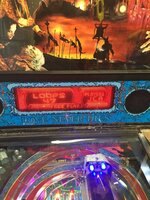
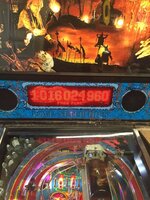
Still to do.
- Recap sound board
- 4 Light Holder Replacements
- 2 Lamp Sockets on the cross that are beyond working
- Washers to stop airs off Castle Lock


Hey @Horsey - it is my machine owned with another forum member - we went 50/50 on this project and I can then switch up the line-up, hence why it is currently "on loan". I will finish it up at his and bring it back at some point. Plus I am out of space and they have room for a few. That is until I manage to get the house move through with the wife in 2019 
Finally getting there - flippers now adjusted too and both working (is that the worst job in pinball!?!?)
Quite a few contenders for that honour. System 11 pop bumpers would be my suggestion

