What's new
Pinball info

Register a free account today to become a member! Once signed in, you'll be able to participate on this site by adding your own topics and posts, as well as connect with other members through your own private inbox!

In Progress Will I ever enter - The Twilight Zone

AlexP

Site Supporter
Joined
Jun 15, 2023
Messages
12
Location
UK
Ok,
Long time lurker on here but first real time posting.
A bit of background, been in the hobby since the late 90’s mainly enjoyed fixing up machines and then selling them on to fund the next one, took a break after moving house and having a child 10 or so years ago.
Last year I picked up my favourite machine (TZ was first ever machine I owned) to get me back into the hobby.
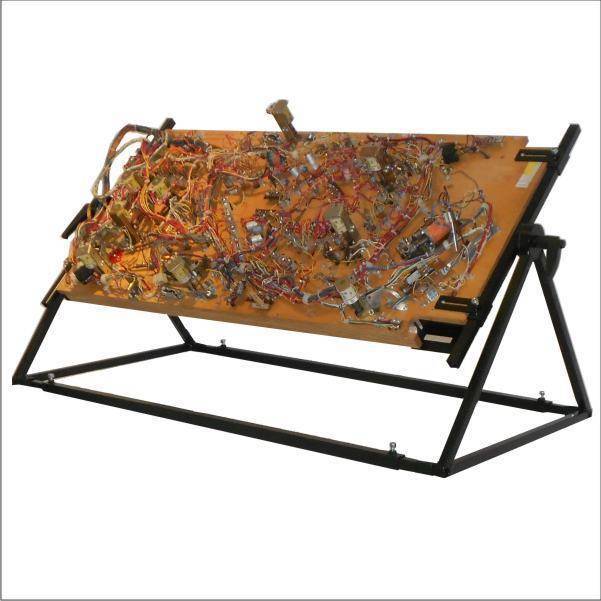
I decided to “outsource” the cabinet refurb to Ant from the forum and tackle putting a new Mirco playfield in myself, which was all going fine until I found that somehow I’d cracked one of the inserts and made a mess trying to fix it. So now I’m back to the start with a playfield No 2.
Putting this restoration on here as motivation for me to get cracking, so feel free to throw me some abuse or encouragement to get this completed.

Apologies in advance.

Alex
 
Good luck, twighlight zone is a complex game.

I've striped and cleaned one the top half, there nothing particularly challenging. It's a master of design very easy to work on, well the top half was. Still a lot of parts and mechs to fit.

My only advice is to get the dolly thing to hold the playfield.

You can get them in Europe but can't remember where I toyed with getting one, but haven't had to replace a playfield (yet)
 
Looking forward to seeing this Alex 👍🏻

Did Mirco send you the replacement in the end? Have you installed the new wooden rails on it?

If it’s a Mirco I’d definitely recommend getting them on there to avoid any bowing which seems to happen quite frequently with repro playfields due to the wood that they use.
Ant,

Yes I got a replacement playfield but it was not free, I got it at a “discount” after a few emails.

Gonna try the rails this weekend!

Wish me luck.

Alex
 
Also if you're not getting the playfield done with a new clear coat you absolutely MUST use cliffy protectors. That clear coat will 100% chip without them.
 
Some of the before pictures (mostly cabinet)

IMG_0298.webpIMG_0299.webpIMG_0300.webpIMG_0304.webpIMG_0305.webpIMG_0307.webpIMG_0308.webpIMG_0312.webpIMG_2510.webpIMG_2512.webpIMG_2513.webp
 

Attachments

  • IMG_0299.webp
    IMG_0299.webp
    207.4 KB · Views: 2
Just make a diy rotisserie for cheap unless you plan on swapping alot of playfields your only ****ing away money otherwise.. but then again this is the hobby where everyone ****es away money on a regular basis
 
Personally just cleaning the top, take the pf out, lay it on its face and transfer the underside to the new one, back in the game and populate top. No need for a rotisserie that way.
And looks like you have set yourself up for a lot of work here including the backbox.
 
Right so I actually made a start!

Last time I did this I ended up with a cracked insert, so was extra careful this time.IMG_0003.webp

Bought one of these "pullers" from Amazon and cut some cork backed wood to use as a buffer on the top side.
Seems to work OK.
IMG_0001.webpIMG_0004.webp

For all those who spotted I only install 2 per bumper.
IMG_0008.webp

Old vs New
IMG_0007.webp

Jet bumper bodies installed.
IMG_0009.webp
 
OK on a roll now, fitted Ant's replacement wooden ball guides, no photo of the process of clamping, measuring and striaghtening, this is them fitted.
IMG_0010.webp

IMG_0011.webp

Some T-Nut's fitted
IMG_0012.webp

IMG_0013.webp

Shooter lane guide fitted (rear). Nice screwhole alignment on the closer ball guide.
IMG_0017.webp

Fixed with a Dremel and a steady hand.
IMG_0019.webp
 
Looking good Alex. I’m sure your find that it won’t be the only dimple on the new playfield that doesn’t line up.

The oak rails came out great and spy on now you’ve fitted them 👍🏻

IMG_1438.webpIMG_1457.webpIMG_1519.webpIMG_4670.webp
 
  • Like
Reactions: Bod
More slow and steady progress, emphasis on the "slow"

A smattering of posts installed.
IMG_0027.webp

Ball guides.
IMG_0028.webp

IMG_0029.webp

IMG_0031.webp

Has anyone ever noticed the two designs of these posts? I though it was just damage but looking in my spares I discovered several with the fluted section (left).

IMG_0026.webp
 
A little more progress. Some mech's getting a clean and installed.
IMG_0042.webpIMG_0043.webpIMG_0044.webpIMG_0045.webp

Gumball machine stripped down, clean and installed.
IMG_0046.webp
IMG_0049.webp

A few plastics installed.
IMG_0050.webp

Original playfiled is now pretty much empty bar the ball shooter sensor. What are the opinions to do with this tired playfield?
IMG_0051.webp
 
Back
Top Bottom