Not sure if this is good enough for a 'shop log', but it may be useful to some.
I took a photo after each airbrush layer so you can see how I built it back up.
Before airbrushing I sanded the area and cleaned it up.
I masked off the area to be painted with frisket paper.
I used Createx Airbrush paint and each coat was applied thinly, then blasted with a hairdryer for about 1 minute until dry. I then applied the next coat until the right covering had been reached.
Once I'd completed that 'layer', I'd remove frisket mask and reapply a new one, before drawing in the next layer to be painted. I then used an 'exacto knife' to cut out the layer I was painting and repeated the light coating, hairdryer stages.
I'm no expert, but it's a huge improvement!
Yes, the octopus looks a bit radioactive on these pics but in the flesh has a nice flourescent glow under lights.
I decided to leave the main playfield mylar on this one.
(not really sure how to upload full-size pics, just used the upload function but I did upload this into media too and it looks much clearer there)

In hindsight, I maybe could have started fading the octopus back to original colour higher up the body, however, it looks great in the flesh.
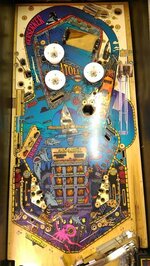
And now the wide shot as it's being waxed and rebuilt....might give the playfield mylar more wet and dry to try and bring it back more.

I think if I'd have decided to remove the mylar, I may have had this whole field clearcoated. As it is, I'm still trying to find the best way to clear touch-ups and this time opted for the Createx Airbrush Top Coat - Gloss.
I'll then probably cover that with some new mylar.
I took a photo after each airbrush layer so you can see how I built it back up.
Before airbrushing I sanded the area and cleaned it up.
I masked off the area to be painted with frisket paper.
I used Createx Airbrush paint and each coat was applied thinly, then blasted with a hairdryer for about 1 minute until dry. I then applied the next coat until the right covering had been reached.
Once I'd completed that 'layer', I'd remove frisket mask and reapply a new one, before drawing in the next layer to be painted. I then used an 'exacto knife' to cut out the layer I was painting and repeated the light coating, hairdryer stages.
I'm no expert, but it's a huge improvement!
Yes, the octopus looks a bit radioactive on these pics but in the flesh has a nice flourescent glow under lights.
I decided to leave the main playfield mylar on this one.
(not really sure how to upload full-size pics, just used the upload function but I did upload this into media too and it looks much clearer there)

In hindsight, I maybe could have started fading the octopus back to original colour higher up the body, however, it looks great in the flesh.
And now the wide shot as it's being waxed and rebuilt....might give the playfield mylar more wet and dry to try and bring it back more.

I think if I'd have decided to remove the mylar, I may have had this whole field clearcoated. As it is, I'm still trying to find the best way to clear touch-ups and this time opted for the Createx Airbrush Top Coat - Gloss.
I'll then probably cover that with some new mylar.

