Pinball info
You are using an out of date browser. It may not display this or other websites correctly.
You should upgrade or use an alternative browser.
You should upgrade or use an alternative browser.
Complete Twilight Zone, now minty
- Thread starter Happypin
- Start date
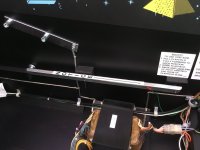
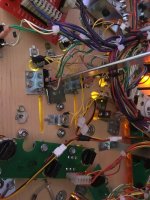
Will need a link to add other optos that I don’t know about. Scratching my head nowNot adding the lane opto (granted, only makes a little noise/minor points)?

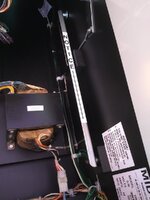
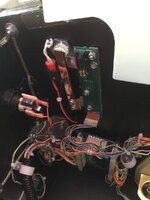
The 3rd magnet optos are in place but not wired yet, I’m not sure of the route I will go with the cables until the cable clips are back on the playfield.
Feel free to come by and look at mine if you want to, am West of London. There were another two in the shooter lane, but that isn’t used by any software. If you have added another seven/ten opto board you have plenty of room to add them in though.
Images here: https://pinside.com/pinball/forum/topic/twilight-zone-prototypesample-photosdocumentation
Images here: https://pinside.com/pinball/forum/topic/twilight-zone-prototypesample-photosdocumentation
Every day is a school day.Feel free to come by and look at mine if you want to, am West of London. There were another two in the shooter lane, but that isn’t used by any software. If you have added another seven/ten opto board you have plenty of room to add them in though.
Images here: https://pinside.com/pinball/forum/topic/twilight-zone-prototypesample-photosdocumentation
Would love a look at your T.Z please. I don’t work so free most days.
If you have not taken enough picture just let me know. I have several hundred pictures of the tz.Thanks mate, so many parts to this T.Z, just hope I’ve taken enough photos.

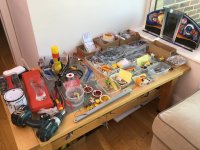
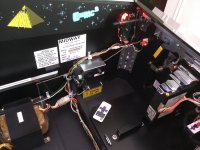
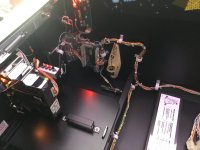
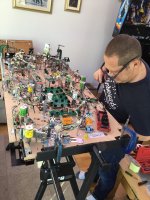
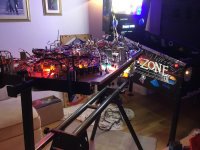
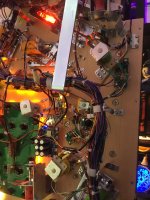
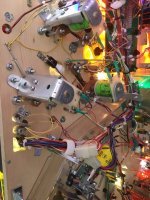
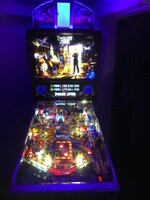
Keeping this log short and sweet and let the photos do the talking.
Mechs built and the cabinet is finished, all tested OK to my surprise.
Mechs built and the cabinet is finished, all tested OK to my surprise.
Attachments

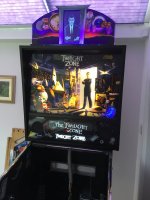
Nice work and great paintwork too

many thanksNice work and great paintwork too
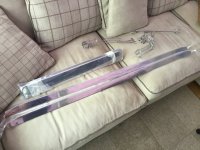
Have really enjoyed this journey, looking forward to having the game back in the line up. Waiting for 4 new ramp flaps then I can have it finished very soon after the playfield is back in the machine.
Hat off to you must zap your energy, amazing effort. Unrealmany thanks
Have really enjoyed this journey, looking forward to having the game back in the line up. Waiting for 4 new ramp flaps then I can have it finished very soon after the playfield is back in the machine.
Need to get it in your top 5 lolAl, it looks incredible mate. You've made yourself an absolute minter
Need to get it in your top 5 lol
Mate, you could paint that thing with Ricicles, make a Krispy Kreme topper and sit Margot Robbie on the playfield and it still wouldn't get into my top 5

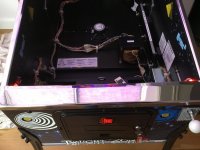
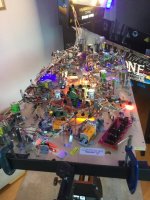
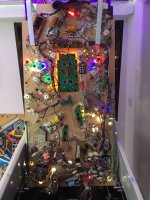
Playfield is now in the machine.
3 issues to deal with but have plenty of time as I’m waiting for the four ramp flaps.
1) Reed switches in my mini playfield mod needs one replaced.
2) A Switch wire form is broken.
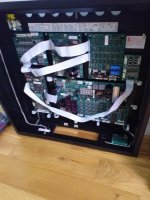
3) The clock is broken, all opto’s are registering, will investigate more tomorrow.
So close to have a game or two.
3 issues to deal with but have plenty of time as I’m waiting for the four ramp flaps.
1) Reed switches in my mini playfield mod needs one replaced.
2) A Switch wire form is broken.
3) The clock is broken, all opto’s are registering, will investigate more tomorrow.
So close to have a game or two.
Attachments
Just an update. Replaced the left reed switch, replaced the slot machine switch, fixed the clock.
1) four flaps lost in the post so reordered from Mantis.
2) awaiting 2 replacement switches one for the ramp and another for the rocket launcher. Replaced today.
3) decided to go back to a clear clock so that’s now on order.
4) coin door switch bracket ordered. fitted on the 12/11/23
5) brass screws for lamp sockets on order. Replaced today.
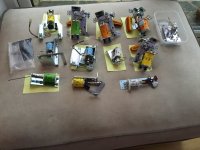
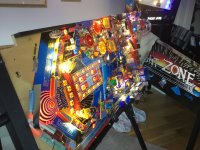
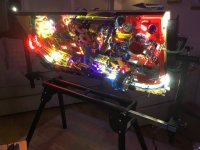
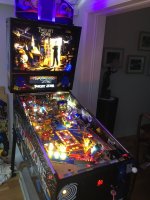
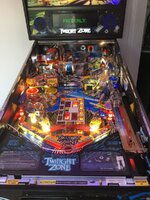
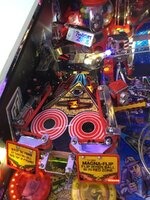
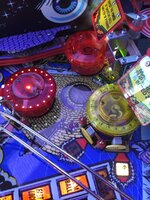
Machine is up and running, it’s just me being fussy to making it more minty.
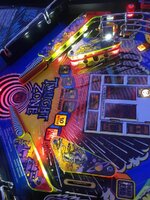
Added photos of some of the mods, photos will do the talking.
1) four flaps lost in the post so reordered from Mantis.
2) awaiting 2 replacement switches one for the ramp and another for the rocket launcher. Replaced today.
3) decided to go back to a clear clock so that’s now on order.
4) coin door switch bracket ordered. fitted on the 12/11/23
5) brass screws for lamp sockets on order. Replaced today.
Machine is up and running, it’s just me being fussy to making it more minty.
Added photos of some of the mods, photos will do the talking.
Attachments
-
 IMG_5522.jpeg139.6 KB · Views: 47
 -
 IMG_5521.jpeg127.6 KB · Views: 47
 -
 IMG_5520.jpeg123.5 KB · Views: 42
 -
 IMG_5518.jpeg135 KB · Views: 41
 -
 IMG_5517.jpeg131.3 KB · Views: 40
 -
 IMG_5523.jpeg86.7 KB · Views: 44
 -
 IMG_5537.jpeg194.7 KB · Views: 42
 -
 IMG_5541.jpeg154.7 KB · Views: 44
 -
 IMG_5539.jpeg162.5 KB · Views: 50
 -
 IMG_5524.jpeg89.8 KB · Views: 42
 -
 IMG_5525.jpeg97.9 KB · Views: 36
 -
 IMG_5535.jpeg184.7 KB · Views: 33
 -
 IMG_5536.jpeg181.8 KB · Views: 31
 -
 IMG_5534.jpeg145.3 KB · Views: 30
 -
 IMG_5533.jpeg167.1 KB · Views: 30
 -
 IMG_5532.jpeg151 KB · Views: 27
 -
 IMG_5530.jpeg137 KB · Views: 29
 -
 IMG_5529.jpeg136.9 KB · Views: 29
 -
 IMG_5528.jpeg165.9 KB · Views: 31
 -
 IMG_5527.jpeg173.2 KB · Views: 37
Last edited:
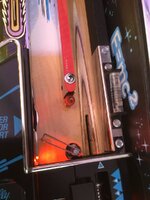
Scott that made me laugh out loud, great idea I must say.Mate looks awesome, only thing I'd change, on your lock bar receiver change it from inspected by #5 to Inspected by Alan.
Gotta leave your mark on this game somewhere
Just a few jobs done to the T.Z, but very little to do now.
1) fitted 3 new switches that didn’t connect with the ball every time.
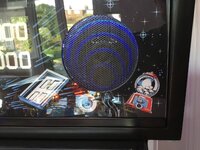
2) Some time ago Chris at the pinball office gave me a pyramid mod which was missing parts and instructions, I bought a light activated switch, so when a chosen mode lights up would trigger what ever is wired to it, using my independent 5v supply it works a treat.
3) 4 new ramp flap’s finally arrived, thanks to Ant-H they got riveted last night and are now installed.
Waiting to arrive is some clock parts and my last mod, The moving Piano mod, then this restore is finished.
1) fitted 3 new switches that didn’t connect with the ball every time.
2) Some time ago Chris at the pinball office gave me a pyramid mod which was missing parts and instructions, I bought a light activated switch, so when a chosen mode lights up would trigger what ever is wired to it, using my independent 5v supply it works a treat.
3) 4 new ramp flap’s finally arrived, thanks to Ant-H they got riveted last night and are now installed.
Waiting to arrive is some clock parts and my last mod, The moving Piano mod, then this restore is finished.
Attachments
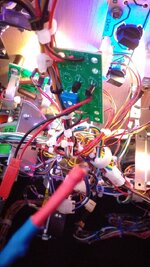
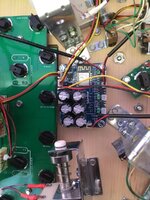
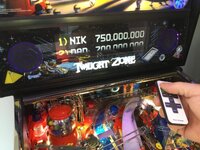
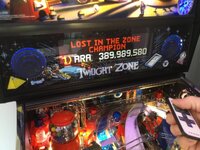
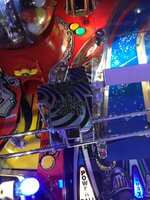
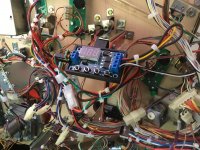
Finally the piano mod arrived, I’m not happy with crock clips on my pins so I fitted a four pin Molex plug. 12v supply from my own transformer and not clipped as per instructions.
I will mark this log complete and load up some final photos tomorrow. TAF is the next machine to do a minty on but this time my brother will be doing most of the work under supervision.
I will mark this log complete and load up some final photos tomorrow. TAF is the next machine to do a minty on but this time my brother will be doing most of the work under supervision.
Attachments
Nice!Finally the piano mod arrived, I’m not happy with crock clips on my pins so I fitted a four pin Molex plug. 12v supply from my own transformer and not clipped as per instructions.
I will mark this log complete and load up some final photos tomorrow. TAF is the next machine to do a minty on but this time my brother will doing most of the work under supervision.
Wombat
Registered
Hi Alan,
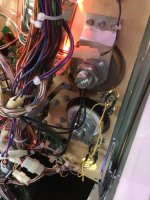
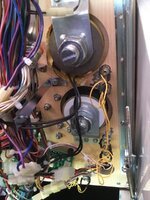
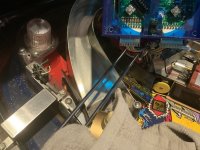
ive just received the same piano mod myself. Looking at your vid you appear to get your clock to sit flat on the piano, something I’m unable to achieve due to the clock connectors fouling . Did you have to make any adjustments to get the clearance needed..do the plugs on your clock protrude out as much as in my pics ?
ive just received the same piano mod myself. Looking at your vid you appear to get your clock to sit flat on the piano, something I’m unable to achieve due to the clock connectors fouling . Did you have to make any adjustments to get the clearance needed..do the plugs on your clock protrude out as much as in my pics ?
Attachments
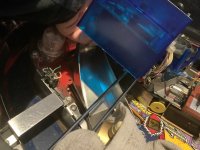
Yes it wasn’t sitting right, the plug was keeping it too high, using my soldering iron I melted some of the plastic away until it sat flat.Hi Alan,
ive just received the same piano mod myself. Looking at your vid you appear to get your clock to sit flat on the piano, something I’m unable to achieve due to the clock connectors fouling . Did you have to make any adjustments to get the clearance needed..do the plugs on your clock protrude out as much as in my pics ?
i think the replacement clock board pushed the plugs out further.
I was thinking what is different to mine than his one, i did a little bit until it went in flat.
Blurb
Registered
Really nice work, cabinet looks amazing and love the piano mod!