What's new
Pinball info

Register a free account today to become a member! Once signed in, you'll be able to participate on this site by adding your own topics and posts, as well as connect with other members through your own private inbox!

In Progress Tutorial - Back Box Refurbishment

Paul

Staff member
Joined
Oct 5, 2012
Messages
11,581
Location
South Wales
Alias
Toibs
There's always questions here about how to go about doing a re-decal, or what is used to fill holes in a cab etc, so figured i'd do a step-by-step guide on how I do it. There may be slight differences in how different people carry it out, materials used, however having done a couple now, learnt by trial and error along the way, and been given some cracking advice, i thought i would demonstrate over the next week or two how easy it is to do. In this case, I have a friend who has a STTNG with a backbox that has seen better days, with chunks out of the corners etc.

I was lucky enough to pick up a "spare" one from @Gaz Shiells at the Slam last year, so I shall be refurbishing the one he gave me, and then passing my original one to @Calimori (I think it was!) so he could try his hand at similar (That's if he still wants it!).

Firstly, head decals have been sourced - that is the first priority. No point in at least starting this without the replacement decals! In this case only need the head decals, since the body is (From what i remember!) in good shape.

Secondly, Tools needed.... (Will add to this if i find anything i've missed, which I'm sure I will!)

Random Orbital Sander + Assortment of pads
Detail sander + Assortment of pads
Putty knife (or similar)
Full set of screwdrivers (Posi and Flat)
Pliers (combination and Snipe nosed)
1/4" socket


Consumables needed....

50 Orbital sander disks (10 each of 40/60/80/120/240) - £8 (Ebay)
6 Detail sander pads - £2 (Ebay)
2 Simoniz 500ml Spray Grey Primer - £7.18 @ Euro Car Parts
2 Simoniz 500ml Spray Satin Matt Black - £7.18 @ Euro Car Parts

So the first debate is really about Paint. Some like to use a High-build Primer, so that any blemishes are easier to hide. Well call me old fashioned, I prefer to use standard primer, since i know where I stand with it. Personal Preference i guess.
Please remember that the cab itself has to be baby-bottom smooth before you apply the decals - ANY (and i mean ANY) blemishes that exist, even if you cant see it, will be accentuated by the decals, and WILL look awful. The entire surface needs to be hole-free, perfectly level (Hence the use of the orbital sander since this in the most part prevents large divots and gives a reasonably even surface) and smoooooooth.

So - Parts are ordered - should be here in a few days Max, and I'll start detailing the next steps...

Time taken so far - Approx 20 mins

(Will lock the thread until the work starts...)
 
Last edited:
Part one - Basic sanding...

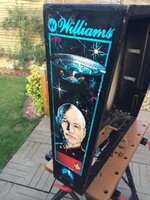
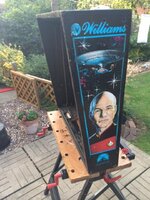
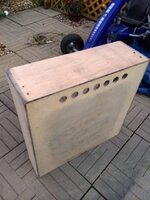
So heres the fist look at the Victim - sorry - i mean head...
bb1.JPG
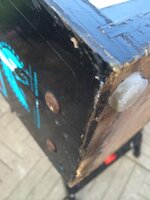
So - Left side, multiple scratches, few chips off the front edge...


bb2.JPG
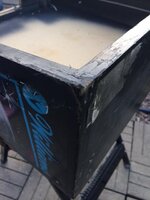
Similar with the right side, nothing obvious...


bb3.JPG
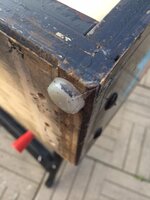
Front edges look chipped, however is mostly the paint - most of the edges are straight and undamaged (other than the near edge which is messy....)


bb5.JPG
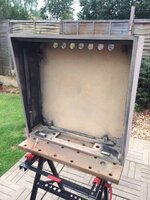
...Still has Braid and the speaker panel bracket in... This will need to be removed before we can sand this down...


bb6.JPG
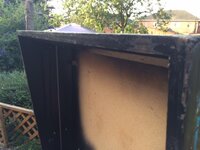
Backisnt too bad, however signs of the fibreboard starting to lift in the corners... Worth being aware of..


bb7.JPG
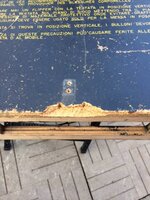
Nice de-lamination at the top rear of the box that will need to be filled... also a severe lack of any defined edge...


bb8.JPG
We can see the fibreboard lifted in the corner - usually due to expansion and damp...


bb9.JPG bb10.JPG
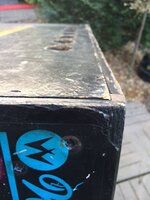
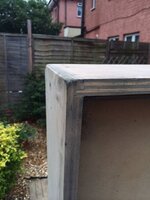
As per usual with the corners and edges... Battered...


bb11.JPG
Same with the other side...


bb12.JPG
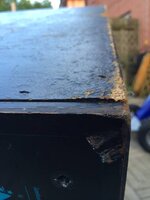
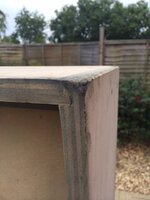
Closer inspection of the top edge shows that front top corner is nowhere near square...


bb13.JPG
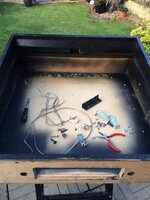
So we start by stripping everything out. all the metalwork, the brackets, the braid, Earthing screw, remove all staples etc that are holding the braid. Remember to take pics of the corners to remember what screws go where...


bb14.JPG
And there you have it. All stripped out and ready to start...


bb15.JPG
See! All gone!! Ready to go :)


bb16.JPG
And all the brackets removed from the bottom of the head, along with Earth screw and braid...


bb17.JPG
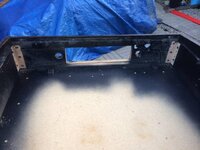
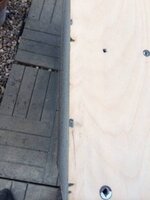
Nice! Looks like when the original backbox bracket broke (There was some kind of made-up replacement installed), it took half the wood behind with it. Will make it difficult to repair since the wood on the back is textured when this old...


bb18.JPG
And there you go. the edge has gotten damp at some point and caused the fibreboard to swell.
We have two options here. If not too bad (as in this case) It can be sanded flat. Some purists (and those good with wood, and lots of time) will make a replacement and re-fit this in place. This is only actually raised by around 2mm, and right in the corner only, so can safely be sanded flat :)


bb19.JPG
There you go - a better picture of the corner demonstrating ho it's really only the corner thats affected...


bb20.JPG
So we start to sand the side. Now STTNG was originally a Decal mounted on the painted cab. There again are two choices. Some prefer to use a hot air gun to remove the decal, and then to sand the glue and pain off, however just to demonstrate that the whole thing will come off easily with an 80 grit sanding pad...


bb21.JPG
And once you have managed to sand through the painted top of the decal and the paper, you come to Glue and paint... a little more difficult, however the main part to remember is to LET THE SANDER DO THE WORK. You only need to apply medium pressure (and have the sander set to mid-speed) - Keep moving it back and forwards from side to side, and top to bottom, slowly - around 1 cm a second. If you put too much pressure on the sander, the orbital rotations will reduce, and it will actually take longer to remove the paint/decal underneath...


bb23.JPG
So see the above - do NOT be tempted to try to sand these type of imperfections out. if you do this then it will cause the wood to bend away towards the sanded section, meaning that the base wood will NOT be flat - and this is what you want to aim for - a FLAT SMOOTH surface, with minor imperfections...


bb25.JPG
The top, since there is no decal, takes a quarter of the time to complete. just remember to keep the orbital sander moving back and forwards. TIP - You know when the top is level with the sides as, if you keep the sander flat, the side (or top depending on which is the higher) will both JUST be sanded by the sanding pad. See below for more...


bb26.JPG
And here's the de-laminated part on the top. It;s actually rather sound, however will need gluing in the laminate BEFORE any filler is applied to make sure it doesn't lift any more..


bb27.JPG
The second side is the same as the first, so onto the back of the head...


bb28.JPG
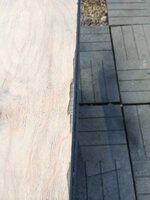
An illustration of two things. More slightly lifted fibreboard back, and also this demonstrates how you can tell when they are level - the fibreboard is sanded, however the actual side of the box itself hasnt been touched. a small amount of excess sanding (REMEMBERING TO KEEP THE SANDER MOVING OVER THE SURROUNDING 5-10cm TO EVEN THINGS OUT AS MUCH AS YOU CAN). You know when the correct level has been reached when the sander JUST starts to sand the edge of the box...


bb29.JPG
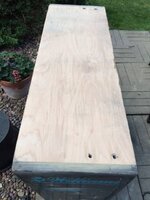
Very crudely done, however the first sanding is complete covering the sides and the rear of the box...


bb30.JPG
View from the rear. However we havent yet touched the front... More to come...

Time taken to sand the head crudely as a first pass.... 45 Mins...
Used 4 x 80 Grit sanding disks (New ones haven't arrived yet, however happened to have some kicking about from last time!!)
 
Last edited:
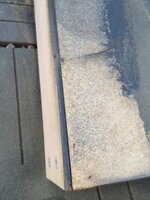
So - First we need to fill any hole, dink, imperfection we can find...


bb40.jpg

Including anything thats not flat, sharp or square..... Like this for example...
bb41.jpg


And this...
bb42.jpg

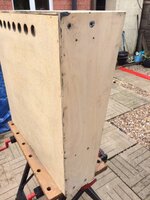
The top left of this back box in another good example of a large piece missing. Aldo can be seen, lots of indentations down the back line of the backbox. Often a point of discussion are the bolt holes. I have found in the past that if you fill them, once you re-fill them then when you tighten the re-fitted bolts back down the filler tends to crush, making it worse. So - Either Fill then and nip the couch bolts down lightly, or leave them as they are (My preference)..
bb45.jpg

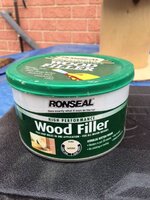
And this is the filler I use. It's a 2 part filler - Comprises of a large filler content, and a small pouch with activator that has to be folded well into the actual filler before it is used. WARNING - I did this on a HOT day, and the filler was going hard within 2-3 minutes. You cant reduce the amount of activator used since the filler wont set properly, so i just mixed small amounts - as much as i felt i could fill in the limited time...
bb46.jpg

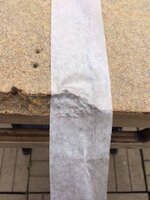
Also - make sure that the surface you are filling against is CLEAN, dry and CLEAR of all dust and loose wood. You can use what they call a "tack cloth", or i prefer to keep it simple - Masking tape!
Stick on making sure you get right into the creases.....
bb47.jpg

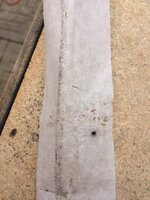
And when you pull it off, it's removed lots of the loose material :D
bb48.jpg

On the top edge, ther is a layer of laminate missing. The temptation is just to fill, however the best way is to glue the remaining laminate back down, clamping it to make sure it holds the laminate...
bb50.jpg

And then Clamp it until it's Dry :)
bb52.jpg

I have always found the best way to fill is to overfill a little, and then Sand down to level. A pro will be able to fill to a level first time (Like plasterers are able to plaster a wall flat day in day out because they do it daily!), however the likes of us mortals can take forever to fill a small hole, and the filler will be all dry by then!!..
bb54.jpg
bb56.jpg
bb60.jpg

Once all the Filling is done (remember that all the sanding will have spread lost of dust!), one last remove of all the dust and dirt, and we have to get rid of as much as possible...
bb63.jpg
Then cover everything in Primer..remembering that it WILL take several coats, and the first one or two will soak in. Also, you really don't need to spray behind the Metal plate area in the backox...
bb65.jpg
bb68.jpg
bb69.jpg
bb70.jpg
bb71.jpg


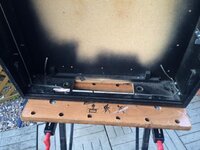
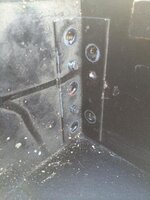
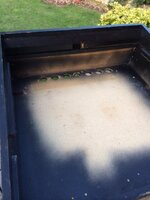
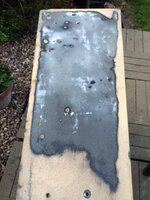
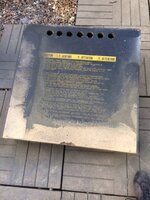
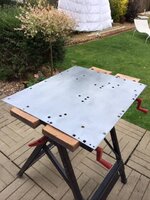
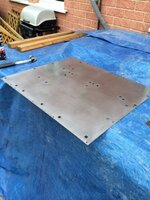
Whilst on the subject of Metal back plate. Some are in a right state. Including this one, where someone seems to have sprayed the inside of the backbox, taking the boards out (I hope!), however leaving everything else in..
bb72.jpg

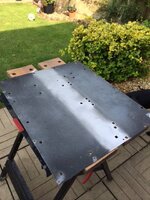
So remove the Board Mounts....
bb74.jpg

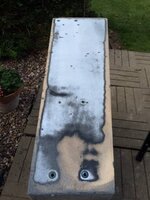
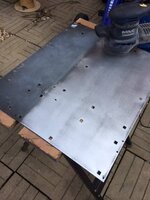
A bit of 40 Grit on the orbital sander..
bb75.jpg

3/4 of the way there... Nice and Shiny (Compared to the start!!)...
bb76.jpg


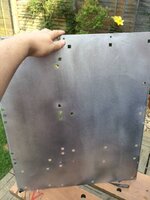
All done!! :)..
bb77.jpg

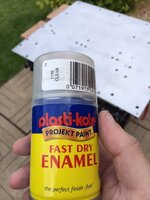
Then - Lacquer it to ensure that the metal doesn't tarnish again... REMEMBER - when installing the clips again you WILL need to scratch a little from around the edge of each little hole so that it makes electrical contact/Grounding..
bb78.jpg

All done!! :)
bb80.jpg
bb81.jpg

TO follow later - A little additional spraying... ;)

Time taken to sand, fill and primer the backbox, alongside re-facing the metal plate - 4 hours
 
Last edited:
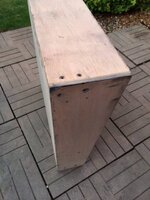
First part (Basic sanding) above done... Next (Weather dependent) to follow... Interior sanding and getting it REALLY smooth :)
 
I offered it to Paul quite a while ago. If he doesn't want it i'll let you know.
 
Russ,

If i could that would be great - Many thanks - Will drop you a pm (and apologies Kev)

Which reminds me - i must catch up with @replicas as he has a wire dropramp to replace the broken one... :D

Cheers
Paul
 
Thank you @Paul, this is very useful. It is a step too far for me at the moment but I think one I really want to try doing.
I am still interested in the spare head as it will help me start one of my projects but lets discuss that when you are done.
 
Great write-up @Paul! Edges of that backbox look sharp enough to cut yourself on! Looking forward to update #3. I've got all this to come on Paragon... :rolleyes:
Also, well done mentioning to remove lacquer on the metal back plate when refitting the mounts. This is critical because it's used as an earth/grounding plane so the earth bond/strap and circuit boards must have good electrical contact on their mounting points to provide interference-free operation and prevent you from dying if there's an electrical fault!

Only thing I'd like to add is that it's possible to continue up through the grits (100 > 200 > 600 > 1200 > 2000 > 2500) with wet'n'dry paper and you could achieve an almost mirror-like finish on the back plate. Personal preference, of course, and maybe the 40 grit is more like the original "brushed" finish?
 
Great write-up @Paul!

Only thing I'd like to add is that it's possible to continue up through the grits (100 > 200 > 600 > 1200 > 2000 > 2500) with wet'n'dry paper and you could achieve an almost mirror-like finish on the back plate. Personal preference, of course, and maybe the 40 grit is more like the original "brushed" finish?


Ain't got there yet but it's coming (along with my "attempts" with Filler primer... Pfft....) :) Plus I have to cover the top final coat too...
 
Didn't this tutorial originally have links to the items needed at the start?
Nope... Can do tho when i can dedicate some more time to it.... When it comes i'll also finish it!! (Distracted with a few other things at the moment unfortunately, alongside the Crappy weather!!)....

It'll be finished soon :)
 
No problems Paul. I was on the lookout for which sanding pads to grab - but I presume I found the right place as they sold them in a bundle of 50 with an option to choose what grit ratings were desired. Paid a little over the £8 you mention above but it was still under a tenner for the lot so no grumbles from me.

Off to grab a sander tomorrow so I can make a start soon on stripping down the backbox on R&B. Going to use that as a practice run at decalling - i've still got 'the fear' over the main cab right now but i'm sure that'll go once i've built up my confidence. Seems the key thing is - DON'T RUSH!! But i've also gathered a lot of good tips from this thread and others i've read online.
 
A question Paul. When removing the existing paint from the backbox is it sufficient just to use 80 grit for the entire task?

You mention at the start about using a variety of grit levels but so far as I can see we've only used a couple so far? One for the backbox and another for the metal plate inside. Is that correct?
 
I used 40 and 80 Grit for the general sanding.... they do the hard work and get all of the paint off. Then Rather than going straight for 400 grit, I work my way up... 120 and then 240... to be honest, with a good sander i find that 240 is enough to be baby-bottom smooth. I know that perfectionists like @replicas go up to 400 Grit though.... :D
 
Thanks for that Paul. I'll keep that in mind when I get started :)

Now just hoping for some decent weather on Sunday so I can actually get stuck in. Now the decals have turned up i'm much happier taking a sander to the cab.
 
but I presume I found the right place as they sold them in a bundle of 50 with an option to choose what grit ratings were desired

Do you have a link for this?

@Paul this might be in another thread but what sander are you using or recommend....fancy buying myself a new power tool :) @replicas I'd be interested in your recommendation here as well :thumbs:
 
Do you have a link for this?
Sure. I grabbed these: http://www.ebay.co.uk/itm/221497277212?_trksid=p2059210.m2749.l2649&ssPageName=STRK:MEBIDX:IT

I also need to grab a sander. But i'm thinking of going for this one from ScrewFix as it is the same price as the one Paul mentions and pretty much the same spec too. Add on top that it's got more favourable reviews and i'm tempted by it. To be fair I suspect either would be suitable given the amount of use it's going to get: http://www.screwfix.com/p/titan-ttb289sdr-random-orbit-sander-230v/46113?_requestid=23095
 
Do you have a link for this?

@Paul this might be in another thread but what sander are you using or recommend....fancy buying myself a new power tool :) @replicas I'd be interested in your recommendation here as well :thumbs:
Chris , I use a Metarbo XSE 460 Duo 6 inch disc, not the cheapest but you get what you pay for .
Go for a mid to high range , you will be glad you did .
 
Back
Top Bottom