What's new
Pinball info

Register a free account today to become a member! Once signed in, you'll be able to participate on this site by adding your own topics and posts, as well as connect with other members through your own private inbox!

In Progress Trigger's Addams family

Tim R

Registered
Joined
Apr 18, 2015
Messages
289
Location
Almondbury, West yorkshire
just on the offchance that some of you will be interested, I have taken the plunge into constructing a super mint Taf, and while the playfield is getting the Henrik treatment in Germany, I thought you might like to see my progress so far, i will also start a WH20 thread at some point as i am giving the same treatment to that too.

so here comes a few before pics.. i dont have many of the complete cab as i forgot to take them before i started the teardown.
20150925_172439.jpg
not massive wear around the mansion, but...
20150920_224509.jpg
it appears damp had affected the playfield..
20150920_224538.jpg
no magnet burn however more damp issues...
20150920_224553.jpg

So the playfield was stripped totally for repair and refurb, i have taken plenty of pics if anybody needs something for reference let me know and ill do my best to find a pc to help.

some pics of the partially stripped PF...

20151011_182935.jpg
20151011_182941.jpg Eurrghh... Rust!!

20151011_182948.jpg

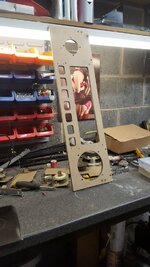
I wanted a really clean cabinet inside so i ordered a bare cab from Manny at Woodteach and proceeded to get handy...
20151212_140105.jpg
All filled and masked up sooo...
let the priming begin!!!
20151212_161548.jpg
after 3 coats and a quick sand...
20151212_164856.jpg
ready for painting, i dont have a compressor but used this little beauty, so much easier can handling...
20151213_133641.jpg
the paint goes on really nice, this is after one coat...20151213_133726.jpg after 3 coats...
20151213_160013.jpg
Finished :clap: a little bleed that needs sorting but nothing major.
20151216_072353.jpg
well the next step is to add the decals..20151228_140427.jpg
i didnt find this difficult at all just took my time and went steady, i found the most nerve racking part trimming the decals back, very easy to slip and ruin all my hard work, but i managed, Just :)

add some stealth leg protectors, 4 shiny new legs and hey presto!!
20151228_154928.jpg

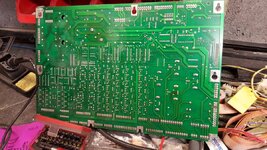
While i was waiting for the new cabinet to arrive i managed to polish up some of the cabinet parts, including the power loom, so here it is fitted back into the machine, just missing a few parts which are on order before i can coninue.
20151231_165801.jpg
20160103_144728.jpg


its a slow shop log but i hope you all agree its going to look nice when its finished.

if anybody has any tips for my I'd be happy to hear them. i always looking for ways to improve.

more to come, Cheers,

Tim
 
That's looking great Tim, nice work it will be like nib when finnished, I guess the cost will be huge on top of what you bought it for but well worth the investment

Ronnie
 
Very nice Tim, hopefully I'll be moving on to an Addams after my WH2O is done.

What is that paint spray gun you're using?
 
Wow, this looks great!

love the manny cabs, so fresh! this is going to be super mint when finished!!

Dunc
 
That's looking great Tim, nice work it will be like nib when finnished, I guess the cost will be huge on top of what you bought it for but well worth the investment

Ronnie

The cost is definatly going to be huge, but i think if we take up this hobby to make money we have been grossley mis-informed ha ha

Very nice Tim, hopefully I'll be moving on to an Addams after my WH2O is done.

What is that paint spray gun you're using?

ha ha, as it turns out ill be doing my WH20 after i have finished this, so hopefully we will be able to help each other out.
Its Plasti-kote Super Satin and a little plastic gun i found on ebay for about £2, i was skeptical but for £2 it was worth a punt, definatley made spraying by hand easier as i felt i had more control and less "finger ache"

thanks for the vote of confidence fellas
 
Haha, how's that for timing?!

Happy days, thanks for that. I'll put an order in for a few as I've done some test spray panels and they haven't come out the best!
 
Wow, this looks great!

love the manny cabs, so fresh! this is going to be super mint when finished!!

Dunc

Cheers Pal, i thought it was a bit futile trying to sand the origional cab up to look like this, i think i made the right choice, i know its not an original cab, but Manny does do a bloody nice job.
 
I went into my local car paint shop and asked them for two tins of the standard "Pegeaut Indigo Blue" and the two guys behind the desk looked at me like I had just kicked their dog!

Went on the halfords website and gave them the pint code on there and they gave me a load of colour swatches saying there's loads of shades of that code. So yeah bit of a nightmare but they helped my find the closest one to the decal I had with me so fingers crossed!
 
When you say there's signs of damp...as somewhat of a noob what exactly am I looking for in the two "damp" photos?
 
When you say there's signs of damp...as somewhat of a noob what exactly am I looking for in the two "damp" photos?

In the third photo down from the top, near things hand, where the glare from the light is, you can see the lines in the playfield that run vertical?

That is (so I am led to believe) caused by damp swelling the wood and cracking the paint.

Fortunately Henrik is currently working his magic over in sunny Deutschland.
 
Ok so I managed to get some time to myself these last few days and got around to painting the backbox, I took the same painted front to raw internals approach that I did with the cab and I think it looks pretty good, what do you guys think?

image.jpeg image.jpeg image.jpeg


All painted.. Looks sweet if you ask me?


image.jpeg
 
Ok so while i was waiting for paint to dry etc i also managed to attack the backplate for the circuit boards. Which came up pretty nice with the sander...

20160213_103741.jpg 20160213_110227.jpg 20160213_110113.jpg

So once i had finished that i went on to adding the decals...

20160213_111021.jpg

And then trimming...

20160213_112332.jpg


Add the backplate to the cabinet and also the cloud flasher loom which i tarted up today, sit the lot on the main body and it looks something like this...

20160213_142745.jpg

So thats pretty much where im up to except i managed to strip and sand the display panel ready for painting...
 

Attachments

  • 20160213_141737.jpg
    20160213_141737.jpg
    81.5 KB · Views: 12
20160213_141737.jpg

;) cheeky motivational calender

And also had a small go at buffing the front bezel...

20160213_131153.jpg

To which i need a better workstation. I keep picking crap up off the floor and adding more scratches than i started with. Ha ha

More to follow soon

Cheers
 
Didnt manage to get alot done today except paint the speaker panel...

20160214_171916.jpg

And also strip, sand and prime the light board ready for painting...

20160214_171923.jpg

Need to source some new switch matrix, lamp matrix and warning stickers from somewhere.

Thats all for now

Cheers
 
So i spent the day slaving over a hot buffing wheel today and i must say im pretty pleased with the results, i never managed to take a before pic of the display panal, so here is my WH20 panel for a comparison...

20160218_175105.jpg 20160218_175108.jpg

And the completed TAF panel.....

20160218_175602.jpg
20160218_175624.jpg
20160218_175620.jpg
20160218_175657.jpg

Sitting lovingly back in the cab...

20160218_175727.jpg

Next i went onto the circuit boards and the first was the fliptronics.

Went to clean it and noticed that someone had made a horrific job of replacing one of the 102's with the wrong component. So that was my first job.

20160218_181640.jpg

Then soapy water and ipa...

20160218_183240.jpg

Looking sweet in the cab...

20160218_183407.jpg

Thats all for today
Thanks for following :p
 
Not much happening today im afraid guys as i got my van broken into And my tools were stolen last night :(. So been dealing with that.

Did manage to get a few hours this afternoon to sort out some dodgy repairs on these boards though and get them washed and back in the cab....

Standing to attention...
20160219_151513.jpg

Not a pretty sight...
20160219_151828.jpg

Thats just lazy...
20160219_151817.jpg

I dont have any headers to hand so an order has been made. Removed this one and did my best on tidying up the board. Far from perfect but alot neater...

20160219_155750.jpg

Sadly this fella didnt survive the bath. Ha ha...

20160219_160738.jpg

All repairs made except the missing header. But starting to feel like im getting somewhere now...

20160219_180339.jpg

The remote battery holder will be screwed into place at a later stage. I might buy an nvm chip and not need it so dont want unnecessary screw holes just yet.

Cheers, Tim
 

Attachments

  • 20160219_155750.jpg
    20160219_155750.jpg
    169.3 KB · Views: 7
This is looking great, well done, any chance of first dibs on old/leaf over parts?
 
Hi, Tim,

I notice from the first picture that the project seems to have started off with 'Gold' software, since the "door open/interlock disables high power" message is showing. If you're staying with that, is it too late now (or excluded from your plans) to add the interlock?
 
Wow. Hopefully one day I'll treat my TAF to the same treatment! Well done, looks awesome.
 
Didnt manage to get alot done today except paint the speaker panel...

View attachment 26693

And also strip, sand and prime the light board ready for painting...

View attachment 26694

Need to source some new switch matrix, lamp matrix and warning stickers from somewhere.

Thats all for now

Cheers
Hi Tim looking FAB!!! did you get your stickers sourced - I can colour laser print you some if stuck, or you can get them yourself from this brill site

http://www.pinballrebel.com/pinball/cards/

Cheers Kev
 
Hi Tim looking FAB!!! did you get your stickers sourced - I can colour laser print you some if stuck, or you can get them yourself from this brill site

http://www.pinballrebel.com/pinball/cards/

Cheers Kev

Thanks for the info Kev! I've had a look on it but can't find the peripheral labels. Only the instruction cards. Any idea what I'm doing wrong?

Cheers pal and also hope your house move is going well

Tim
 
Thanks for the info Kev! I've had a look on it but can't find the peripheral labels. Only the instruction cards. Any idea what I'm doing wrong?

Cheers pal and also hope your house move is going well

Tim
Hi Tim,

Once you are on webpage scroll down left hand column until you see 'coil wrappers' and there you have it !!


Cheers Kev
 
Thanks for the info Kev! I've had a look on it but can't find the peripheral labels. Only the instruction cards. Any idea what I'm doing wrong?

You have to enter the web site address as news is says, there doesn't seem to be a link just from pinball rebel, or you have to enter http://www.pinballrebel.com/pinball/cards/
Or google search pinballrebel.com/pinball/cards/

Hope this helps!
 
Back
Top Bottom