What's new
Pinball info

Register a free account today to become a member! Once signed in, you'll be able to participate on this site by adding your own topics and posts, as well as connect with other members through your own private inbox!

Complete Tommy - My first pinball shop

Julian

Site Supporter
Joined
Mar 23, 2014
Messages
744
Location
Bromley
I've been enjoying collecting pinballs for around 30+ years, in that time I've fixed the usual stuff, installed mods, cleaned playfield, diagnosed board issues (with the help of others), had said boards repaired by Phil @ Pinball Heaven, but never attempted a pinball ship out!

To be honest it scared the bejeebers out of me! I mean how the hell will I get it back together.

Anyway having just purchased a Tommy that had a couple of VUKs that didn't work! Only for me to find out that it was in a real state (battery acid leakage, GI connectors badly burnt, cut wires, fuses being blown, filthy), I thought a) I'll never get my money back on this machine or b) I really really wanted a Tommy so its about time I learnt this art.

That said I have started the long and some what scary task of 'shopping' this machine.

I have thus far stripped most items form the top of the playfield so I could clean it as it was so dirty even if it had worked and not blown fuses I really would not have put the rusty balls round the playfield, sadly I did not do a before photo, but I have been taking photos of the strip down (loads of them), so here is one of the rear of the playfield;
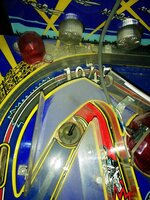
IMG_20150404_193409.jpg

During my strip down I a) took loads of photos, b) did sections / key things in parts and kept them in separate plastic boxes each with their own notes and photos, that way when they went into the tumbler all together I could later on know what the parts and screws were for;
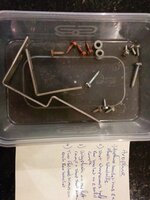
IMG_20150411_101604.jpg

The playfield clean up is complete, I have used Novus 3 & 2, carnauba wax, Novus 2, Millwax, and then another coat of carnauba wax.
Plastics were cleaned both sides with Novus 1, I have a few broken ones that I will replace;
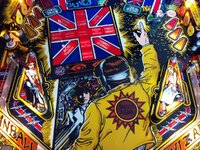
IMG_20150412_181418.jpg IMG_20150412_181413.jpg IMG_20150412_181409.jpg

Sadly the right flipper had been hitting the playfield a little but its not too bad, as I guess the machine was in such a state it was not played that much.
That said I hear CPR may be making repo ones...

So I have now started the process of putting the playfield back together.
In doing so I have installed LEDs for the GI.
 
Nice work Julian.

I'd heard Grizz talk lovingly about Tommy a while back but reading your posts made me look into it a bit more - have to say it looks like a lovely Pin. Another one for my wish list.

Interesting what Grizz suggested about changing the posts out too. I've heard of a few people doing the same thing on the DE R&B table too - have to say i'm tempted as I do find the original posts a bit boring and dull to look at.
 
Just wanted to add that I am another fan of changing the posts on Data East games. They just look sooooo much better with star posts. A nice cheap and effective mod.
 
I'll probably do mine as i'm in the midst of a playfield strip down at the moment anyway.
 
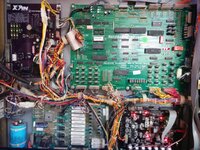
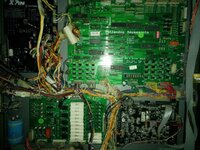
I got three of the four new boards in yesterday, which meant I had to put on a new Molex IDC for the main power board, damn those things are not easy to get on, I ended up using the lid of a Tupperware container in the palm of one hand and then using the Pinball Heaven IDC insert tool, IDC connector was 2 pins too long but I did put the key in the right place so if the machine is ever sold on at least the connector can only go in 1 way;

IMG_20150412_181327.jpg

GI connector was also badly burnt so that was replaces with 'chocolate block and electrical tape.

Powered on and found that one of the non-working coils is now working, sadly 1 is still dead with no voltage at the PPB the only board I have left to replace, and I did not check the ball auto launch coil as this is disconnected due to it blowing fuses I'm planning to test this one once the final board is replaced.

I also managed to get the 'seized/locked' bolt loose on one of the flippers, so I can start the rebuilding process.

There is just not enough time in the evenings....
 
The star posts are a nice addition/mod. I particularly like the straight yellow posts on @GrizZ's Cliffy. There seem to be a lot of those black and grey straight posts so plenty of room for colour coordinated upgrades! In this game though I think black rubbers have the edge over white...
 
I got three of the four new boards in yesterday, which meant I had to put on a new Molex IDC for the main power board, damn those things are not easy to get on, I ended up using the lid of a Tupperware container in the palm of one hand and then using the Pinball Heaven IDC insert tool, IDC connector was 2 pins too long but I did put the key in the right place so if the machine is ever sold on at least the connector can only go in 1 way;

Should of just upgraded it to molex much easier to do and more reliable.

View attachment 15654

GI connector was also badly burnt so that was replaces with 'chocolate block and electrical tape.

That's a hack / bodge no one likes that should of molexed it to ;0p

..
 
Me too, usually @GrizZ. Nothing but sparkly white rubbers on my old Bally SS pins. But this TOMMY... the playfield art has a lot of heavy black outlining... I just slightly swayed in this case towards the original (I assume?) black. But whatever, another pin being given a glorious makeover and a happy new home! WOOHOO! I'll drink to that whatever colour your rubbers :p
 
A good weekend, nothing like overkill all four new boards in and machine is 100% working thus far, all coils and flashers now working, so in the end the CPU & PPB boards were toast!

Are they worth sending to Phil @ PH for repair or just junk them?

IMG_20150416_233235.jpg

I also managed to get the 2 main flippers re-built, with new coils, all LED conversion fitted along with cleaning the inserts lenses and lamp PCBs.

Fitted two switches one for missing unit and one that I broke when cleaning the playfield, note to self those wire roll-overs can be snagged by the Treasure Cove Pinball drill-pads foam polishers.

Also got the blinders to work with a new servo board, new high power servo and blinder arm, blinding work even if I do say so myself.


Odd thing is that after fitting all these parts the blinders did not work, strange right as I have all 4 new backbox boards, new servo board and new servo so everything is new (except wiring) and the blinders did nothing in the test utility!
A quick Google and I find on Pinside / RPG that a Stern Tech advised disconnecting J2 connector going into the shaker motor board, which I did and the blinders now work - How odd, I wonder what this will stop working, plane motors maybe?

IMG_20150414_203210.jpg

I am waiting for Cliffy and playfield protector (a first for me lets see how good it is http://playfield-protectors.com/) before I start putting the top-side of the playfield back together.

After that it will be replacing some more coils, re-build upper-left flipper, change a couple of broken plastics,

I also need the plastic in-front of the DMD as this has warped, any suggestions as where to find one?

Then finally a game or two on it, before its taken apart for the cabinet & backbox refurb.
 
A good weekends work. What parts did you replace as part of your flipper rebuild?
 
I think it would be easier to say what was left in the flipper mech after the rebuild, which was flipper base plate, the front bracket, & nylon stop oh and all the screws.

They have a lovely action now, makes me think my next task is rebuild all my B/W games.
 
Flipper overhaul/service is probably the job the yields the biggest results for the effort. Can transform a game from "Meh..." to "YOWZERS!"

Except of course polishing your playfield with Pledge ;)
 
I think it would be easier to say what was left in the flipper mech
I'm certainly picking up here that flipper renovation is worthwhile even if they seem ok. Did you buy a renovation kit or such like?
 
Yes just purchased the flipper re-build kit.

And much easier that I imagined so very well worth doing.

Only difficult part was getting the screws undone on the coil stop, I had to use some special spray and loads of muscle!!!
Having taken the whole assembly out of the machine.

Roadshow and Dracula get it next...
 
Yes just purchased the flipper re-build kit.

I see the kit for DE on Pinball Mania - did you replace the flipper coils as well? I was under the impression the coils don't degrade performance wise, but certainly can fail over time so I can see the sense in putting new ones in whilst you're shopping the flippers. I'll study @Nedreud thread next for what he did with the Bally linear flippers as I have them too.
 
A good weekend, nothing like overkill all four new boards in and machine is 100% working thus far, all coils and flashers now working, so in the end the CPU & PPB boards were toast!

Are they worth sending to Phil @ PH for repair or just junk them?

Sell them as is on eBay.


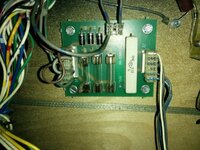
You have a problem with this board which needs to be fixed. The fuse holder for F3 is wide open and won't be making a connection. Basically it's completely broken and needs to be replaced. I hate, hate, hate DE fuse holders! Check all of your others to make sure they're not loose.

Ask @PeteB about the benefits of Pledge ;)

Am I getting some kind of reputation here lol?

I see the kit for DE on Pinball Mania - did you replace the flipper coils as well? I was under the impression the coils don't degrade performance wise, but certainly can fail over time so I can see the sense in putting new ones in whilst you're shopping the flippers.

With heat and usage they expand and contract so much that over time the shellac wears off the windings (this is what causes a lot of dust), that eventually leads to the resistance of the coils lowering. It's best to test them with a multimeter but generally if the coil sleeve is tight then the coil needs to be replaced. Sleeves should slide in and out easily. I've seen them get so tight the sleeve is permanently stuck in and it starts gripping the plunger, therefore losing flipper power.
 
Reputation @PeteB? Never! ;)

Good spot on that fuse holder. So obvious once you see it.

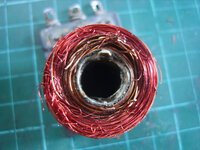
Agree totally on the coil advice too. I pulled a flipper coil off an old playfield in the hope I could replace a dead one on my PARAGON project. The windings tested ok for resistance and the plunger slid in and out just fine. But when I tried to remove the sleeve it just wouldn't budge. Out of curiosity I eventually put it in the bench vice to press the sleeve out, but the whole thing just ruptured. This is what I found inside. One well cooked coil that on the face of it looked and tested ok:

farm6.staticflickr.com_5588_14875870364_7e51481fda_c.jpg

Notice the inner thicker winding is slightly blackened? And the centre of the sleeve had just totally melted into the windings!
 
Wow! Totally cooked!
But visually, mechanically and electrically it appeared "normal". I never actually tested it by fitting it as I couldn't remove the sleeve, which set the alarm bells ringing, but just goes to show that even a well fooked coil might appear to be ok. Basically, don't assume anything!
 
Yep I just figured that as coils are so cheap I may as well do them while the flippers were out of the machine, I mean they are 20 years old, planning to actually do all the coils.

At this rate the only original part of the machine I will be left with is the wiring harness and bulb holders! :cuckoo:
 
So yesterday my playfield protector (http://playfield-protectors.com/) and Cliffy set arrived, only for the Cliffy set sent all the way from Oz to be for the wrong game!

Oh well I'll have to put one in the the game in a few months.

So down to the playfield protector fitting.

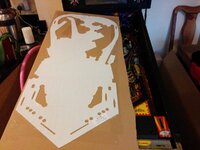
It came in a box the size of a playfield and is taped to a piece of cardboard;

IMG_20150423_200900.jpg

You do have to take a fair bit off the playfield, including flippers, ramps etc, luckily I had not put too much back on as I was waiting for these parts to arrive.

First you remove the tape and leave the top and bottom protective plastic on the protector so you can place it on the playfield and see if any adjustments are needed, I had to remove some rubber parts and realised that the bumper caps had to come off.

Now happy it fits and I know what jiggery pokery was required to get it flat to the playfield I took it out and removed the bottom protective plastic and proceeded to put it back on the playfield.

Oh I forgot to add I vacuumed the playfield and then cleaned it again with a lint-free cloth so it was uber clean (also made sure not to touch the dogs while doing this process).

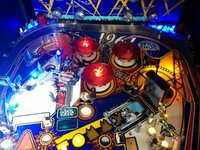
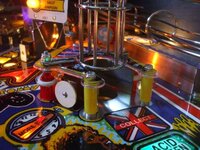
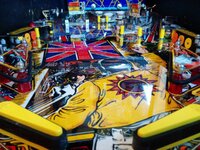
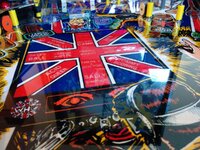
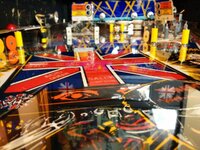
Once flat against the playfield I removed the top protective layer, and hey presto sexy shiny smooth playfield...

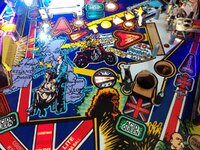
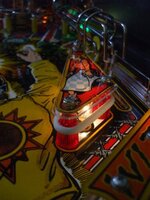
IMG_20150424_072011.jpg IMG_20150424_072017.jpg IMG_20150424_072027.jpg IMG_20150424_072034.jpg IMG_20150424_072040.jpg IMG_20150424_072054.jpg
 
The more I see of these playfield protectors the more I like them :) Seems like a really good (and easier) alternative to clearcoating.
 
They sit 'loose' although as they are actually quite tight against some parts it will clearly (excuse the pun) not move.

I don't think I would have bothered it they had adhesive on the bottom as I've done some iPhones in the past and fitting an entire sticky playfield with such a thing would be horror.

They say its also quieter to play I did roll a ball around and it is indeed quite quiet, also evens out the surface.

There about 110 euros so not too much, not sure about the 'need' in a home environment, but if I was putting my machines out in pubs etc I'd put one in every machine.

I'm not sure how cleaning works with it?!? At the end of the day the great thing is it can be taken out and heavens forbid if I really hate it cut the bugger out with out stripping the entire playfield.

I'll post more updates on the protector in a few weeks / months with updates on how it plays, cleans gets dirty etc.
 
Back
Top Bottom