What's new
Pinball info

Register a free account today to become a member! Once signed in, you'll be able to participate on this site by adding your own topics and posts, as well as connect with other members through your own private inbox!

Complete Theatre of magic shop log

Hi All,

its been a while since i updated. Its also been a while since i got much done on this machine! Unfortunately having a tempramental italian motorbike and a new AFM have reduced the time i have spent on the TOM. There have been a few updates however.

1) Heard from henrik that the touch up work on the PF will start in earnest in the next week or so.

2) Solved my lockdown bar mech conundrum. Nick Marshall has come up trumps with a shiny chrome one.

3) Parts have been sent off to my plating guy, Bill Caulton. Bill does polishing and farms out plating work. I've sent him a coin door, lockdown bar, siderails, a box of bolts, shooter housing and a set of legs. these will all be done in brass plate and then lacquered over so they wont need constant polishing. I've also sent him the 2 wireform ramps and spirit ring. these are going to be polished and plated in wither brass or 24k gold. I did break the spirit ring magnet getting it out of the ring (its glued in there pretty tight!) so i've added that to the list.


There will be more parts going to bill over the next few weeks. All the metal parts, brackets etc will be refurbished in some way and a lot of this will involve some kind of shiny plating. I suspect i'll end up handing bill over a fair chunk of cash!


I've been debating whether to replace the decals on the cabinet as they really werent too bad. The head ones were toast though. Phil couldnt source just the head decals and so i've ordered a full cabinet set. I'm told theres a chap would would refurb the cab and apply the decals for around £200. this includes the screen print on the rear. Having seen his work on my AFM i am impressed. However £200 is a lot of cash and for something i can do myself i think i need to get it done! The decals arrived last week along with a new plastic set (Phils just got them into stock)


Stripdown of the backbox has just started. Nothing too nasty so far, but the decals are being a pain to remove! I've tried heat and that just made things worse. Sanding was a no go also. At the moment i'm back to the old favourite of peeling them off by hand. SO time consuming that i'm already regretting my decision to tackle this part myself!!


More updates to follow when there is m ore meaningful information. I havent forgotten about this thread!!
 
elrikos' date=' post: 1697083 said:
At the moment i'm back to the old favourite of peeling them off by hand. SO time consuming that i'm already regretting my decision to tackle this part myself!!


You could try soaking in some glue remover stuff first, leaving to sink in and then try peeling off... It might help a little... :cool:
 
Mini update!

Got the head decals removed. I had a go with the hear gun but didn't have much luck. Melted the decals so when you pulled them they stretched. Didn't manage GOO gone but I did have some similar looking citrus based cleaner. Didn't go near it! I'm the end a steady hand prevailed and they peeled off. I also removed the black vinyl from the top of the backbox. Ive sourced some gloss black vinyl to replace it with to keep it all looking new and smart! Just the cab to do now, then it's on to filling dents and painting!

I also dropped more bits to bill the plater. I forgot the siderails last time. He's In the process of quoting me for something quite special. I'll reveal all when the prices are in!

I've emailed henrik (again) as his promise of getting cracking last week didnt seem to have occurred. His out of office tells me he's on vacation until 15th. Expect an update soon after chaps!

It's been a little slow here of late and apologies for that. Fingers crossed normal service will be resumed shortly!
 
Really was hoping to see a restored playfield for you by now but at least you are still going with your restoration work.
wink-1.png
 
So was I to be honest. Quoted a 12 week turnaround which is not far away. We'll see though. So long as the works to a good standard I'm happy!

No word from bill the polisher yet. I'm promised a quote on Monday.

Not sure if I mentioned bills pricing. Lock bar and siderails are around £40-45 for a full mirror polish. He also manages to "hide" the spot welds on the lock bar as he polishes so you cant see them at all. My tz and afm have bars polished by bill. I know Dave the taxman uses him also (in fact he put me onto bill in the first place). I'm going to confirm public contact details for bill and I'll post them up. He's keen to do more pinball stuff.

Back to waiting!!
 
bigger update! 2 Things happened all at once today.

1) LOTS of pictures through from Henrik. Suffice to say the work is looking outstanding. Parts of the PF i would have said were perfect have been touched up. I won't spoil the surprise by putting pictures up as Henrik will be adding to this thread himself with the pictures and an explanation of how they've done what they've done. To follow over the next few days.

2) While i was looking at the pictures who should call but Bill the polisher/plater. He has a price and a lead time for me. I'm still keeping this part a closely guarded secret at the moment! The parts are due to be returned to me in early/mid October and at that point i'll upload pictures, prices and everything else you may need. If you need Bill in the meantime PM me and i'll pass on his phone number. All i have is a home number so i won't post that online without his permission.


Little in the way of other updates i'm afraid! Food poisoning last week has stopped progress on the cabinet! I'm about to order some satin black spray paint for the cabinet and hopefully i'll steal a few hours this week! Big order to be made from Marco in the next couple of weeks. If anyone wants anything and fancies sharing postage give me a shout.
 
paint ordered. From previous cabinet refurbishment I've found that Simoniz satin black spray paint is a good match for colour and finish. Its also readily available on ebay and costs about £4 per can! 3 cans is more than enough for a full cabinet job. Way cheaper than halfords £7 per can!
 
Another mini update. Hendricks been in contact. 1 more coat of clear to go and the play field will be ready for shipping. He's trying to reset his password on here as we speak so he can upload the full restoration story. Watch this space!!
also picked myself up a da sander this week. Should make cabinet sanding more bearable!!
more updates when I find 10 minutes to hit the garage!


paint ordered. From previous cabinet refurbishment I've found that Simoniz satin black spray paint is a good match for colour and finish. Its also readily available on ebay and costs about £4 per can! 3 cans is more than enough for a full cabinet job. Way cheaper than halfords £7 per can!
 
So
now you can all see Hneriks work in the other thread. Amazing stuff! Still have yet to see the bill yet but hopefully he's come in on budget! Im just waiting for the call from Bill about the plating. Should be any day now. Things have been a little hectic in the elrikos household. found out mrs elrikos is pregnant with twins. :biggrin1: Suddenly the need to get the TOM finished has gone up the list of priorities (before they arrive!) as well as down the list (so much other stuff to do!)
Either way its going to got to get put back together again!
more updates soon (ish!) I also promise more pictures. Nothing worse than a resto thread without anything to look at!
 
Wow, congratulations on your news.
And the playfield is looking amazing. Really hope it all goes back together before the babies arrives.
 
thanks for the congratulations! its a bit daunting but fingers crossed it'll be ok!
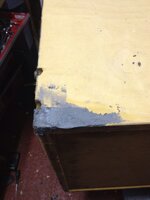
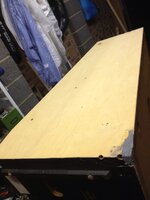
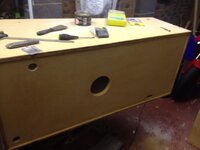
A bit more progress made today. I've been beavering away with the backbox, getting all the dents and scrapes filled in (of which there were a lot!). I used chemical metal for anything on an edge and P38 body filler for dents on the flat stuff.
Heres a pic!
95F50C5CD1854A0C83A20B637600C20B20700000-1.jpg
Finally today managed to get some varnish on the paint and get it sanded. Its almost ready for some black paint and then decals!

Also had an hour this evening so experimented further with decal removal. I've done a few cabinet redecals before and its by far my most hated part! Just a soul destroying job. I tried all the suggestions on how to remove the decals easier and struggled with all. I also tried sanding them off. Didnt go so well! Heat gun just melted the decals and left a gluey mess!
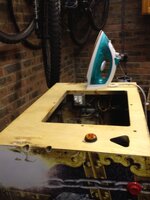
I was about to admit defeat when i thought to try an iron. I keep one in the garage to wax snowboards with and i found that the iron on the lowest heat setting made the decals come off really easily! I did the front and 1 side of the cab within about 40 minutes. I was very pleased!
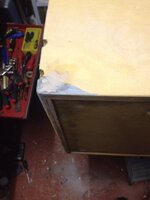
The operator has clearly at some point overtightened the leg bolts, given that the leg plates are all stripped. The cabinet has some impressive dents in it where the legs have been pushed into the wood. I've started on the repair with the chemical metal.
Heres a few pictures of progress so far! I've also learned that chemical metal is a nightmare to work with in the cold, its just solid. I may have to hide it in the house to keep it warm!!
77FCA172A48644528AFD30DCD333B12914840000-1.jpg
6A35EF38AE994AADB45B3C4609E634FD14840000-1.jpg
FDD4AEA70DBC45F39E71B3790224D46414840000-1.jpg
6B8C8590FA274630B24F8DFF521E077B14840000-1.jpg
 
How well does that epoxy metal bond with the wood? I've used it to patch up a radiator before but never on a pin :)
 
i've used it before on my TZ cabinet. Sticks like nothing else! I don't think you've ever get it off anyway!
 
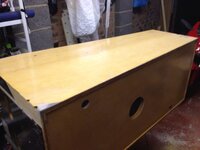
Managed to get a few more hours in today. The cabinet side and front has now been filled and sanded to an acceptable finish.
The chemical metal i used for the corner set eventually (it slows right down in the cold!!). After a good sanding and a little body filler just to finish up its now a perfect repair.
1150E34647BC4B99ADAEE634AF877DB120370000-1.jpg

I turned my attention to the bottom of the cabinet. I know no one will ever see it and its a bit OCD but i wanted it to look as nice as i could get and frankly leaving dirty greasy finger marks and pieces of chewing gum over the bottom just isn't my style! Cue a piece of 60 grit paper and a fair bit of dust!
Before
D0E4D340C7484463BA9A102216E1EC5A20370000-1.jpg
E746991FA9FB49BF9E2697BE62AB14A120370000-1.jpg

After!

98FC03C260B24FD38A3D0C3C4E8F05FF20370000-1.jpg

Of course without some protection it'll just go back to looking nasty. I was already having to coat the cabinet sides in varnish to seal the surface so it seemed rude not to give the bottom the same treatment! I've just got in from putting a second coat on. Looks really nice.
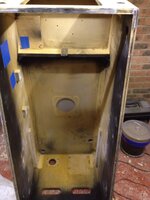
One more cabinet side to do and then we're ready for paint. I still need to do the inside of the cabinet which is frankly disgusting. Putting that off at the moment!

63F63974015242F1B930EFEAA0314E1F20370000-1.jpg

No word from Henrik as to when the playfield will be winging its way back from Germany. I guess the clearcoat is still drying?

Also spent half an hour on Marco today. I'm up to about $300 which once you've added the £40 shipping charge, turns into about £300. Deep joy! Unfortunately nowhere else seems to stock the bits i need so i'm a bit stuck. I've not ordered yet and am building to order so i only need to order once. If anyone has an order and wants to share postage give me a shout!
 
mini update. No pictures this time!
Henriks been having e-mail problems so the invoice was delayed. i now have it so it'll get paid on monday. Incidentally paying by IBAN and BIC codes (euro transactions) is REALLY expensive through banks (£25 set up fee!). Luckily the post office do it free (im sure the exchange rate isnt as good but hopefully less than £25!). Unfortunately its a live post office process so i need to wait until monday.
Bills plater has had the flu but i was promised that the plating would be done yesterday. I'm expecting it back later this week. Bill called me yesterday just to apologise. Top chap!
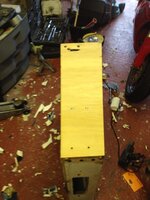
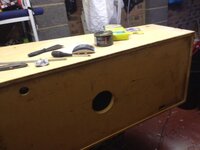
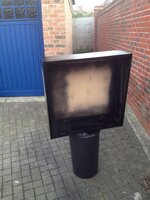
More filling and sanding on the cabinet has been completed. All decals have now been removed and the backbox has been sprayed black. Fingers crossed its ready for decals this morning. The main cabinet is still a little way away. I was hoping to leave the bottom of the cabinet as bare wood, with just some clear varnish to seal. Unfortunately the staining in there is just too deep. Given that im going to steal another dave the taxman idea and spray the bottom of the cabinet in grey primer. I've tried full on Manny style paint finishes to the bottom of cabinets (my TZ is in ford petrol blue!). I don't like it so primer is the next finish to try!
Hopefully there will be some updates shortly!!
 
bigger update, with pictures!
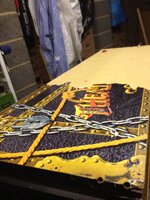
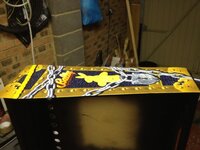
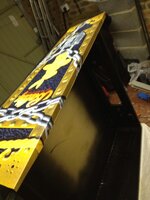
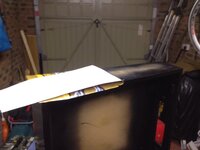
I spent the day putting on the backbox decals. I'll take you through how i did it!
The first thing to say is that there are 2 methods of applying decals, the wet method and the dry method. The wet method involves using windolene as a lubricant to avoid the adhesive sticking to the cabinet until its in the right place. You then squeegee out the windolene and the adhesive sticks. I've used this method once before and never again! its messy and i just dont think the adhesive stuck as well as it should have. If you get the decal in the right place first time theres no reason to use this method. I much prefer the dry method which i'll run through below.

The backbox has been varnished with a matt varnish to seal the surface, i then sanded lightly to smooth it. Following that it was sprayed with satin black spray paint on all edges, so that when the decals are trimmed, you'll see black, not wood colour.
23D74A8C12774BF4BA05E26B10D8BA5F27300000-1.jpg
I masked off the warning text on the back of the backbox and feathered the paint, so there wasnt a big edge visible.

Next it was time for the top vinyl. I had removed the old stuff as it was pretty manky. I finished the top in the same way as the sides, with varnish and black paint. I used a standard black gloss vinyl to cover it with. Looks really nice!
ABEFD1BBBD8F4A9EAAB426C2C088F21027300000-1.jpg
I trimmed the white surround off the decals to aid their fitting. The backbox decals are way too big and are almost rectangular. I had to remove a lot of actual art before it was even close to the right size. Luckily theres a brass bar on the decal that you trim down to get it to the right shape.
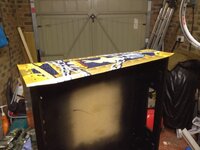
Heres the decal roughly laid out.
BD0C5781880543F0885EF3C6095EDF7227300000-1.jpg
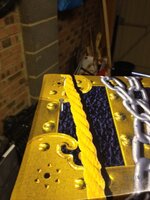
I realised that there is a line of brass studs on the decal that need to be a contant distance from the front of the box. Ideal! I just measured and creased the decal at the correct distance (for reference the front of the studs are 7mm from the front edge of the decal).
24554ABE0D694DD3949C9FD6000A1E8927300000-1.jpg
So, thats the left right alignment done, just the up and down to go! I looked at pictures of TOM backboxes on the internet and noted where the carriage bolts go through the decal. I put a wood screw through my decal in the same place and put the screw into the carriage bolt hole. Simple!
9841A2DA51BF47C58423081FB24CB9B927300000-1.jpg
So, we're all aligned now, just a simple matter of sticking the thing down!
I removed a section of backing paper near the middle of the decal. I laid the decal down and aligned it as above and, with baited breath, pressed down firmly.
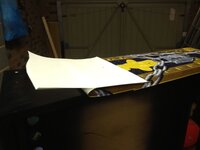
Next i folded the decal over and began to slowly remove the backing paper, pressing firmly as i went.
A9F90EF3B869476E9A320B0B8A15E3BD27300000-1.jpg
Next the other end!
82607437607B451590787331C6E34DE127300000-1.jpg
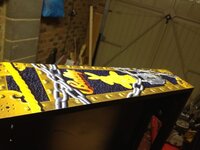
And there it is, all laid out in the right place!
54AE0E32F6A44CAA880B544D5D6E4DDE27300000-1.jpg
Now it just needs trimming. Theres only one tool for this. A swann morton scalpel with a no11 blade. Anything like a stanley blade is too thick and too blunt. Razor blades could be used i guess but i like the control of a scalpel. Ebay sellers sell them for a couple of pounds. Its amazing how often they come in handy!
On previous cabinets i've used a straight edge to trim the decal. This has worked but its hugely time consuming and it can be hard to trim it just right. This time i carefully ran the blade along the box, using the edge of the box as a template. With the blade at the correct angle you can trim perfectly along the edge, with no over hang and without the blade digging into the wood. Its quite satisfying!
The finished product!
02C65990B33643AAB209AC08F30AEAC827300000-1.jpgthe cabinet itself will be ready in a few days. I need to get myself to halfords to buy some primer! Once thats ready then the REAL big decals come out! That'll be a big day.
I'll post pics later in the week of the plating when its back.
 
This is going to be a minty TOM when done what with Henrik's amazing work on the pf and the great job your doing on the cab...top work fella :thumb:
 
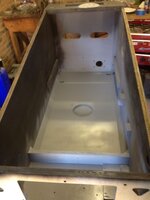
A little more done over the past days. As i said i've decided that the floor of the cabinet is too far gone to sand clean. On this basis i've stolen an idea from Dave the Taxman and am using grey primer on the bottom. 1 Coat and the scratch marks from 60 grit paper still showed through so i've spent the last half hour sanding again! Had just enough paint to give it another going over. We shall see but it looks a little better. Still not immediately sure im happy with it but i'll see when its dry.
Before
7A4C9CA677254B979B591EF8B7EB092211880000-1.jpg
and after 2 coats

60FFF78C4CA5476C87E9F0C0BDF9447911880000-1.jpg
 
bit more time in the garage this evening. The primer finish on the bottom is looking nice, no more coats needed there thank goodness! Lesson learned for next time. You need to go to at least 180 grit otherwise the sanding marks show through!

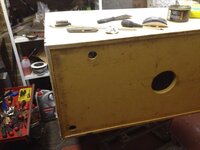
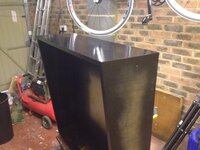
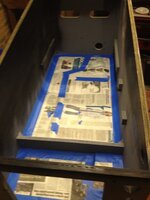
Spent a while masking up the bottom of the cabinet so i could spray the black on the sides.
Heres it all masked up
29F8D270A4B843D596AE52E2F83AE0EF14510000-1.jpg
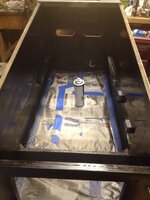
and with the back and sides sprayed black.
72B269605EE74453B4BB248B71F2547614510000-1.jpg
More coats of black tomorrow (and removing a run on one side where i got a little overzealous with the paint!)
Fingers crossed i'll be getting the plating back tomorrow. Watch this space!
 
Back
Top Bottom