Here we go again.
For those paying attention Whitewater still isn't finished but it is nearly there. I made the decision that the cabinet I made myself by hand isn't good enough when everything else is going to be pretty much mint so I'm waiting for a new one to be made by Matty Jacques. He advertises on Facebook and his work looks top draw so fingers crossed it should be finished sooner rather than later.
If anyone wants to catch up on that thread here it is: http://www.pinballinfo.com/community/threads/whitewater-full-refurb.32237/
Anyway, I bought this classic 90's pin from a forum member a few years ago with a great playfield but a faded and splitting cab.
So the plan is to refurbish the cab with new decals and give the playfield a deep clean and shop. Rebuild the mechs, flippers, add LED's and new rubbers, replace any broken plastics, etc.
Pictures from when I bought it:
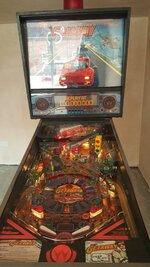
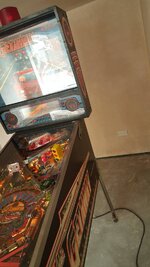
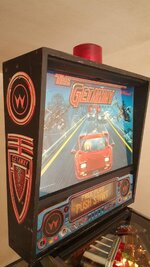
Pretty good condition overall but after playing the sh1t out of it for a few years the split at the front of the cabinet has become a bit too big to ignore and the flippers are starting to get a bit weak so good excuse to start a refurb.
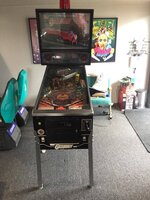
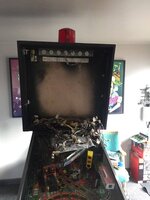
Usual starting point of stripping everything out the head. I have decided after my Whitewater refurb where I had bits all over the place at different stages that I am going to refurbish the head to pretty much completion, then the cabinet, then the playfield.
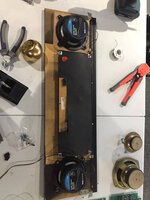
While the weather was crap I cleaned the speaker panel and installed the upgraded speakers on the new bracket, 16-Bit ZZ Top will never have sounded so good.
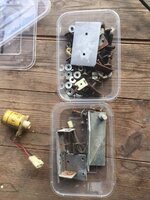
Parts for the tumbler. I have found that a load of cheap takeaway containers off ebay make great little storage pots for bits and you can label them easily with a permanent marker.
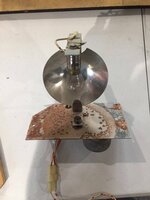
Bit of surface rust to remove from this!
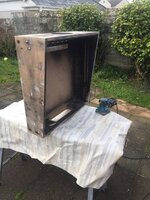
While the weather was good all day Saturday I managed to sand, fill, and paint the head which was pretty good going!
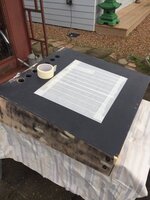
Masked off the warning print.
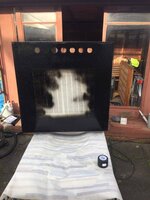
Started with 80 grit to get all of the old paint off then filled for the first time, sanded with 120 grit, filled for the second time, sanded again with 120 then gave it two coats of primer. Another sand of 120 then 240 then painted the whole thing black.
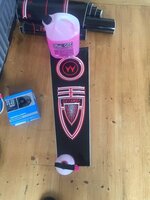
Left the decals out flat for a few weeks under some weight. Used the standard method of putting a heavy weight at one end of the decal, peeling back and sticking part at the beginning then slowly peeling the rest back wile pushing out any air bubbles with a 3M squeegee.
Once the decals were stuck firm I went round with a metal ruler and a sharp Stanley knife and cut the decal back a few millimeters from the edge to give a nice clean finish. Good news, they both went on perfectly and I am really happy with the result!
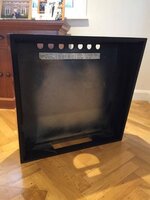
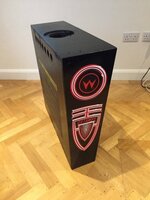
And that's where I am up to. Everything will be going back in over the next few days and I will hopefully get it finished by the weekend and then move on to the cabinet.
For those paying attention Whitewater still isn't finished but it is nearly there. I made the decision that the cabinet I made myself by hand isn't good enough when everything else is going to be pretty much mint so I'm waiting for a new one to be made by Matty Jacques. He advertises on Facebook and his work looks top draw so fingers crossed it should be finished sooner rather than later.
If anyone wants to catch up on that thread here it is: http://www.pinballinfo.com/community/threads/whitewater-full-refurb.32237/
Anyway, I bought this classic 90's pin from a forum member a few years ago with a great playfield but a faded and splitting cab.
So the plan is to refurbish the cab with new decals and give the playfield a deep clean and shop. Rebuild the mechs, flippers, add LED's and new rubbers, replace any broken plastics, etc.
Pictures from when I bought it:


Pretty good condition overall but after playing the sh1t out of it for a few years the split at the front of the cabinet has become a bit too big to ignore and the flippers are starting to get a bit weak so good excuse to start a refurb.


Usual starting point of stripping everything out the head. I have decided after my Whitewater refurb where I had bits all over the place at different stages that I am going to refurbish the head to pretty much completion, then the cabinet, then the playfield.

While the weather was crap I cleaned the speaker panel and installed the upgraded speakers on the new bracket, 16-Bit ZZ Top will never have sounded so good.

Parts for the tumbler. I have found that a load of cheap takeaway containers off ebay make great little storage pots for bits and you can label them easily with a permanent marker.

Bit of surface rust to remove from this!

While the weather was good all day Saturday I managed to sand, fill, and paint the head which was pretty good going!

Masked off the warning print.

Started with 80 grit to get all of the old paint off then filled for the first time, sanded with 120 grit, filled for the second time, sanded again with 120 then gave it two coats of primer. Another sand of 120 then 240 then painted the whole thing black.

Left the decals out flat for a few weeks under some weight. Used the standard method of putting a heavy weight at one end of the decal, peeling back and sticking part at the beginning then slowly peeling the rest back wile pushing out any air bubbles with a 3M squeegee.
Once the decals were stuck firm I went round with a metal ruler and a sharp Stanley knife and cut the decal back a few millimeters from the edge to give a nice clean finish. Good news, they both went on perfectly and I am really happy with the result!


And that's where I am up to. Everything will be going back in over the next few days and I will hopefully get it finished by the weekend and then move on to the cabinet.

Last edited:
