TFTC / Playfield Inserts Repair
So this isn’t a resto thread on my TFTC but as other people out there have similar problems I thought I’d post some pictures. My TFTC which I don’t regret buying, (well that’s a lie, it has been a bit of a PITA sometimes) it was always going to be considered a “players machine” cabinet wear, flipper issues and a moderate amount of playfield wear.
I did source a replacement playfield with thoughts of replacing it but if I can possibly save something then I will. The benefit of me having the 2nd good playfield is that I do have opportunity to get some decent pictures as reference.
How bad was the playfield insert wear? Bad. Everything to ghosting – where the adhesive under the factory decal / adhesion of the factory paint comes loose and areas become white. That to cracked split due to long hours of heat from incandescent bulbs to full blown torn, ripped and missing. So bad that in areas the top mylar (placed in heavy wear areas) had a hole in it, the mylar underneath that had a hole in it and even what I presume was the thin film of decal which the text is printed to is gone as well, 3 layers in all. God knows quite how!
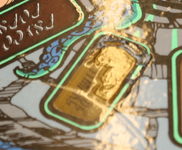
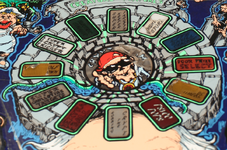
(Above, before. Ooo, eck! I'm not looking forward to this. Time for some brave pills, here we go!)
How many areas were effected? 14 inserts in all, most needing complete repair, others needed just a section replaced as they were solid for the most part.
 ic
ic
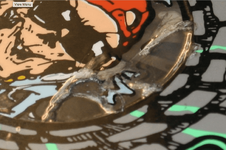
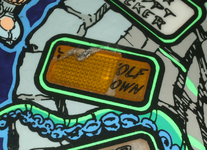
The mylar was SLOWLY removed, probably took me 1 ½ hours with a hairdryer, rather than a heatgun, rolling up the junk mylar as I went.
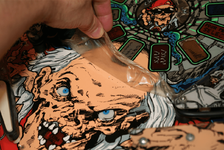
Have I tried freezespray? Yeah, that did not go well on the other playfield I worked on and wouldn’t recommend it to anyone. Use heat. Soften the adhesive, gauge how tacky it is and how much it’s still biting before you just rip it off. The hairdrier should be very, very warm, not quite hot. A heatgun may well start cooking your playfield if you’re not careful. Fingers too actually.
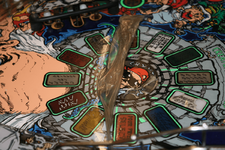
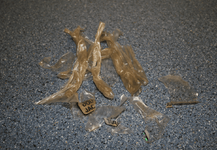
How discoloured and thrashed? Yeah, very.
Trim with a blade any remaining insert decals you want gone. Get that mylar gone then clean up with paper tissues, isopropyl alcohol, Q-tips. Then polish with a rubbing compound inserts if they’re dirt and yucky if the dirt crept underneath them, I had to. Finally alcohol again to remove any polishing compound residue.
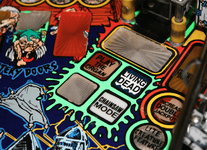
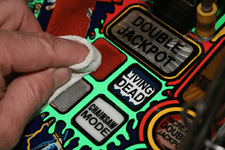
Clean and ready for decals?
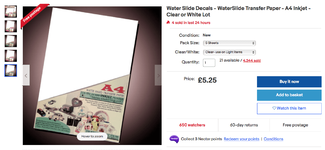
I photographed, measured, scaled and sized the images in photoshop and did the digital repairs. Once done I did a test print time and again until I had the sizing correct. Once correct I then commited to some transfer paper. (Like this stuff).
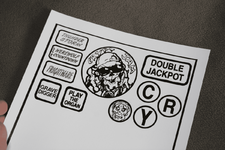
Printed then sealed with some 2K automotive lacquer. The paper is taped to a wooden board here. 2 coats sprayed with touch-up paint gun.
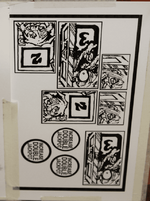
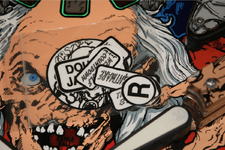
Trimmed the new decal paper as required & float onto the playfield the decals. Not too much water and more paper tissue to keep it dry as possible. Give it (whatever) time to dry out. I gave mine a week or so but it probably would be OK after 24 hours.
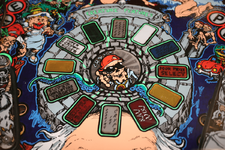
(Above, well the old damaged stuff is gone at least so while incomplete it does look a "bit" better...decals next!)
If the insert needs paint then add that now before final sealing. I used 2K solid colours which I mixed as required, enamels can be OK too. Acrylic at a push. The important thing is you seal that decal with lacquer again. You don’t want the risk of catching the edge when cleaning / leaving a hard line that will disrupt a ball. If your playfield is stripped you’ll lacquer the whole thing anyway. If like me it’s in the house (cough, kitchen) then you’ll have to brush it in very carefully.
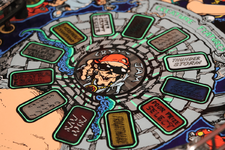
(Above, same playfield after a good few hours. Time well spent though)
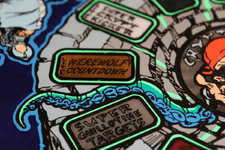
(Above, same Werewolf Countdown insert, just new decals).
If you have to spray it you really want to be doing that outside, 2K is nasty stuff. Please read all the warnings and take all safety precautions for your health and others.
At some point when I swap / strip this playfield down and lacquer the whole thing then I’ll level the existing lacquer up with a flat and polish once it’s all lacquered.
The important thing for me was to stop it looking such an eyesore and stop it getting any worse. This my same thinking on my EATPM.
Hopefully this will about cover it.
Rich
So this isn’t a resto thread on my TFTC but as other people out there have similar problems I thought I’d post some pictures. My TFTC which I don’t regret buying, (well that’s a lie, it has been a bit of a PITA sometimes) it was always going to be considered a “players machine” cabinet wear, flipper issues and a moderate amount of playfield wear.
I did source a replacement playfield with thoughts of replacing it but if I can possibly save something then I will. The benefit of me having the 2nd good playfield is that I do have opportunity to get some decent pictures as reference.
How bad was the playfield insert wear? Bad. Everything to ghosting – where the adhesive under the factory decal / adhesion of the factory paint comes loose and areas become white. That to cracked split due to long hours of heat from incandescent bulbs to full blown torn, ripped and missing. So bad that in areas the top mylar (placed in heavy wear areas) had a hole in it, the mylar underneath that had a hole in it and even what I presume was the thin film of decal which the text is printed to is gone as well, 3 layers in all. God knows quite how!


(Above, before. Ooo, eck! I'm not looking forward to this. Time for some brave pills, here we go!)
How many areas were effected? 14 inserts in all, most needing complete repair, others needed just a section replaced as they were solid for the most part.

 ic
icThe mylar was SLOWLY removed, probably took me 1 ½ hours with a hairdryer, rather than a heatgun, rolling up the junk mylar as I went.

Have I tried freezespray? Yeah, that did not go well on the other playfield I worked on and wouldn’t recommend it to anyone. Use heat. Soften the adhesive, gauge how tacky it is and how much it’s still biting before you just rip it off. The hairdrier should be very, very warm, not quite hot. A heatgun may well start cooking your playfield if you’re not careful. Fingers too actually.


How discoloured and thrashed? Yeah, very.
Trim with a blade any remaining insert decals you want gone. Get that mylar gone then clean up with paper tissues, isopropyl alcohol, Q-tips. Then polish with a rubbing compound inserts if they’re dirt and yucky if the dirt crept underneath them, I had to. Finally alcohol again to remove any polishing compound residue.


Clean and ready for decals?
I photographed, measured, scaled and sized the images in photoshop and did the digital repairs. Once done I did a test print time and again until I had the sizing correct. Once correct I then commited to some transfer paper. (Like this stuff).


Printed then sealed with some 2K automotive lacquer. The paper is taped to a wooden board here. 2 coats sprayed with touch-up paint gun.


Trimmed the new decal paper as required & float onto the playfield the decals. Not too much water and more paper tissue to keep it dry as possible. Give it (whatever) time to dry out. I gave mine a week or so but it probably would be OK after 24 hours.

(Above, well the old damaged stuff is gone at least so while incomplete it does look a "bit" better...decals next!)
If the insert needs paint then add that now before final sealing. I used 2K solid colours which I mixed as required, enamels can be OK too. Acrylic at a push. The important thing is you seal that decal with lacquer again. You don’t want the risk of catching the edge when cleaning / leaving a hard line that will disrupt a ball. If your playfield is stripped you’ll lacquer the whole thing anyway. If like me it’s in the house (cough, kitchen) then you’ll have to brush it in very carefully.

(Above, same playfield after a good few hours. Time well spent though)

(Above, same Werewolf Countdown insert, just new decals).
If you have to spray it you really want to be doing that outside, 2K is nasty stuff. Please read all the warnings and take all safety precautions for your health and others.
At some point when I swap / strip this playfield down and lacquer the whole thing then I’ll level the existing lacquer up with a flat and polish once it’s all lacquered.
The important thing for me was to stop it looking such an eyesore and stop it getting any worse. This my same thinking on my EATPM.
Hopefully this will about cover it.
Rich
Last edited:
