What's new
Pinball info

Register a free account today to become a member! Once signed in, you'll be able to participate on this site by adding your own topics and posts, as well as connect with other members through your own private inbox!

Complete Terminator 2 T2 - Shop Log

Ant-H

Site Supporter
Joined
Oct 17, 2020
Messages
1,308
Location
London
Since finishing the 2 TAF’s, I’ve been juggling different projects, starting a full on restoration of a BSD and working with @Gonzo on his Eight Ball Deluxe.

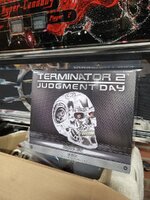
For this T2, I was actually asked to restore it by the owner back at Pinfest last year and have been working on it, on and off over the last couple of months along side the other projects.
IMG_5769.jpegIMG_5796.jpeg

It’s not been a full on super minty job, with new switches, re-plated mechs etc or a playfield swap. The owner wanted the cabinet fully restored and at first was thinking of a full playfield swap.

But after I looked at it, I recommended that it wasn’t needed as I could see that someone at some in its history has done a basic PF swap with what I believe is a nos PF, which is still in really nice condition, so suggested a full strip down, clean/polish along with new plastics etc and a full cabinet rebuild.

IMG_5774.jpegIMG_5771.jpegIMG_5776.jpegIMG_5775.jpegIMG_5773.jpegIMG_5770.jpegIMG_5772.jpegIMG_5779.jpegIMG_5782.jpegIMG_5781.jpegIMG_5778.jpegIMG_5777.jpegIMG_5787.jpegIMG_5786.jpegIMG_5785.jpegIMG_5784.jpeg
IMG_5809.jpegIMG_5810.jpeg
 
I suspect this wasn't originally a u.k. allocation machine, which may explain the vacant slot on the card holder. And the German warning sticker on the power inlet box. The door is the C220 type, with no mention of 20 pence on the entry label. These were fitted to Data East games, and Williams Riverboat Gambler, AFAIK the only System 11 game to have an electronic acceptor for u.k. production.
 
I suspect this wasn't originally a u.k. allocation machine, which may explain the vacant slot on the card holder. And the German warning sticker on the power inlet box. The door is the C220 type, with no mention of 20 pence on the entry label. These were fitted to Data East games, and Williams Riverboat Gambler, AFAIK the only System 11 game to have an electronic acceptor for u.k. production.
Yeah I think this originally spent most it’s time in Germany
 
I've got a Dutch T2. Just recieved Titans, colour DMD and Pinsound this week. Busy weekend ahead.
I'm scrapping the original HK ship with a more detailed Die cast HK.
 
I've got a Dutch T2. Just recieved Titans, colour DMD and Pinsound this week. Busy weekend ahead.
I'm scrapping the original HK ship with a more detailed Die cast HK.
Imo, 2 of the best mods you can do on a T2, is to upgrade the Hunter Killer ship and the T800 skull.
 
Before I started stripping the old decals I could see that the wood on some of the corners had completely split, so I removed all the loose ply, back to solid wood so that I could rebuild it with with resin.
IMG_5847.jpeg
Once the id stripped all the decals, i gave everything a sand with 60 grit, followed by 80 grit sand paper.
IMG_6767.jpegIMG_6476.jpegIMG_6477.jpeg
Once I’d given everything a rough sand I started the filling process. I generally do it it in 3-4 stages. Firstly I give everything a thin coat of filler, to help fill all the tiny holes/grain of the wood, as I like the decals to look nice and smooth once applied.
The interior also gets the same treatment.
IMG_6506.jpeg
IMG_6507.jpeg
Once this has been sanded back, I started rebuilding the corners and squaring up some joints with resin, as it’s a lot harder than regular filler and helps give straight edges and sharp corners.

Once this is smooth, I used a very fine filler over the top of the resin as this fills any pin holes created by air bubbles when it was drying.

It’s take abit more time compared to using just filler on its own but it’s worth it imo.
IMG_6774.jpegIMG_6775.jpegIMG_6776.jpegIMG_6777.jpeg
IMG_6778.jpeg
The job I did before painting was to sand all the dirt marks and stains off the base of the cabinet.
IMG_6780.pngIMG_6787.jpeg
 
Last edited:
I've got a skull in store ready to do. Going to take a bit of doing though 😉
What skull are you installing? On this one, I modded the same one that I originally fitted on my T2.
If it’s the same one, I’ll add some photos which might help as it’s some major surgery that you have to do in order to get it to fit 😂
 
Seeing the base and inside of the cabinet is another sign that it isn't a u.k. machine; the original equipment for Germany were most likely a 3-slot 'S 10' door, the (nearly) all-plastic cashbox and its 'U' bracket with lockable crossbar. Only one of the t-nuts for the bracket is still present, and the cross-member behind the cashbox has never had the clip for attaching a padlock to the 'traditional' cashbox lid. Looking at earlier pictures, the door opening lacks the guide bracket to hold the cashbox, too.
 
Last edited:
Seeing the base and inside of the cabinet is another sign that it isn't a u.k. machine; the original equipment for Germany were most likely a 3-slot 'S 10' door, the (nearly) all-plastic cashbox and its 'U' bracket with lockable crossbar. Only one of the t-nuts for the bracket is still present, and the cross-member behind the cashbox has never had the clip for attaching a padlock to the cashbox lid. Looking at earlier pictures, the door opening lacks the guide bracket to hold the cashbox, too.
Yeah, it didn’t have the guide bracket for the cash box. It definitely came for Europe at some point.

IMG_5841.jpeg
 
This was the first cabinet that I used my new spray gun set up with my compressor instead of rattle cans.

I hadn’t used a spray gun in years so had to practice for a while, but you get a much better finish plus its definitely cheaper in the long run compared to using cans.

IMG_6921.jpegIMG_6924.jpegIMG_6922.jpegIMG_6925.jpegIMG_6926.jpeg
Before painting the top coat, I flattened the primer down with 600 grit sand paper followed by a good wipe down with some panel wipe.
IMG_8070.jpegIMG_8072.jpegIMG_7121.jpegIMG_7123.jpegIMG_7128.jpegIMG_7130.jpegIMG_7129.jpegIMG_7125.jpeg
 
I left the paint to dry and harden for a few days before starting in the decals.

The licensed decals are silk screened and came from Buthamburg in Germany. I wet sanded the cabinet with 1200 grit sandpaper to remove any dust in the paint and to get a really smooth finish.
IMG_7228.jpegIMG_7368.jpegIMG_7369.jpeg
Next job was to line up side decals with the front one.
IMG_7371.jpeg
IMG_7370.jpegIMG_7372.jpeg
Once I was happy with the positioning I like to use a transformer to hold them in place, then give the cabinet one final wipe with a tack cloth.
IMG_7229.jpegIMG_7375.jpegIMG_7373.jpeg
When it comes to actually sticking the decals down, I prefer using the wet method now as it gives you a s little flexibility to adjust if needed.
IMG_7381.jpegIMG_7380.jpegIMG_7231.jpeg3C287453-0B38-4C44-9871-9C1701502E97.jpeg
Once down, I trimmed the edges and fitted the leg protectors.
68E6ECC2-F665-42FF-B1BB-4EA3FFBA8F17.jpeg
 
Next job to do after the decals was to rebuild the cabinet followed by the back box.

Before I start that though, I like to get the screen printing done, as it’s easier to move everything before all the heavy parts go back in.
IMG_7423.jpegIMG_7438.jpegIMG_7439.jpegIMG_7440.jpegIMG_7451.jpeg
IMG_7461.jpegIMG_7462.jpegIMG_7463.jpeg

When I took the game apart one of the first jobs I did was to wash the cabinet harness. That way I knew it would be dry for when it needed to go back. It always surprises me how much crap comes off after a 20 minute bath. It turns the water brown.
IMG_7383.jpegIMG_7389.jpeg
Running new earthing braid and refitting the newly powder coated brackets was next. I don’t know why but it’s little jobs like this that I really enjoy doing 🤔😂
IMG_7388.jpegIMG_7396.jpeg

Last job on the cabinet was to re-wire it, fit the sub and shaker as well as re-produce and install replace warranty and inspected by labels.
IMG_7892.jpegIMG_7896.jpegIMG_7901.jpegIMG_7902.jpegIMG_7905.jpegIMG_7903.jpeg
 
Next job to rebuild the back box and get that mounted onto the cabinet. First thingi did was to restore lamp board.
IMG_6745.jpegIMG_6810.jpeg
I find it easier to completely dismantle the board, so I remove the wiring harness and all the lamp sockets.
IMG_6811.jpegIMG_6812.jpeg
The board then gets sanded on both sides. Once complete the rear gets 2 coats of satin clear to seal the mdf, and the front gets painted in matt white. A new Caution label also gets added. The lamp sockets then get re-installed followed by the harness.
IMG_6902.jpegIMG_6901.jpegIMG_6900.jpegIMG_6899.jpeg

The final thing I needed to do before fitting the back box was to mod the sides so that I could light up the T800 eyes on both sides.
This entailed drilling large holes in the sides and through the new decals 😬

I needed to mod the leds for the eyes before hand. For these ones I did it slightly different and imo a better way when compared to the set I installed on my T2.
Removing the large led unit was the first thing to do.
IMG_7762.jpeg
In doing this however, I realised that the actual led was sunk into the acrylic so this needed carefully cutting off and sanded back.
IMG_7764.jpegIMG_7765.jpegIMG_7766.jpeg
Other than the slightly different fitting I chose for this mod, I also wanted to use standard comet leds so that they could easily be changed if needed in the future.
IMG_7768.jpeg
IMG_7781.jpegIMG_7771.jpeg
IMG_7779.jpeg
Next was the job I had been putting off 😂. Before cracking out the drill I checked and double checked I marked the exact centre of each eye.
IMG_7761.jpeg
Once happy I drilled away using a 20mm drill bit. 😮😬
IMG_7783.jpeg
Once both sides were drilled the leds simply dropped in place.
IMG_7773.jpeg6F53F72A-1F03-4672-A455-3F706ED87BF2.jpeg
These will be powered along with any other mods by a separate power supply.
Now this job was complete I refitted the boards along with a new FBI warning decal and mounted the back box onto the cabinet.
IMG_7890.jpegIMG_7894.jpeg
 

Attachments

  • IMG_7770.jpeg
    IMG_7770.jpeg
    117 KB · Views: 3
  • IMG_7763.jpeg
    IMG_7763.jpeg
    183.7 KB · Views: 3
Awesome Job as usual Ant given me a few tips to help me through the FH i am currently doing.

I like the red harness clips are they just dyed? if they are what did you use?

Also how are you getting the ground to the back box plate it looks powder coated did u just grind off the holes where lock in clips go?
Thanks mate. In regards to the grounding, you’re exactly right. I grind off any spots that the grounding straps needs to make contact.

I’ll send you a pm in regards to harness clip 👍🏻
 
The last couple of jobs for cabinet was to rebuild the gun handle and fit one of my s/s start button rings.IMG_7906.jpegIMG_7897.jpeg
IMG_7884.jpegIMG_7886.jpegWith the cabinet on this T2 basically finished all that’s left to do is the playfield.
It has definitely had a PF swap done in the past as it’s in really nice condition, with no real wear to it. It’s stamped on the side, Sept 1995.
IMG_7610.jpegIMG_7614.jpegIMG_5787.jpeg
IMG_7613.jpegIMG_7619.jpeg
The plan is to do a full strip down, Flipper rebuild, polish everything then put it back together with new plastics, ramp, rubbers, Comet leds, star posts etc along with a few mods.
The wire forms have also been re-chromed as they were all heavily tarnished.

The first job to do was chuck all the metal parts in the tumbler and to fit a chrome panel to the back board so that it matched the mirror blades that will go on later.
IMG_7821.jpeg
IMG_7883.jpegIMG_7932.jpeg
Once it was all stripped, I cleaned the playfield and gave it a good polish then added the comet leds.
IMG_7756.jpeg
Before taking it apart, the game played ok, but did have an issue with a couple of targets with a few broken wires as well the Skull vuk/drop target.

So I took the mechs aparts and replaced the spring and any broken parts, which turned out to be most of it.
IMG_7946.jpegIMG_7947.jpegIMG_7952.jpegIMG_7973.jpeg
Once rebuilt and installed I gave the underside a tidy, fixed some dodgy wiring and installed some colour matching cable clips.
IMG_8013.jpeg

With the playfield flipped back, I then refitted all the polished posts, new star posts as well as colour matched Titan rubbers.
IMG_8101.jpegIMG_8102.jpegIMG_8104.jpegIMG_8103.jpeg
 
Last edited:
That's a useful picture of the drop target assembly, showing the 'frame and eyelet' mounting for the dropper coil with the stop for the moving plate intact. Star Trek Next Gen seemed plagued by breakages of that component.
 
Ive continued to do some more work on this T2 whilst working on some other projects but have got quite a bit done on it now.
Mainly I’ve been testing out my new bench polisher and polishing up aload of the playfield parts. I also fitted all the comet leds.

All the ball guides had the usual years of ball trails so they were the first thing to sort.
IMG_8208.jpegIMG_8215.jpegIMG_8228.jpeg
I blasted over them with quite a course drum in order to remove the marks, and takes them back to a factory finish, but then used the bench polisher to get a mirror finish.
IMG_8216.jpegIMG_8217.jpegIMG_8232.jpeg
IMG_8175.jpeg

I sent all the plastics off to @Colywobbles who made up so awesome red plastic protectors, so I fitted these along with a new plastics set.
IMG_8192.jpegIMG_8239.jpeg
IMG_8249.jpeg
Back on the polisher, I polished the metal ramp and all the other PF parts. I also re-installed the chrome backboard and new plastic ramp.
8AC97F7D-BDE1-4ACC-B0E9-A542B706F9C8.jpegIMG_8711.jpegIMG_8713.jpegIMG_8290.jpeg
IMG_8313.jpegIMG_8292.jpegIMG_8293.jpeg
The plan was to fit 4 main playfield mods. The T1000, moving Hunter Killer Ship, Laser Canon cover and the updated skull that I originally did on my T2.

First to go on was the T1000. These come grey as standard, so I masked up the little leds and gave it a few coats of Chrome paint. I also polished the stainless steel mounting plate to match.
IMG_8267.jpegIMG_8269.jpegIMG_8280.jpeg99AB53B3-0F3F-44CD-B677-D598513796BB.jpegIMG_8258.jpeg
The updated hunter killer ship is an expensive mod, but imo along with PinSound, is the best mod to go on a T2. I
also polished the laser canon mod before fitting it in place.
IMG_8310.jpeg
IMG_8245.jpeg
The new re-chromed wire forms then went back on.
IMG_8719.jpeg
Now that the wire forms are in place, the last thing for me to do is the T800 skull mod, which is very much a trail and error procedure in order to get it to fit.
 
The last big job to do on this project was to complete the skull mod, which I actually did a while ago but have been working on another T2 so haven’t updated the log in a while.

The skull that I use is actually a resin pot so the front face of the T800 is removable.

There are 3 stages to the mod itself. First one is getting it to actually fit over the wire form. The second is to make a bracket to fix it in place, and the last is to mod the eyes with leds.

Getting it to fit takes a while as after I cut the initial opening there a lot of grinding and checking fitment to get it just right so that there is clearance for the wire form.
IMG_8748.jpegIMG_8747.jpeg
Once I’m happy it fits perfectly I remove the tape and move onto the mounting bracket.
IMG_8752.jpegIMG_8753.jpegAB930F93-394D-4D93-9C08-4AE1EECB83E0.jpeg
When it comes to the eyes I like to reuse the little red resin eyes that the skull originally came with. I then slowly drill out the eye sockets, gradually getting bigger with the drill bits until the opening is large enough for the leds.
IMG_8754.jpeg
IMG_8755.jpeg
The 2 leds are simply fixed inside and I glue the original red eyes onto the eye mod that Pinball life sell. The reason I do that is for me personally, I find the pinball life mod gives the T800 and bit of a bug eye look as they are quite flat.
IMG_8756.jpegFFB8A9B3-92F0-4B26-A9D4-083DF827ED25.jpeg
Last job is to do a quick test and fix it into its final position. 👍🏻
IMG_8764.jpegIMG_8772.jpegIMG_8773.jpeg
 
Where did you get the yellow backbox writing stencil from? I have a T2 that is pretty ropey. I looked at new German pf's, presently they are out of stock, I might do something like yours if I can get a good pf.
 
Where did you get the yellow backbox writing stencil from? I have a T2 that is pretty ropey. I looked at new German pf's, presently they are out of stock, I might do something like yours if I can get a good pf.
I screen print the yellow text back onto the back box and cabinet. I’ve done a few other people now. I did a video with @Gonzo explaining how to do it.

If you not too far away I’m happy redo yours if you decide to go down that route.

 
This one came with a restored playfield by @ChrisFormela to start with which was nice, but it got the same treatment as the other one in regards to cabinet and general PF strip down and shop but with a few slight differences

The main one being we went with chrome legs and armour plus art blades instead of mirror blades.

IMG_3016.jpegIMG_3019.jpegIMG_3020.jpegIMG_3021.jpegIMG_3022.jpegIMG_3024.jpegIMG_3025.jpegIMG_3026.jpegIMG_3017.jpegIMG_3018.jpeg
 
This one came with a restored playfield by @ChrisFormela to start with which was nice, but it got the same treatment as the other one in regards to cabinet and general PF strip down and shop but with a few slight differences

The main one being we went with chrome legs and armour plus art blades instead of mirror blades.

View attachment 236291View attachment 236292View attachment 236293View attachment 236294View attachment 236295View attachment 236296View attachment 236297View attachment 236298View attachment 236299View attachment 236300
Stunning, we all learn from you.
 
Back
Top Bottom