I purchased this Tecnoplay Space Team about 18 months ago in such poor condition that it wouldn’t have been worth restoring if it wasn’t quite a rare machine. For those who haven’t come across them Tecnoplay was set up by the Zaccaria brothers after the Zaccaria pinball company went out of business in 1987. They produced two games which were basically Zaccaria hardware (Devil King and Scramble) and two that used their own electronics and hardware (X Force and Space Team/Hi Ball. Hi Ball was the same table as Space Team but with a spring mounted cabinet in a vertical console to reduce floorspace. Tecnoplay are still in business making arcade machines today but haven’t produced a pin table since 1988.
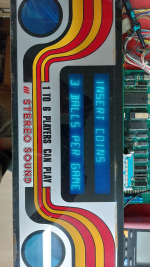
The game had a lot of features for the time including 6 players, multiball, ball launch aiming, a high level “toilet bowl” with ball diverter into a crossover ramp, pop-up targets, stereo sound.
I have been unable to find any information on the number of tables made but they don’t appear very often and there are no suppliers of spares for any of the game specific parts including all of the electronics, which makes them a challenge to restore, but I like a challenge!
The playfield didn’t look too bad except that it was missing a vacuum moulded transparent crossover ramp that runs the whole length of the playfield and all of the multiball mechanism both of which would have to be made from scratch.

Things proved quite quickly to be more challenging than I had hoped. I knew the machine had suffered damp and therefore probably rust, but given that much of the cabinet is made of MDF I hadn’t expected woodworm.

The front of the cabinet was Weetabix anyway and it transpired that at some point in its history the front of the base had been kicked through to get at the coin box and some wormy old plywood had been screwed over it after which the little bug***s had been very busy.
So off came the front panel:

After removing the other bad/loose bits I was just left with these!:

So they got thoroughly dosed with worm killer (although I don’t think the worm was still active), treated with wood hardener and then epoxy wood filler where necessary.

Lots of expensive birch ply and black faced MDF was sourced from mdfdirect.co.uk and many happy hours with the router using the old parts as a pattern resulted in the following:

Lots of Titebond Ultimate and sash cramps later:

By this point I had discovered the worm and rot issues in the back box, so another expensive order was placed with mdfdirect.co.uk and even more routing and gluing later:

Much of the cabinet bracketry was very rusty and was recovered using electrolytic derusting, which partially reverses the rusting process and leaves sound parts for painting or plating without damaging any plating that might still be present. My rather basic electrolytic derusting setup:

Note that the red wire is actually negative and the black wire positive for derusting as the rig was originally made for chrome plating which is the opposite polarity.
Before and after derusting:

Coin return cups before treatment:

Front of cabinet after applying newly printed graphics and refitting cleaned up hardware (apologies for the reflections from the high gloss black finish):

Inside view including restored coin returns, etc:

Backbox after refitting restored hardware and newly sourced speaker grilles:

In parallel with this I was attending to the electronics boards. There is one main board with the power supply and all digital electronics on it. A display board with the two line vacuum fluorescent display is mounted off this. There is a separate sound board and two small interface boards with the solenoid switching transistors which were intended to be easy, low cost replacements.
Main board and display board:

Sound board and interface switching boards:

Unfortunately the main board had suffered the usual battery leakage and, as always, the battery was positioned immediately above the processor and eproms (why oh why). Note the nice green and furry test pins alongside the processor!:

The alkaline battery leakage was neutralised with a mild acid solution and the corrosion deposits removed before ultrasonically cleaning the whole board, washing and drying before beginning the tedious process of identifying a repairing all the damaged tracks on the pcb.
The board after cleaning, repairing and testing. Note the memory capacitor in place of the battery. There are no NVRAM upgrades available for this game although I might make one later:

The board working during bench testing:

In the next episode I will look at the playfield restoration. If you have any questions I will do my best to answer them.
Keith
The game had a lot of features for the time including 6 players, multiball, ball launch aiming, a high level “toilet bowl” with ball diverter into a crossover ramp, pop-up targets, stereo sound.
I have been unable to find any information on the number of tables made but they don’t appear very often and there are no suppliers of spares for any of the game specific parts including all of the electronics, which makes them a challenge to restore, but I like a challenge!
The playfield didn’t look too bad except that it was missing a vacuum moulded transparent crossover ramp that runs the whole length of the playfield and all of the multiball mechanism both of which would have to be made from scratch.
Things proved quite quickly to be more challenging than I had hoped. I knew the machine had suffered damp and therefore probably rust, but given that much of the cabinet is made of MDF I hadn’t expected woodworm.
The front of the cabinet was Weetabix anyway and it transpired that at some point in its history the front of the base had been kicked through to get at the coin box and some wormy old plywood had been screwed over it after which the little bug***s had been very busy.
So off came the front panel:
After removing the other bad/loose bits I was just left with these!:
So they got thoroughly dosed with worm killer (although I don’t think the worm was still active), treated with wood hardener and then epoxy wood filler where necessary.
Lots of expensive birch ply and black faced MDF was sourced from mdfdirect.co.uk and many happy hours with the router using the old parts as a pattern resulted in the following:
Lots of Titebond Ultimate and sash cramps later:
By this point I had discovered the worm and rot issues in the back box, so another expensive order was placed with mdfdirect.co.uk and even more routing and gluing later:
Much of the cabinet bracketry was very rusty and was recovered using electrolytic derusting, which partially reverses the rusting process and leaves sound parts for painting or plating without damaging any plating that might still be present. My rather basic electrolytic derusting setup:
Note that the red wire is actually negative and the black wire positive for derusting as the rig was originally made for chrome plating which is the opposite polarity.
Before and after derusting:
Coin return cups before treatment:
Front of cabinet after applying newly printed graphics and refitting cleaned up hardware (apologies for the reflections from the high gloss black finish):
Inside view including restored coin returns, etc:
Backbox after refitting restored hardware and newly sourced speaker grilles:
In parallel with this I was attending to the electronics boards. There is one main board with the power supply and all digital electronics on it. A display board with the two line vacuum fluorescent display is mounted off this. There is a separate sound board and two small interface boards with the solenoid switching transistors which were intended to be easy, low cost replacements.
Main board and display board:
Sound board and interface switching boards:
Unfortunately the main board had suffered the usual battery leakage and, as always, the battery was positioned immediately above the processor and eproms (why oh why). Note the nice green and furry test pins alongside the processor!:
The alkaline battery leakage was neutralised with a mild acid solution and the corrosion deposits removed before ultrasonically cleaning the whole board, washing and drying before beginning the tedious process of identifying a repairing all the damaged tracks on the pcb.
The board after cleaning, repairing and testing. Note the memory capacitor in place of the battery. There are no NVRAM upgrades available for this game although I might make one later:
The board working during bench testing:
In the next episode I will look at the playfield restoration. If you have any questions I will do my best to answer them.
Keith
Attachments
Last edited:


")


.webp")