What's new
Pinball info

Register a free account today to become a member! Once signed in, you'll be able to participate on this site by adding your own topics and posts, as well as connect with other members through your own private inbox!

Shop Log: Creature From The Black Lagoon

Calimori

Staff member
Joined
Mar 15, 2012
Messages
4,208
Location
Luton, UK
Alias
Calimori
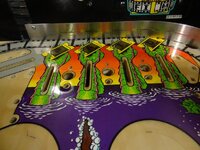
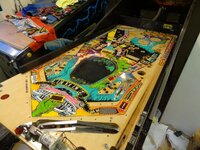
This was Jonathan's CFTBL which I bought back in November. It has a hot pink play field and was in pretty good condition but was showing signs that it would benefit from a good clean and some new rubbers.

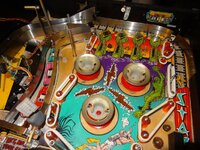
There was also the plan to fit some lights into the jet bumpers to give some excitement when the jets fire.
Sort out the ball plunger which was off the scale to even get a ball into the top of the game.
Fit some hot pink posts.

So this shop log plans to deal with those things by doing a strip, Treasure Cove Clean and carnauba wax, rebuild with new rubbers.

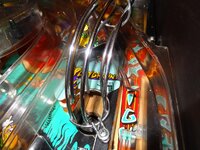
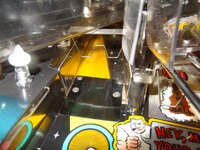
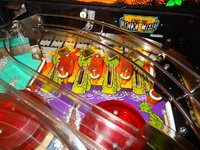
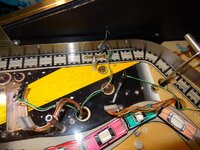
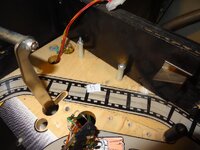
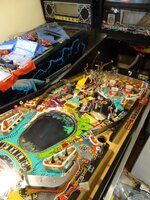
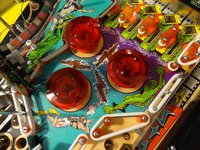
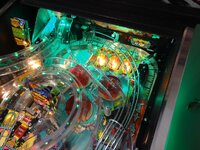
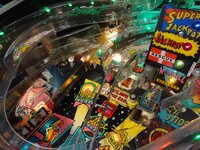
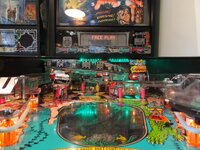
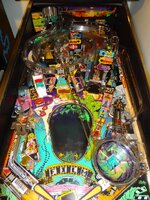
So this is how it looked when I started:
1_zps1c0b5681-1.jpg


2_zpse03db4d6-1.jpg


3_zps894c7989-1.jpg


4_zps71c11ddc-1.jpg


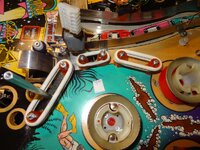
Generally the ramps and rubbers were showing they were tired and there was a lot of ground in dirt around the jet bumpers because to clean them requires the ramps to come off.
That is also the most likely reason there are not lights in the jet bumpers, because they would never get changed in a hurry.

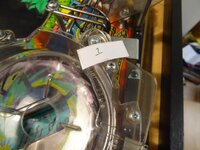
I followed the recommended process of taking photo's with numbers on them next to the bits being taken apart. Then the bolts when in a zip loc back with the number written on it, the plastics went in another. This meant I could also have a numbered order to do in reverse which I then knew is most likely to go back together properly. It didn't exactly go perfectly when I did it but it amazed me how much easier it was than when I did TAF.
5_zpsf18f2c2c-1.jpg


Examples of the ingrained dirt and dirty rubbers.
6_zps618f4399-1.jpg


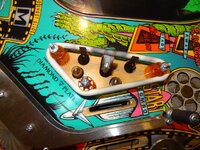
There are a lot of rubbers around the jets on Creech. It required a lot of pictures so I would put the posts and rubbers back in the right place.
7_zpsef3cf463-1.jpg


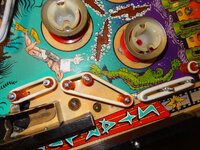
Mylar looked tired and was coming up in places.
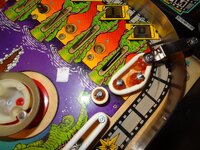
8_zpsc276167a-1.jpg


More ground in dirt and tracks.

9_zps88f21a5a-1.jpg

10_zps143f4aee-1.jpg


I could have stopped around this point. It was nearly 3 hrs in and I was done for the night.
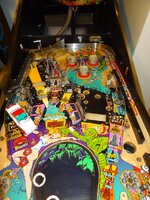
11_zps1fd8239c-1.jpg


The next morning the confidence or stupidity kicked in and I carried on remove and bagging bits.
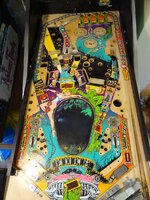
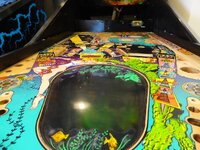
12_zps3f48f572-1.jpg

13_zps83d5337d-1.jpg


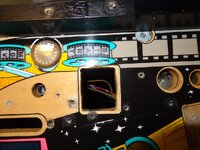
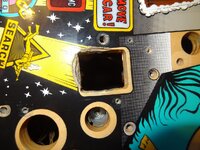
There was some bad wear around the KISS and Snack Bar but I didn't want to deal with them this time. The Snack bar had a cliffy on it, which was broken so I will replace that later.
14_zpsec9d3678-1.jpg

15_zpsaa63bcbf-1.jpg


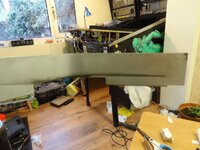
The ball trough came off in the end to allow for me to start cleaning the table to prepare it for the Treasure Cove treatment.
This was about 5 ish hours to get to this point.
 
Thats a very pretty pf, should look stunning when you've done. Are you going with the hot pink posts all over?
 
Over all its in great condition and will look great once you give it the Treasure Cove Polishing treatment.
(Is this the first time you will be using the polishing kit ?) not heard of anyone else giving it a go as yet.
Looking forward to the finished playfield once polished and waxed. Get plenty of pic's during the polishing stages as I would be very interested in how good this kit is, (or should be).
Well great time to be doing work like this as we can't do much else with the weather.
 
The machine was actually worked on Friday the 11th, Saturday the 12th and Tuesday the 15th so I am cheating as I know it all went back together. I took about 1GB worth of photo's and some videos as I wanted to capture as many parts as possible. The delay in posting the shop log was that there were a few more parts arriving plus the time to sort out all the photo's into the ones that would be best posted on here. If anyone ever need more, or a particular area, I probably have a few to cover it.


Phase Two, the polishing.
It was my first use of the Treasure Cover Polishing Kit. TAF's play field is pretty worn out so was worried about putting a polishing drill attachment on to it. Pretty scared to do the same on Creech so I watched the attached DVD (thanks Paul) first to confirm I had the right idea.

First thing I did was clean off the grime with Foaming Cleaner and a soft cloth. I bought a bulk load of micro cloths and used them as though there was no tomorrow to make sure no contaminates went from one process to the next. Then I used Novus 3 as I have experience of that but could see it is very harsh in already worn areas.
Once cleaner, I used a Magic Eraser cleaning sponge and again was careful as it will take off paint. The juggle was between getting clean or losing paint.

The Treasure Cove Polishing Kit has several attachments to go onto a drill. Some for cleaning, some for polishing so you swap around the attachment as you go through the three polish liquids in the kit. Polish 3 is the most aggressive whilst 1 is the polishing finish.

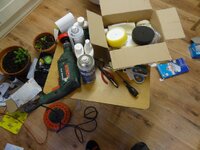
The things I used to clean and polish can be seen here. The Missus was out so she didn't know I used half the kitchen space, so please don't tell her.

18_zps425df565-1.jpg


I spent about 5 minutes on each round, moving the high revving drill about so I didn't stay in one place long. There was not additional pressure from me on the drill, "let the drill and polishing kit do the work" as the guys at Treasure Cove say in the video. After the first one with polish 3, I wasn't overly impressed. After polish 2 I could start to see it was looking better, after polish 3 I was convinced it looked much better.

But I really wanted to make the play field pop, so I used Carnauba wax which was applied by hand rubbed into places carefully, left to dry for 30 minutes, then buffed off with another micro cloth.

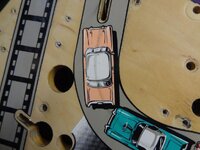
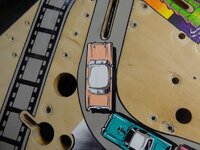
Before

16_zpsa8af6aa4-1.jpg


After the Magic Eraser

17_zpsceee898c-1.jpg


After Treasure Cover and Carnauba Wax

20_zps542a4353-1.jpg


Lifting and dull mylar

21_zpsfcf4abb0-1.jpg


After Treasure Cover and Carnauba Wax

24_zpsbd5b238e-1.jpg


More after pics

22_zpsb9b0b23c-1.jpg

25_zps3f9dfbf8-1.jpg

23_zps8811f32e-1.jpg


So that is the play field cleaned up. It didn't really take much more than an hour of time but over a 2 hour period as I was nervous. I think if i was careful with the kit, I could use it on TAF and get more out of the dull mylar and other areas so TAF might get the treatment next. For play fields, I am convinced it is a better product than Novus and the drill bit attachments are worth the money.

Next instalment, cleaning and rebuilding.
 
Phase 3 Putting it back together

Feeling good about what felt like a straight forward strip down and then polish of the play field. I was confident I could put it all back together in the five hours I had left in the day, that was stupid.
I sorted through the box of box of bag and realised I had 50 steps to repeat and each step now included a cleaning process. I felt like someone at the top of Everest who now realised they needed to climb back to base camp and had left it a little late.

To add to that, there was to be a reoccurring issue with screw in posts that Mooseman and I had spotted in December. The play field had a lot of wood screw holes that were now lose and as I found them I fixed them with a cut length of kabob stick and PVA glue (left to dry for 12 hours). I was told the technique should involve gluing in the new wood and then cutting to size but I cut to size and then glued in. This allowed me to rebuild the areas around the holes as I might not have great access later.

The actual plastics and pieces were in pretty good condition. The snack bar plastic is knackered, the left ramp exit has a broken tab, some plastics are repro's and there are a lot of scratches on some but all the star posts were perfect, there were no broken parts found in the machine and pretty much all of the parts were re-usable. Only a few post screws and nuts were not good enough to go back on. This was a great result as it meant I didn't have to wait for parts for the rebuild.

I didn't do anything special with the metal parts other than clean them with Foaming cleaner and autusol. Some were filthy.

26_zps9da2e7d2-1.jpg


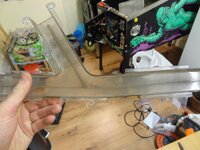
Ramps were all cleaned with Foaming Cleaner, then Novus 2 and the Novus 1 before being licked with a flame. However, I have not good pictures of post flame licking so will show you the under ramp which was pure filth.

27_zpse404faa4-1.jpg


If that hadn't been cleaned, all that dirt would have been tracked back on the play field.

28_zpsc7ed9bfb-1.jpg

29_zps40eb190e-1.jpg


All poppers that return the ball to the play field were taken off and cleaned so nothing underneath should make the play field dirty again. This was the end of Saturday, 12 ish hours so far.

As mentioned, the jet bumpers have no lights in on Creech which is a shame, it also meant the jet mechanism was easy to remove for a good cleaning.

30_zpse17a258b-1.jpg

31_zps1b543588-1.jpg


By this point, it still didn't look like it would be finished any time soon. It was Sunday and I had to go out but I had managed to put all the rubbers back into the right place with the hot pink posts fitted.

32_zps836e3ce8-1.jpg


I didn't have to work Tuesday so I got stuck in. I spent 3 hours fitting the lights into the jet bumpers which I will discuss in another post and I don't count those hours as being on the shop log but without the ramps on, it was time to put the bulb holders and bulbs into the jets.

33_zps630715ed-1.jpg


Now it was just a case of bolting on cleaned plastics and more flame polishing of ramps and they do look much better for it.

35_zpsd0606ad5-1.jpg

37_zps6b979b40-1.jpg


Ball's view

38_zps8d1bcdd7-1.jpg


I am going to say that the total time for the actual shop was about 21 hours. There were times where I was on the phone or meant to be cooking that I was also cleaning something. Or other times where I was recording the time but I had to do something else.
Creech has very few tricky bits on it so think it is not a bad machine to shop.
 
Wow, that's dedication! Looking great. Bar TAFG I think creech has been my favourite table. My dad still hasn't forgiven me for selling it
 
Great writeup and photos soldier. Sgt Grizz loves the Creech 🍵 I always find it takes waaaaaaaaaaaaaay longer to reassemble than you think. Were you dismantling and cleaning mechs like the slingshots, rebuilding flippers etc or were they all ok ?
 
The flippers and slingshots were not rebuilt as they looked almost brand new so this was pretty much top side only.

After thoughts and oddities
This is the part of the show where I like to give particular attention to what I have learnt.

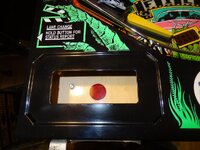
Creech has a red window under the left apron card holder. I wonder what they planned to use that for and what mod can I can think up for that.

40_zps3cca2362-1.jpg


Andy, The Legend, sent me 7 hot pink posts because apparently there are not meant to be rubbers on the two skill posts. He said he knew of several examples that were left un rubbered but understood why people wanted rubber on these posts too. All my parts were sourced from Andy and I thank him for all his advice and help. The hot pink posts really do go with this play fields.

My play field was reconditioned during Jan of some year and not sure by who but they stamped the board.

Creech has very few toys other than the lovely ramps and the hologram but removing the ramps has to be done in a certain order and will take a while

Mod: Jet Bumper Lights.
As said, there were no lights in there originally and therefore no lighting program in the main CPU. So the choice was to have them come on when other lights fired or have them permanently on. I found this post explaining, the process and the parts needed to get them to fire when the solenoids fire and that sounded like a good simple mechanism.

http://www.thekorn.net/cftbl/howto.html

Andy supplied:
The standard bulb holders for jet bumpers which hold #555 bulbs
3 x #555 bulbs (ok, it was 4 because I blew one up).
Normal pinball wood screws to hold the barrier strips.

RS components supplied:
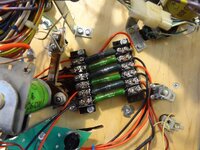
W23 vitreous wirewound resistor,47R 9W: 199-5634: £3.88 for 5
Vitreous Wirewound Resistor, 10R 10W: 666-1724: £5.80 for 5

Some ebay bloke supplied:
2 x 6 position barrier strips (http://www.ebay.co.uk/itm/130645443928?ssPageName=STRK:MEWNX:IT&_trksid=p3984.m1497.l2649)

Maplins supplied:
Black and red wire

First you need to get to the top of the jets to take the caps off, I recommend stripping the entire play field and giving it all a good clean, other wise you will just need to remove all three plastic ramps.

DSC03426_zpsf31e624e-1.jpg


The are normal jets plastics so do have the unused holes for the lights at 1 o'clock and 7 o'clock in this picture

DSC03432_zpsaf28ab6f-1.jpg


Push the metal legs/strips of the bulb holders through and then open up the table to see where they will be coming out. Much like all other games with lights in the jets, there is a route for the wires to come out.

DSC03544_zps9c7ccef1-1.jpg


Pull them through the gaps so that they pull the bulb holders tight into the centre of the jets.
The chap who's post I followed worked out that 60 ohms resistance was about right for the bulbs but 60 is not a usual size of resistor. That is why we are using 10 ohm and 47 ohms, less might mean the bulbs blow quicker, higher would mean they are less bright. The way this is wired up, I can change the resistors if I am not happy with how they work. Which is just as well because I some how mess up the original order and got 470 ohm resistors which did not let the bulbs light. I then tried with two 10 ohm resistors (total of 20 ohms in the circuit) and blew the bulb very quickly but damn did it look good in that one flash.

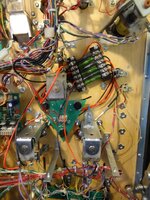
I have tried to make a sensible use of red and black wires, a resistor on each only because it was tidiest. The wires go from the bulb strips, through a resistor and to one end of the relevant coil. In the above pictures the strip wires are all being held in place under the triangle play field flashers to make the space look cleaner.

We don't want the resistors melting so we use big ones that can take the watts. They are only flashing briefly so less might work but I like my table so followed the chaps instructions.

The barrier packs hold the fuses and allow for the wiring to terminate, there is loads of space to fit one right where you need it.

DSC03545_zps0d4425a9-1.jpg


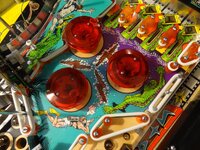
Here is the picture from the top, showing the bulbs in place with the caps back on.

33_zps630715ed-1.jpg


It really is quiet a simple process and looks fantastic whilst you are playing.

Hopefully a video for people to view what it looks like to the player, I can do more if required. You have to click on the picture below.

th_00007Clip1_zps8ca751d3-1.jpg
 
That red insert under the left score holder appears on many 90s Williams games, and seen on older games too (I think ???) I always assumed it somehow played a part in factory testing/quality control :noidea:

EDIT - just googled and apparently yes used for playfield quality control. They could pull out playfields and do tests on that insert to check clearcoat etc. without any damage/harm coming to main pf. Makes sense.;)
 
Thanks GrizZ, it clears up that mystery. :hail:
I do not have one on my TAF play field and don't remember seing one on other machines but I wasn't looking.
 
Back
Top Bottom