What's new
Pinball info

Register a free account today to become a member! Once signed in, you'll be able to participate on this site by adding your own topics and posts, as well as connect with other members through your own private inbox!

In Progress Rocky & Bullwinkle Shop Log

Yeah, but that £60 would buy me TWO springs so I would have a spare. In reality if I go that route i'll be asking how much it would be for 3 or 4 or even more springs. It could be the setup charge which is the expensive part so getting a few extras might be a cost effective step to take.

I understand what you're saying about Frankensteining the machine- there's actually an R&B on eBay right now - but it's at £555 and rising and I can't justify spending that sort of money when almost everything else on the table is in pretty good order. I'm just too poor. ;)

The spring is some way down my list for now. I'm going to focus on other stuff that needs doing such as the cliffy protector, replacing some of the beat up plastics and getting the cabinet back in order. I'm also looking at powder coating the habitrails, legs and lockdown bar - so plenty to keep me going.

Fingers crossed I can get the glass cleaned up tonight and the replacement microswitch back in place. Then I can actually play the thing again. I had a quick go last night and it absolutely flies now, although it's very very noisy to play with the glass off. Oh yeah, and I still have a fair few coil sleeves to swap out.
 
maybe find one that's been sited using pinformer, turn up in overalls carrying a toolbox and ladder or something, jimmy it open, remove the still beating organ, sew it up crudely, and back away making excuses. it's a method people use to get replacement kidneys all the time.

ok ok no, i don't mean it really.
gif aint nobody got time for dat.gif
 
Haha, well I was kinda thinking of something similar to remove a knackered Elvis from a local arcade. But still not got around to it.

Whatever - the one thing I can say is that this time next year my R&B will be in better condition than it is now. Loving having it to play on and loving doing the work on it.

Hell it's been a great intro to Pinball and i'm looking forward to being part of the community for many years to come. Hopefully we can manage to get together for a beer or three when i'm down in London next month.
 
Thanks elrikos. I'd actually spotted that one myself a while ago before i'd got measurements and additional pictures. I have to admit it looks very close and for the sake of < £3 I reckon i'll give it a go. Nothing to lose and all that. :-)

I've done plenty of searching online and not turned anything else up unfortunately. I spent 8 hours a day sat in front of a PC so i'm not short of time to search (erm, when i'm not working my ass off of course).

Last night I cleaned the mechs on the pop bumpers and SVUK before replacing the coil sleeves. Before doing so i'd spotted that one of the bumpers was a bit 'weak' and wasn't moving as much as the others. No such problem now - they're hammering the crap out of the ball and it makes the game play much faster. Only other job I need to do is to tweak the trigger on one of the bumpers as it takes a fair whack to register the hit. Is there a technique for doing this or is it simply a case of carefully bending on the metal contacts in the switch mechanism?
 
I wouldn't be surprised if it was a spring from a chainsaw choke, seems a bit much for DE to go to the trouble of making a custom spring.
 
That's what I figured too Carl - i'd have thought they would have used a stock spring.

I'm sure i'll get to the bottom of it eventually. Having fun working on various bits of the table in the meantime. Flippers are aligned now as well. ;)
 
A little more progress tonight, although time is getting short as we rapidly head towards our weeks holiday away.

Today the replacement micro-switch that I needed for the Spin & Win Ramp arrived. It wasn't an exact match to the old one but thankfully it worked fine - a quick solder job and a change of the armature was all that was needed before fitting it in place and going into the switch test menu. Worked a treat. Lovely :)

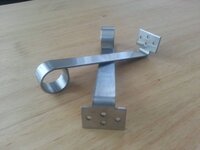
In other news i've received the new playfield supports from Mantis Amusements in the States. Again thanks to Phil at Pinball Heaven for allowing me to ship them with his delivery and then forwarding them onto me. Much appreciated as always.

So yeah, playfield supports to replace the ones missing from mine.

20130802_163952.jpg

I was pleased to find when fitting them that the mounting holes still were a good fit for the screws. I've heard horror stories of these getting ripped off, thus rendering the mounting points useless. Better still these have four holes to mounting instead of the original two so hopefully they'll be a bit more sturdy.

20130807_190016.jpg
20130807_190041.jpg

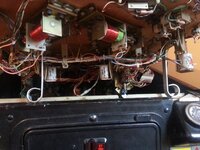
There's already some damage to the wrapper on the coil to the right that you can clearly see in the last shot. Thankfully it's not to the detriment of the table, although it bugs the hell out of me every time I see it.

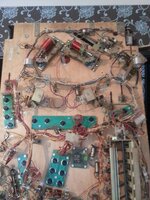
I've also started working my way around the table over the last couple of nights and started cleaning the mechs and replacing the coil sleeves. Pop bumpers and the SVUK and VUK are now done, as are the ones under the apron. All that's left now is the drain coil, the S-A-V-E-D reset and the two slingshots. I also need to tweak the slingshots and one of the pop bumpers that's not registering hits against it (unless the ball is hammered at it from another bumper).

I've also heard a very odd noise coming from the top of the table during play. It's something to do with the mechanism that locks or unlocks the outer loop gate so i've stripped the plastic above that away so I can see what it's doing. Seems to have stopped now so perhaps the plastic was just loose and was vibrating and making the noise. I'll leave it off for now and see what happens.
 
Had a week away but hopefully will get back to this tomorrow.

Jobs on the list are:

1. Adjust the left slingshot. It keeps firing on it's own.
2. Adjust the top pop bumper. It takes too much of a whack to get it to trigger in my view. So quite often at launch the ball dribbles down through the lanes and fails to trigger it, thus causing it to just roll of to the right.
3. Clean the glass. It's very dirty.

I've also got some cash to spend on replacing the insert lamps with LEDs so i'm going to have a look at those and figure out what I need to order.
 
Apologies that this thread has been a little picture light lately. Not really much worth showing. I might try to get a video of the table running in the next day or so.

Over the last couple of days I adjusted the left slingshot and the top pop bumper. Both work much better now and the table is playing really nicely.

I've put an order in for some dual SMD LEDs for the playfield. At the moment i've just grabbed a selection of a few key locations and once i've fitted those i'll look at what else needs doing.

I've also ordered that chainsaw spring to see if it's any good for the Nell Assembly.

Glass still needs cleaning though. ;)
 
I looked into it but my gut feeling is that a clothspeg spring would yield too much torque. This is mainly because the diameter is so much smaller - the clothes peg spring in front of me here is <=10mm in diameter whereas the original one from the Nell Assembly should be at least 19mm.

I've got one here that I can try out as plan B if the Chainsaw Spring isn't a closer match.
 
Maybe as it's a less complex game? :-)

I have no idea how much work Dan (or any previous owners) have done on the underside but the cable routing is all pretty neat aside from a few tie-wraps that i've snipped whilst working on various parts of the table. One of the other jobs on my list is to re-apply the tie-wraps that I had to cut.
 
I know many may think this overkill because it's ONLY a Data East table and not a Bally/Williams. But......

I've sourced a NOS playfield in the USA and part of me is really really tempted to look into grabbing it. There were two listed a few months back and now they're down to one.

Is it worth me grabbing? I'm tempted to get it and put it to one side with a view to maybe having it clear-coated and doing a full playfield swap out at a later date.

After purchasing, shipping and VAT i'm looking at around £500. Sure it's pricey and I know i'll never get that back from the table should I move it on, but to be honest I have no intentions of getting rid. It's my first Pin and for that reason alone it would have been a keeper, but the kid-friendly family theme also makes me want to keep hold.

Also, on an unrelated matter. I've noticed that one of the standup targets on my R&B seems to have a nasty habit of launching the ball up at the glass when struck with enough force. Is there something you can do to prevent this? I'm thinking maybe the metal post behind the target needs adjusting to be more upright or even leaning forward slightly?
 
If you bend the posts forward, the ball will eventually bend them back again. It ends up as new targets from my own experience.
As for the playfield. Could you not fit a £500 pin into your collection, would that not be more fun?
A playfield is a part of the machine that is hard to repair for less money than you are quoting unless you can do it yourself. Buying it and storing it will probably not lose you money (if you can find a buyer) but will take up a lot of space. I would jump on a NOS TAF, CFTBL or IJ playfield for that price. The divorce would cost me a lot though.
 
go for it dude, this is a hobby so if you wanna spend X hours or Y pounds on it, as far as i can tell, it's all good XY well spent
 
I simply don't have the room for more Pins right now, so i'd be more inclined to invest the money on the one I do have to make it as pristine as I can get it.

In other news i've fitted some new LEDs under the inserts tonight and cleaned the glass. Looking lovely now, although I still need to get the Cliffy in place and order some additional LEDs.

Loving doing the work though. :-)
 
Cliffy protector set for the ramps and the Aesop hole ordered. :-)

I'll soon be at the point where I can turn my attentions to the cab.

Main things left to do on the playfield now are:

* Strip off the habitrails and get hose shot blasted and re-powder coated.
* Finish off the LED lighting on the inserts
 
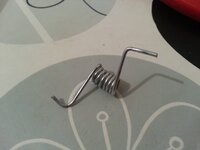
So, today was the day that my new spring arrived. Y'know the one that we thought might be the right fit for the Nell Log Assembly?

I rushed home to a small parcel waiting for me and ripped it open. To find this.

photo.JPG

So, err, yeah, it's a bit on the small size. In fact there's no chance it's going to work. Oh well back to the drawing board.

Next up was Dan's suggestion of using the spring from a clothes peg. I very craftily nabbed a couple from the wifes peg bag and set about dismantling them and twisting the spring out so that the legs had the bends in the right direction.

20130821_195822.jpg

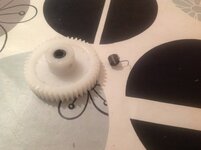
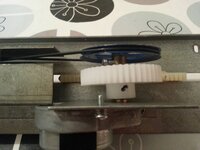
Then I hit a problem. There isn't enough room between the motor and the plastic gear to fit the spring. You could probably get it in there but there wouldn't be enough room on the spindle to fit the belt pulley.

Doh!!

20130821_195828.jpg

The explains the reason for the 19mm diameter of the coil in the spring. It actually sits over the 'lug' on the inner side of the plastic gear so that the whole assembly can sit like it's shown in the picture above.

So my quest continues. To find an 8 coil, 19mm diameter torsion spring. Wire size is 1mm. I have all the measurements so now I need to start hunting again.
 
Last edited:
Not done much lately as i've been too busy playing and having my birthday weekend. Oh, and then I got shipped away on business for a few days.

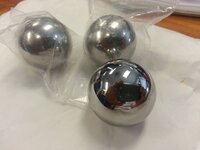
I've been getting withdrawal symptoms so i've just ordered 3 new shiny balls for the table - the ones on it were ok but were starting to look at a little worn and they weren't as shiny as they could be.

Going to have a bit more of a dig around for a replacement spring for the log assembly at the weekend I think.
 
Can you not just buy a piece of spring wire and wrap it around a bit of 20mm dowl to form a spring ?

Or put a spring between the bit the cog drives (straight, toothed bit) and the metal housing of the unit, to pull it it back down
 
To be honest Ian I didn't even realise you could buy such a thing as spring wire.

I've found a place that can sell me it in 1m lengths of both 0.9mm and 1.2mm diameters and the cost for that would be around £5. A 20mm dowel would set me back about the same so for £10 I could have the materials needed to have a go at making my own.

I'm also guessing at 1m a length I could easily try two or three different springs with a different number of windings and thus a different spring tensiosn. So yeah, worth a go and if funds allow I might well give that a try in a week or two.

Right now i'm waiting on my new balls to arrive and also the cliffy set I ordered a week or two ago. :-)
 
My balls turned up today. By god they're shiny - they didn't look great in the bag but when you take one out they just gleam.

In other news i've spent the day getting my moneys worth out of 'balls of steel' jokes and asking people if they'd like to see my ball bags.

9662131553_ea83880f14_o.jpg
 
Weeell, it's looking like I might have managed to blown one of the transistors on the CPU board as a whole column of switches is out but continuity appears to be there. I'm going to grab some jumper cables tomorrow and test the theory by jumpering pins between CN10 and CN8.

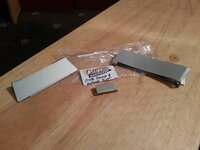
However, in the meantime the protectors from Cliffy in the USA turned up. And best of all they flew through customs with no charges. Hurrah!!

20130904_194025.jpg

I wasn't so fussed about getting the WABAC ramp protector on because a previous owner has made their own to patch up a hole in the ramp. Longer term the plan is to buy a new ramp and when I come to do that i'll fit Cliffys protector as it's a little better made and less battered.

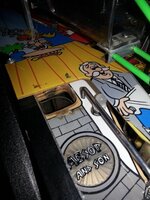
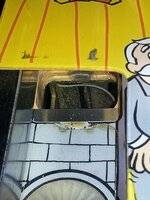
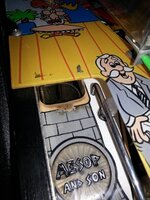
So, first job. Patch up Aesops Hole.

20130904_194049.jpg

It's pretty badly worn there and longer term I need to really peel back the mylar and touch up the artwork before sealing it again. But for now the objective is to prevent it getting any worse. Fitting the protector was simple. Just remove the VUK assembly and subway from underneath, put the protector in place and then refit. All done in 5 minutes.

20130904_200557.jpg

Theres still some damage visible but hopefully the lip on the protector will prevent it from getting any worse.

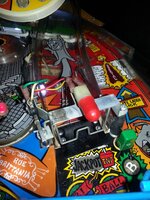
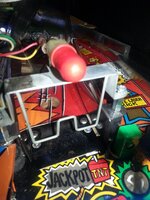
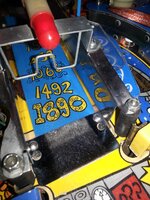
Next up was the Spin & Win ramp.

20130904_200659.jpg

Again, just a case of removing the gate assembly and the hex nuts. Fit the protector and then put the gate back in place.

20130904_202154.jpg

Job done for now. Hopefully it'll stop things getting any worse.
 

Attachments

  • 20130904_194053.jpg
    20130904_194053.jpg
    110.6 KB · Views: 6
  • 20130904_200706.jpg
    20130904_200706.jpg
    136 KB · Views: 5
Weeell, it's looking like I might have managed to blown one of the transistors on the CPU board as a whole column of switches is out but continuity appears to be there. I'm going to grab some jumper cables tomorrow and test the theory by jumpering pins between CN10 and CN8.

Blowing a transistor doesn't normally take a whole row of switches out.... As they're normally different circuits! :D

A break in one of the cables feeding a switch will, as will blowning up the switch matrix chip (by putting more power on the matrix such as shorting a switch cable to a coil lug with 50v+ on it)... :cool:
 
It's not a row but a column that's out. So they all share the same switch driver hence why it was pointing to the transistor.

Is that not right?
 
Columns and rows form a Matrix. There is effectively a switch matrix, a lighting matrix and a solenoid matrix for each game as you need something to tell the game where the ball is (switch) and how to react to it (light/sound & solenoid activation). The light and solenoid may share the same matrix, but the switch matrix is normally seperate and normally operates on a lower power.
 
Ok just read the other thread on this and I'm thinking in BW terms rather than DE which it looks like they're using transistors to run the switch matrix rather than one enclosed in a IC like modern BW do... :rolleyes: So yes you need to replace Q51 if I've correctly understood the other thread.
 
You mentioned about blowing the switch matrix chip? But i'm assuming that doing that would cause more than the failure of a single column.

Reading the schematic for the table it appears all the transistors for the switch matrix drivers route back to to an LS244 processor. Surely if that blew then all switches would fail?

Apologies for all the questions. Just want to be sure what i'm doing before I start stripping bits out.

I should perhaps mention that Wizcat has been helping me with the issue which was originally described in more depth here: http://www.pinballinfo.com/community/threads/noob-switch-fault-tracing.5205/
 
Back
Top Bottom