What's new
Pinball info

Register a free account today to become a member! Once signed in, you'll be able to participate on this site by adding your own topics and posts, as well as connect with other members through your own private inbox!

Robo-War ... boots! 🎉 Man vs Robot - MAN WINS

stumblor

Site Supporter
Joined
Sep 16, 2018
Messages
3,703
Location
London UK
Alias
Davey Price
So Robowar has conked out.

Midway through a ball, I got a few loud beeps, the display disappeared and it reset. Since doing that, it won't boot. Sometimes the soundcard LED comes on, sometimes it doesn't. I did get it to boot once (nothing I did would have fixed it), but then the same beep/reset thing occurred second ball.

Not much experience with fixing 80Bs (or any architecture for that matter!) so bear with me.

Things I've tried:

* Checked all transformer fuse continuity
* Reseated all connectors
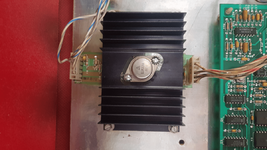
* Pushing on the daughter board to check cracked joints
* Closing slam switch, although it looks as though the slam switch mod has already been done (solder bridge)
* 5V power, both on the 5V supply and after the first capacitor on the MPU next to J1 (5.33V)
* Checked connector terminals at J1, a few were broken so I repaired those, but it didn't fix
* Checked interconnect cable ground mod, had been done already
* Checked transformer ground mods, not sure about these might need to confirm
* Checked for hot chips, nothing jumping out

Anyone used a QuickScan80 before? Or have one they'd like to sell me??

Failing that anything else I should be checking?
 
Last edited:
Whenever I have worked on a System 80b with weird mpu faults, once I've done all the potential weird dry joints on the piggy back board I always seem to find that the switch matrix PIA and/or one of either z11, z12, z13 or z14 has packed up. It may just be coincidence with the ones I have worked on but I would check them 4 smaller ic's first if you're luck enough to have them socketted. Oh also they must be the exact type so a 74ls** must be a 74ls** and not a 74hc** as you can get away with putting in on most other makes. Hope this makes sense!
 
Thanks @General Zod - so you just recommend replacing outright, rather than diagnosis?

1584620146035.png

Not socketted either:

20200319_121645.png

Extensive work done on this board too bottom left, but all looks really neatly done.
 
Before you get to involved, try reseating all connectors first....

Sorry meant to say that I've already done that. Will update main post.

Then check that you're getting 5v using the adjustable pot.

That's just it - my 5V power supply doesn't seem to have a pot?

20200319_131025.png
 

Attachments

  • 20200319_131025.png
    20200319_131025.png
    288 KB · Views: 3
Are you getting 5v tho? Looks like the Pot has been replaced with a fixed resistor...
 
Getting about 5.44V. Dunno if this is within acceptable range or not..
 
Step one to improving power supply reliability is to replace the original 500 ohm 1 watt adjustment pot. This procedure can be done easily without removing the large heat sink. A replacement sealed pot is recommended, but not completely necessary.

Next, remove all the old solder from the all of the .156" header pins, and reflow new solder onto the joints. The top header pins (J2) supply +5VDC to the majority of the associated circuit boards in the back box. Provided that the power supply is delivering acceptable voltages in the +5VDC range, these two relatively simple repairs are the only things needed for this board.

However, if you've adjusted the pot as much as possible in the appropriate direction, and the power supply is still delivering voltages higher or lower than around +5VDC, it's probably time to look at replacing the LM338K voltage regulator. While not a frequent occurrence, the voltage regulator will sometimes fail.

If the voltages measured are less than 1VDC, the grounds for the power supply (located at the transformer panel) will more than likely need attention. Once the grounds at the transformer panel are better secured, recheck the voltage at the power supply.

Note: When measuring the +5VDC provided by the power supply, first disconnect J2 on the power supply. Measure power at the J2 male headers first. Once within an acceptable range, turn power off and reconnect J2. Measure power across C1, the 100uf/10V capacitor that is next to J1 (power connector) on the MPU. The MPU may drag the +5VDC supply down a bit. If you find this to be the case, adjust the trim pot on the power supply until a steady +5VDC is seen at the MPU. Poor connections between the +5VDC power supply and the MPU board may also reduce the voltage measured at the MPU.


https://www.pinwiki.com/wiki/index....Repairs_for_the_System_80B_Power_Supply_Board
 
So first step is to replace that resistor with a proper pot, and bring the voltage down closer to 5V?

This one do the trick?
https://www.ebay.co.uk/itm/23mm-Col...527465?hash=item53e70ac1e9:g:-1UAAOxyaTxRQWNB


My advice leave the 5v regulator as a fixed design. Theres a reason a voltage pot is a crap design. Measure the voltage at the cpu board and sound board end, not at the output end of the 5v regulator. Somewhere around 5.05 to 5.15v is best (if the regulator has already been converted, chances are this is already set correctly by the resistor chosen). You need to allow for load drop and connector wiring drop. Setting the voltage at 5.00v at the regulator end will just mean the game wont work.

Second check your ground mods are done and to a decent standard.

Third, think about whether your cpu board is time to replace it.

If you dont want to repair your old board, or its too far gone, i can add you to the list for new cpu 80b boards. Plus you'd get all the benefits of a new board rather than an old knackered one. Of course I'm not hard selling anything here. Its up to you and what you want to do.
 
If you dont want to repair your old board, or its too far gone, i can add you to the list for new cpu 80b boards. Plus you'd get all the benefits of a new board rather than an old knackered one. Of course I'm not hard selling anything here. Its up to you and what you want to do.

Thanks Jim - that'd certainly crossed my mind when reading through the other 80B non boot threads. I'll try other suggestions first and let you know how things pan out 👍

Also - would you say that 5.44v is too high on the cpu?
 
Pics of the transformer.

20200319_142046.png

So I'm a bit weirded out by the grounds. These aren't the big square stock molexes that I see on pinwiki (they're the flat 0.156" kind), so I'm guessing someone has already done something with them?

20200319_142054.png
 
Thanks Jim - that'd certainly crossed my mind when reading through the other 80B non boot threads. I'll try other suggestions first and let you know how things pan out 👍

Also - would you say that 5.44v is too high on the cpu?

cool let me know no problem and we can get you back and going :)

Regarding the voltage level, is that measured at the cpu board end or the regulator end.?Also what does it measure at the sound board end? Sometimes it has to be turned up higher to make it 5.1v at the sound board

so in summary measure the voltage at all 3 points and report back 👍🏻
 
5.44v after the first capactor (C1) on the CPU. Haven't measured sound board yet but will do that.
 
Pics of the transformer.

View attachment 103975

So I'm a bit weirded out by the grounds. These aren't the big square stock molexes that I see on pinwiki (they're the flat 0.156" kind), so I'm guessing someone has already done something with them?

View attachment 103974

that’s stock gottlieb but later 80b games then the pin wiki pic. It’s gottliebs attempt to improve the issue. Direct ring eye grounds bolted to the transformer chassis is the best solution. I can take a pic of how my own gold wings is later if you like
 
Thanks everyone. Pics would be good thanks @myPinballs if you get around to it but I think I got the gist. Just need to pickup some of those twisty eyelet connections ..?

I suppose if 5.44 is a little high, my only option would be to retrofit a potentiometer in the 5V supply?

Will go take some more measurements.
 
Replace the 220 Ohm resistor with 120 Ohm resistor
Pot should be a 180 Ohm resistor
Replace the 390 Ohm resistor with 180 Ohm resistor
 
5V Input (J2) - 5.33v
CPU J1 (C1) - 5.33v
Sound - 5.31v

if it’s 5.31v at the sound board and the game isn’t running right now ie cpu not booting id leave the voltage as us for now. It’s not at a dangeroys level and you won’t know what load draw there is until it’s back up and running
 
Some earthing mods have been done, as seen in the photo. Not sure about the other earthing mods.

The 5 v line being a little high is fine for now and is unlikely to be your issue.

Have you tested the fuses with a meter? One could be partly blown. I'd also test the fuse holders with a meter by putting one lead from where the wire connects to the fuse holder tab and the other on the fuse being held in place by the holder. Remember to test both ends.

You could disconnect P4/J4 connector on the MPU (that feeds the driver board) and see if the display boots up once you turn the power on.

Sorry yeah that was one of the other things I did initially as I thought this fuse looked well suspect but it has continuity so discounted it..?

20200319_183050.jpg

Haven't check the holders themselves though, so will do that, and the interconnect cable test as well, cheers for the help 👍🏻
 
Thanks @General Zod - so you just recommend replacing outright, rather than diagnosis?

View attachment 103963

Not socketted either:

View attachment 103964

Extensive work done on this board too bottom left, but all looks really neatly done.
Hi there,
Sorry I probably got too involved too quickly, when you've checked all other bits and bobs, my guess is that the switch PIA and one of those 4 z11-z14 ic's has gone down, I had a Victory and a Gold Wings and both wouldn't boot, after quite a bit of checking this and re-pinning that I got a bit more involved in these mpu repairs and, although it's a couple of years ago now so a little hazy, I popped the mpu's on my rig with Leons test chip and both had got Switch PIA faults, and one of those chips was down and for the life of me I can't remember which of the 4 it was. There are of course many mpu problems that will stop the mpu booting but if it went down in a game, my moneys on the switch PIA and one of its related buffer chips.
 
Back
Top Bottom