Hey there,
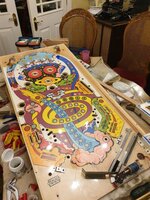
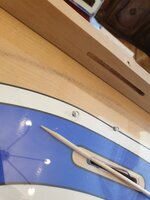
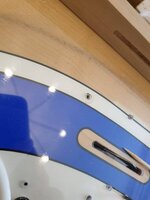
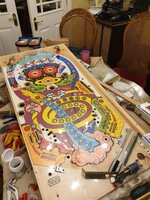
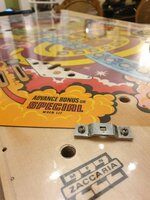
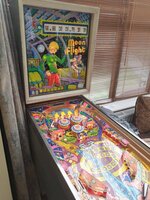
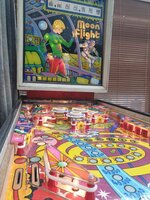
Recently I finished producing and installing a custom made playfield protector for my old Zaccaria Moon Flight. I find it to be very successful and want to produce a guide on how you can do this yourself and if it is right for your machine.
So why would you do this? I did it for four main reasons:
I have noticed that during hot days when the room temperature can reach 40°C the LEXAN™ protector would warp in the centre of the playfield. This influenced play but would contract back to the surface of the playfield during the afternoon/evening when the temperature decreased. If you live somewhere really hot like in Arizona, your machine will play funny the whole summer because it will get too hot. This also goes for extended play sessions with incandescent bulbs as the heat from under the playfield may cause the protector to warp. The protector is ideal for home use pinballs.
Also, It is essential to check that when applying a protector that all components can be reattached to the playfield ontop the protector. Even the thickness of 0.75mm (or 0.5mm if you choose PETG over LEXAN™) can cause features and components to malfunction or fit incorrectly.
So if this is for you, here is what you will need.
Step 1 - Depopulating the playfield:
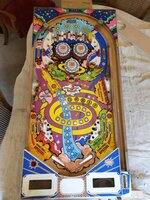
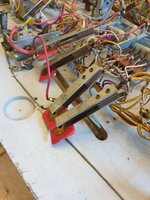
Depopulating the playfield is a slow and gruelling task but must be done with care and patience. Keep all screws and fixings with their respective part. I would recommend this order for removal:
Step 1.1 - Removing playfield wireforms:
If you have an old EM like mine then you may be unlucky enough to have reforms in your playfield. These are a pig to remove.
You can either choose to remove them like I did or you can cut slots around each one in your protector. This may let dust get under the protector and is not easy to make look good.
This is the method I used for removing the wireforms:
Step 2 - Screw holes:
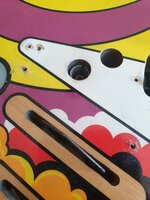
Layout your material over the playfield. Just ensure that the piece covers the playfield and that all components will be able to reattach over the material. You shouldn't remove the protective film until reassembly so use a torch under the playfield to see holes through the material. Once you have one corner of the material aligned with a corner of your playfield, clamp it on. As many holes do not continue through the playfield you have to drill from the topside. Drill a small pilot hole (smaller than the target screw hole) through the material at the centre of the hole. After drilling all your holes you can remove the protector and drill each hole bigger than the target hole. Making the hole too small can cause the screw to warp or crack the material. I screwed in some rubber posts to act as the clamps and position the material for the cuts.
Step 3 - Beginning to cut:
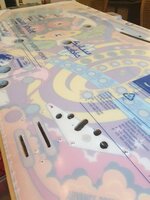
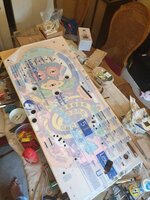
The rotary tool and Dremel bit will be used for most all cuts except the shooter lane. I made the mistake of drilling bulb holes however they were not perfectly centred. Take a bit more time to remove the bulb holders and use the rotary tool. Also, before you begin, ensure the chuck has been tightened with a wrench as I found thumb tightening the chuck can send the bit flying around the room at 30000 RPM. Wear eye and ear protection and do this in an area where plastic chips are welcome. Hand protection is not recommended as any threads dangling from gloves could drag your whole hand into the cutting bit.
Step 3.1 - Recesses:
If there is a small recess in the playfield where the hole does not protrude through the playfield then you cannot use the rotary tool. Instead, use a scalpel or Exact-o blade to trim around the edge. I drilled relief holes for the blade so it didn't get stuck. After making a rough cut you can just push the blade around the edge to achieve a smooth cut.
Step 3.2 - Shooter lane:
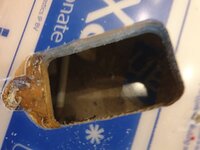
Ensure you do not even consider doing what i did for this which was to heat up the material using a heat gun and to then try and press the material to curve into the shooter lane. This will most likely ruin all your work. Luckily I was able to salvage my piece as I warped it back flat again using the heatgun, but there were tiny bubbles forming inside the LEXAN™ when I was done. They all got removed when I cut the shooter lane so I saved myself £20.00 and a lot of work!
To cut the shooter lane mark each edge of the shooter lane where it ends at the bottom of the playfield. Then, find a point at the top of the shooter lane and mark it. I then drilled down with a 2mm bit to make a hole. From here I used a metal rule and stanley knife to score and cut the line between the right edge of the hole and right marking at the bottom. Do the same for the left side. Do this slowly and you should have a good looking cut. I wouldn't recommend that you bevel this with sandpaper as it is likely to cloud up.
Step 4 - Cleaning:
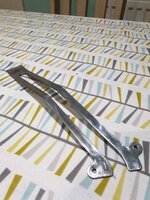
Before reassembly all components should be cleaned. I used an abrasive polish called T-CUT for all plastics. I then used Autosol for the metal and a rotary tool buffing wheel. The metal parts looked fantastic after buffing and the plastics no longer have 40 year old grime on them.
Step 5 - Reassembly:
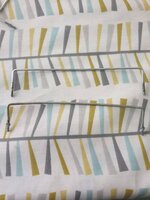
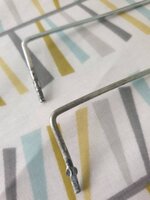
Now that you have completed the mammoth task of depopulating the playfield and making the protector its time to put it all back together. Clean and wax the playfield to keep it nice and shiny under the protector. Lay the protector over the playfield and install everything in reverse. If you have wireforms like me then I would recommend that you use a grinder or file to remove the barbs on the tips. This will reduce breakout when pushing them back in. You dont need a hammer to push them back in if you remove the barbs. Just position over holes and push them in evenly using a piece of wood between the wireform and your hand to spread the preassure. If you get any bits of dirt under the protector after reassembly then do not fear! I used a bamboo kebab stick and wet the tip. Then slide it under the playfield protector through a hole close to the dirt and the bits of dirt should stick to the tip of the kebab skewer.
Finalé:
Congratulations if you went through with this! It can be a right pain but the finish and look of the playfield is stunning.


Credit goes to Nedreud for doing it first and producing a video on what he did. Definitely got me inspired to do it myself.
Thanks for reading and feel free to ask for information,
Josh
Recently I finished producing and installing a custom made playfield protector for my old Zaccaria Moon Flight. I find it to be very successful and want to produce a guide on how you can do this yourself and if it is right for your machine.
So why would you do this? I did it for four main reasons:
- The playfield had sunken inserts - applying a protector levels the entire playfield
- The playfield had some worn areas - applying a protector prevents more damage
- Applying a protector gives a fresh & glossy look without clearcoating
- There are few commercially available EM playfield protectors
I have noticed that during hot days when the room temperature can reach 40°C the LEXAN™ protector would warp in the centre of the playfield. This influenced play but would contract back to the surface of the playfield during the afternoon/evening when the temperature decreased. If you live somewhere really hot like in Arizona, your machine will play funny the whole summer because it will get too hot. This also goes for extended play sessions with incandescent bulbs as the heat from under the playfield may cause the protector to warp. The protector is ideal for home use pinballs.
Also, It is essential to check that when applying a protector that all components can be reattached to the playfield ontop the protector. Even the thickness of 0.75mm (or 0.5mm if you choose PETG over LEXAN™) can cause features and components to malfunction or fit incorrectly.
So if this is for you, here is what you will need.
- Playfield protector material
- LEXAN™ is a great choice. It is expensive when compared to PETG but is UV resistant. I got a sheet of 1.25m * 0.5m for £19.99 which was all I needed for my Moon Flight.
- PETG is a thinner alternative and is used by the official Playfield Protectors website but it may not fare well after long UV exposure.
- A rotary tool with router attachment. I used a Dremel 4300 with the Dremel router base, but any rotary tool (or router if the chuck can hold a 3.2mm bit) with a router base will work.
- The Dremel 560 drywall bit. This is a rotary tool bit that has a blank tip so it can cut material following a template underneath it.
- An Exact-o or Stanley knife. This will be used for the shooter lane.
- A free weekend because this will take you many many hours.
Step 1 - Depopulating the playfield:
Depopulating the playfield is a slow and gruelling task but must be done with care and patience. Keep all screws and fixings with their respective part. I would recommend this order for removal:
- Plastics
- Rubbers
- Rubber posts
- Targets
- Rollovers (I pushed each rollover into place in styrofoam so I remembered which one goes where)
- Pop bumpers
- Everything else
- Bulb holders in holes that protrude through the playfield must be removed also.


Step 1.1 - Removing playfield wireforms:
If you have an old EM like mine then you may be unlucky enough to have reforms in your playfield. These are a pig to remove.
You can either choose to remove them like I did or you can cut slots around each one in your protector. This may let dust get under the protector and is not easy to make look good.
This is the method I used for removing the wireforms:
- Get two small (10cm * 10cm) pieces of either 1/2" plywood or MDF and cut slots with the width equal to the diameter of the wireform into their centre of the piece.
- Push the pieces onto the two wireform legs and clamp the pieces onto the playfield. This is done so that when the wireform is lifted the slot prevents it from scraping out and ripping the artwork
- Use the nail-lifting side of a hammer and place a rag between the hammer and wireform.
- Lever out each side slowly and evenly until the wireform is free.
- Place the wireform in cardboard or lable its position so they go back in the same holes.
- Move the wooden pieces, rinse and repeat.

Step 2 - Screw holes:
Layout your material over the playfield. Just ensure that the piece covers the playfield and that all components will be able to reattach over the material. You shouldn't remove the protective film until reassembly so use a torch under the playfield to see holes through the material. Once you have one corner of the material aligned with a corner of your playfield, clamp it on. As many holes do not continue through the playfield you have to drill from the topside. Drill a small pilot hole (smaller than the target screw hole) through the material at the centre of the hole. After drilling all your holes you can remove the protector and drill each hole bigger than the target hole. Making the hole too small can cause the screw to warp or crack the material. I screwed in some rubber posts to act as the clamps and position the material for the cuts.
Step 3 - Beginning to cut:
The rotary tool and Dremel bit will be used for most all cuts except the shooter lane. I made the mistake of drilling bulb holes however they were not perfectly centred. Take a bit more time to remove the bulb holders and use the rotary tool. Also, before you begin, ensure the chuck has been tightened with a wrench as I found thumb tightening the chuck can send the bit flying around the room at 30000 RPM. Wear eye and ear protection and do this in an area where plastic chips are welcome. Hand protection is not recommended as any threads dangling from gloves could drag your whole hand into the cutting bit.
- Adjust the height of the router base so the blank is level with the playfield but the cutting edge is level with the material.
- Turn on the tool and push into the centre of your cut. The bit is blunt on the end but it can push through to the underside. Otherwise use a drill and 3.5mm or larger bit.
- Slide the tool to the edge of the hole and move it around the edge slowly in a clockwise motion. If the rotary tool does not cut like butter then the revs are too low.
- After cutting the hole move the tool back to the centre and turn off before lifting out.


Step 3.1 - Recesses:
If there is a small recess in the playfield where the hole does not protrude through the playfield then you cannot use the rotary tool. Instead, use a scalpel or Exact-o blade to trim around the edge. I drilled relief holes for the blade so it didn't get stuck. After making a rough cut you can just push the blade around the edge to achieve a smooth cut.

Step 3.2 - Shooter lane:
Ensure you do not even consider doing what i did for this which was to heat up the material using a heat gun and to then try and press the material to curve into the shooter lane. This will most likely ruin all your work. Luckily I was able to salvage my piece as I warped it back flat again using the heatgun, but there were tiny bubbles forming inside the LEXAN™ when I was done. They all got removed when I cut the shooter lane so I saved myself £20.00 and a lot of work!
To cut the shooter lane mark each edge of the shooter lane where it ends at the bottom of the playfield. Then, find a point at the top of the shooter lane and mark it. I then drilled down with a 2mm bit to make a hole. From here I used a metal rule and stanley knife to score and cut the line between the right edge of the hole and right marking at the bottom. Do the same for the left side. Do this slowly and you should have a good looking cut. I wouldn't recommend that you bevel this with sandpaper as it is likely to cloud up.
Step 4 - Cleaning:
Before reassembly all components should be cleaned. I used an abrasive polish called T-CUT for all plastics. I then used Autosol for the metal and a rotary tool buffing wheel. The metal parts looked fantastic after buffing and the plastics no longer have 40 year old grime on them.


Step 5 - Reassembly:
Now that you have completed the mammoth task of depopulating the playfield and making the protector its time to put it all back together. Clean and wax the playfield to keep it nice and shiny under the protector. Lay the protector over the playfield and install everything in reverse. If you have wireforms like me then I would recommend that you use a grinder or file to remove the barbs on the tips. This will reduce breakout when pushing them back in. You dont need a hammer to push them back in if you remove the barbs. Just position over holes and push them in evenly using a piece of wood between the wireform and your hand to spread the preassure. If you get any bits of dirt under the protector after reassembly then do not fear! I used a bamboo kebab stick and wet the tip. Then slide it under the playfield protector through a hole close to the dirt and the bits of dirt should stick to the tip of the kebab skewer.


Finalé:
Congratulations if you went through with this! It can be a right pain but the finish and look of the playfield is stunning.


Credit goes to Nedreud for doing it first and producing a video on what he did. Definitely got me inspired to do it myself.
Thanks for reading and feel free to ask for information,
Josh
